
Good day everyone,
I hope you are all well and having an excellent day, welcome to CryptoGod-1's blog on all things gaming and literature. Following on from a post I did titled "Elementary my dear Watson" where I brought up the topic of the latest game which will be released in the Sherlock Holmes series by Frogwares, I have since decided to do a post on each of the individual games to give readers a better idea of one of my favourite gaming series ever created. Today I will be looking at the eight game in the series, called Sherlock Holmes: The Devil's Daughter.
The first post in the game series was Sherlock Holmes: The Mystery of the Mummy
The second post in the game series was Sherlock Holmes: The Case of the Silver Earring
The third post in the game series was Sherlock Holmes: The Awakened
The fourth post in the game series was Sherlock Holmes Versus Arsène Lupin (aka Nemesis)
The fifth post in the game series was Sherlock Holmes Versus Jack the Ripper
The sixth post in the game series was The Testament of Sherlock Holmes
The seventh post in the game series was Sherlock Holmes: Crimes & Punishment
Sherlock Holmes: The Devil's Daughter
The eight game in the series, Sherlock Holmes: The Devil's Daughter, is set in 1896 and follows the events of The Testament of Sherlock Holmes. Sherlock is now taking care of Moriarty's daughter, Katelyn, while keeping her true origin as a secret. The game was released in 2016 for Microsoft Windows, PlayStation 4, and Xbox One.
The game begins in 1896, and follows on from the events of The Testament of Sherlock Holmes. Professor James Moriarty is dead and Sherlock Holmes is now taking care of Moriarty's daughter, Katelyn, and in doing so is keeping her true origin as a secret. A new neighbour moves in next door to Holmes, a woman by the name of Alice De'Bouvier. She befriends Katelyn, and in doing so beings causing emotional issues between Holmes and Katelyn. As the game develops and Holmes solves different cases, he ensures to discover the true identify of Alice's origin along with her true intention, and in doing so he must fight not to reveal a secret, but to keep one.
The game features five individual cases which are all separate from each other. Each case is self-contained and any moral choices made in one case does not relate to another.
You can first the previous case here:
Sherlock Holmes: The Devil's Daughter - Case 1: Prey Tell
A Study in Green
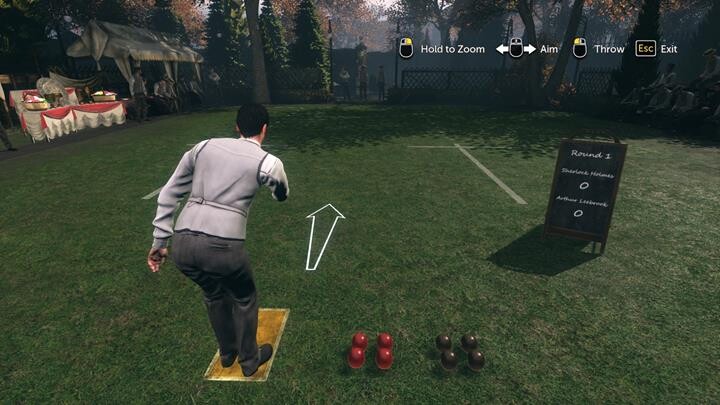
The story begins with Watson entering 221B Baker Street to find Holmes playing Lawn Bowls indoors with Mrs. Hudson's vases. Holmes has been invited to a lawn bowls tournament hosted by a local Archaeological Society. Holmes prepares his outfit and reads a letter from Dr. Fisher claiming himself and Lord Marsh did the killings for the greater good and as part of a lesser evil, before Holmes and Watson head to the tournament.
Once they arrive Holmes is greeted by Sir Charles Yellingham, the manager of the London Archaeological Institute bowls club. He shows Holmes the prize for the winner of the tournament; a Mayan Calendar, along with showing a statue of an old Mayan King called Tecun Uman. From here Holmes explores the area, and after poking around the area, takes his turn in the bowls tournament final. The final is an exhilarating match, Holmes is the winner. Congratulated on his achievement, Holmes is informed the awards ceremony will be the following morning where he can claim the calendar as his prize. Watson unfortunately will be unable to attend.
Holmes and Watson return to 221B Baker Street where Holmes finds Katelyn and Alice, giving Holmes the chance to finally profile his neighbour. Holmes notices how she wears a bracelet which signifies she visits a prisoner, has no wedding ring so in unmarried, wears a necklace of an occult item, and has scars on her wrists from previous suicide attempts. Katelyn enjoys her company and that's important to Holmes, although he does refuse Alice's offer to teach Katelyn the piano.
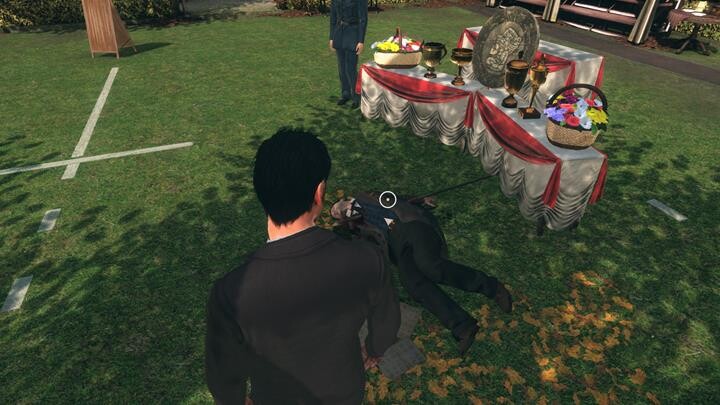
The following morning Holmes does some research on the Mayan Calendar before making his way to the awards ceremony. Holmes arrives to discover Inspector Lestrade in conversation with Sir Charles. Apparently in the early hours, around 4am, the Mayan statue killed Zacharias Greystoke of the London Archaeological Institute. Lestrade begrudgingly allows Holmes investigate the mysterious murder. Lestrade believes it is clear that someone broke in to steal the Mayan calendar and Zacharias caught them in the act. Strangely though, according to Inspector Lestrade there is not trace of the thief disappearing over the wall, although apparently the statue had been seen 'walking' after the murder. The murder weapon used was the Mayan spear from the statue, which killed the man on the bowls lawn by piercing his heart. Holmes inspects the statue pedestal where it is clear the metal of the statue broke from its connecting rods, and the metal scaped along stones, along with a broken branch in the hedges along the wall. At the corpse, Holmes notices that money is left in Zacharias' wallet, while his valuable gold pocket watch and notes on Mayan symbols were not taken. Holmes also notes the leaves on the lawn, which were not there the previous day.
Next Holmes speaks to Sir Charles. who claims to have stayed at the club overnight to prepare for the awards ceremony. He claims to have seen the statue running away after he heard the noises in the night. The Mayan calendar was apparently donated anonymously along with a letter asking for it to be awarded to the tournament winner, but it holds little financial value. Holmes notices some details which indicate that Sir Charles is socially active, politically active, and also ex-military. Sir Charles has no explanation why Zacharias was at the club so early, and he refuses Holmes request to enter the clubhouse as it is members only without a police warrant.
Holmes recreates the events using his imagination and deduction skills, creating a scene of how the murder happened. He informs Lestrade of his suspicions, which line up with what Sir Charles said. According to Holmes:
Zacharias Greystoke walked on the leaves as he approached the Mayan calendar.
The statue threw the spear towards him while he was unaware.
Zacharias Greystoke was struck by the spear, causing Sir Charles to be alerted to the noise and run out to see what was happening.
The statue leapt from it pedestal, ran away and used a tree branch to jump over the wall.
Inspector Lestrade is not impressed, but grants Holmes access to Scotland Yard where the detective can examine the victim in further detail, along with the victims belongings.
At Scotland Yard Holmes and Watson proceed to the evidence room here Holmes looks through the items of Zacharias Greystoke once more, this time taking the Mayan papers with him. Next Holmes inspects the Mayan calendar, and discovers the notes correspond to a puzzle on the calendar. Once Holmes solves the puzzle, it depicts a curse that anyone who disturbs the sacred temple will meet death by the statue, and only the chosen will be spared. Fascinating! Next up Holmes goes down to the morgue and inspects the corpse of Zacharias, noticing old scars and the report regarding traces of alcohol. There is also a nasty infection in his right eye, and the puncture wound from the spear. Holmes decides he might find more evidence at the lawn club, and goes to request a warrant from Lestrade. The Inspector refuses, but after Holmes profiles him and notices traces of alcohol and of a woman, Lestrade is only to happy to oblige.
Holmes travels back to the lawn club alone, which is now swarming with members gossiping about the events of the previous night. After talking to Sir Charles, Holmes gets a key to gain entry into the clubhouse. Holmes discovers a bunch of collections of deceased members, along with photos of an expedition to Guatemala. One of the photos containing Sir Charles, Zacharias Greystoke, and an unknown man looks altered, so Holmes removes it to inspect later. There is also an impressive large globe with two pieces missing, and upon a desk there are letters regarding the sale of a chunk of Guatemalan gold and a letter from the bank. Also amongst the items is a telegram and details of how the awards ceremony should have gone. Holmes also finds trunks containing valuable items belonging to Sir Charles. Apparently the club is struggling to repay its debts to Lloyds bank, while Zacharias had grave reservations in giving away the calendar as a prize. Holmes speaks with Sir Charles once more, where Holmes confronts him regarding a telegram that stated Zacharias would visit Sir Charles, although Sir Charles does not know who the person with Zacharias was going to be. He also confirms that all club members agree to donate their prized possessions upon their death.
Back at 221B Baker Street Holmes investigates the photograph he took from the clubhouse, discovering the photo had been painted over, revealing another man in the picture. Watson is on hand to inform us via his medical expertise that the swollen eye of the new man is a sign of a tropical disease from South America, and he will consult with his friends in the Hospital for Tropical Diseases.
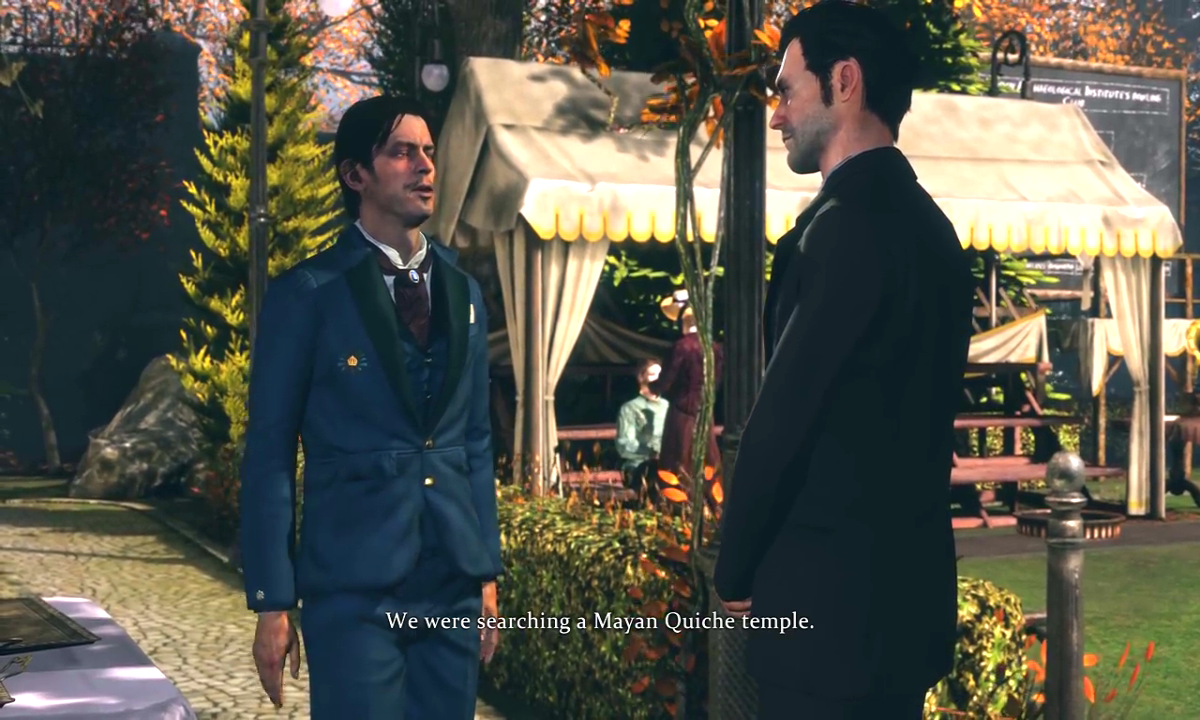
Back at the bowling club Holmes discusses the photo with Sir Charles, who reveals the hidden man was called Albeit and he didn't donate his belongings upon his death. They had been on that expedition about 14 years ago, and the final man in the photo is Bernard Marley, who is standing by the statues pedestal and was the person who built the statue roughly a decade prior. Holmes talks to Bernard, but the man is unwilling to discuss the expedition to Guatemala in somewhere so public, instead giving Holmes his card and telling the detective to meet him there.
Holmes makes his way to Grubb street, getting to his destination of Bernard Marley's Foundry, with Bernard in his office. Holmes assess Bernard when they speak, noting that the man seems superstitious, wearing protective charms and clearly believing in the curse from their expedition to Guatemala 14 years prior. Bernard confirms Albeit died on their journey and that he was too courageous against the gods. Holmes learns that Bernard was not friends with Sir Charles, and although Zacharias asked for Bernard's assistance in stopping Sir Charles giving the Mayan Calendar away as a prize, Bernard knew it was fruitless. Although he admits to making the statue, he pleads it was ten years ago and he has nothing to do with the murder. Bernard feels they have discussed enough, as the Mayan gods could be listening, and leaves Holmes be. The detective searches around the Foundry some more, discovering evidence that boxes had been dragged towards the office door, prompting Holmes to return at night with Watson to break into the office.
Back at 221B Baker Street Watson arrives with a letter for Alice, only to discover Katelyn disobeying Sherlock by learning the piano at Alice's, prompting Holmes to investigate her a bit further. Using his workstation and some steam, Holmes delicately opens the letter to discover Alice moved there to be close to him. After resealing the letter he hears Alice on the balcony, and goes onto his own one to chat with her. Here Holmes learns that Alice knows of his 'secret' regarding Katelyn, although she like Katelyn and wants to keep the secret as long as Holmes doesn't stop the girl spending time with Alice. Blackmail. Stunned, Holmes goes back inside and Watson informs him that a man named James Byron frequently visits the Hospital for tropical disease. Holmes dons an appropriate costume and the pair hastily go to the hospital.
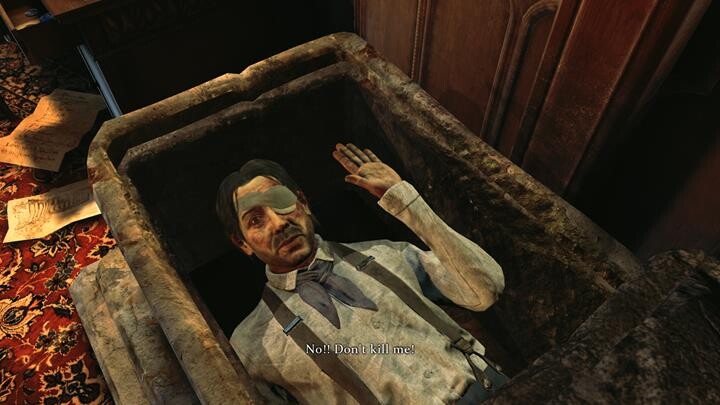
At the hospital they speak with Byron, who is in a bad way. He is missing an arm and has one eye under a patch due to his tropical disease. There are also signs of him having been bound in chains, along with traces of opium. He denies the expedition to Guatemala until shown the photograph from the club, causing him to freak out and yelling for doctors to get him away from Holmes and Watson. Byron is in fact Albeit, not dead as suspected, although he is taken by the doctors for his consultation before they can press him further. Holmes and Watson search his belongings while they wait, but Albeit has lets immediately after his consultation, meaning Holmes needs to track him down. The pair rush back to 221B Baker Street to search the map and locate Albeit's home, 21D Brook Street.
Once the pair reach Abeit's home they need to gain entry via breaking down the door with an axe after hearing a scream inside. Once Holmes breaks down the door, Watson saves him from an incoming arrow. The pair use their cunning to avoid their assailant, who is on an upper level, from shooting them as they manage to obscure his view with curtains. From there they make their way up to Albeit's bedroom, only to discover a rope hanging from a skylight which the attacker must have escaped through. Holmes searches further and open a sarcophagus, to discover Albeit hidden inside! Holmes questions the man, and after pointing out the 'curse' it is clear Albeit is already resigned to death. He had a statue which also seems to have come to life and been hunting him. Holmes must investigate further, getting a key off Albeit for a locked door. Looking around the home, Holmes discovers the pedestal where this latest statue has 'come to life,' Holmes also discovers a small bed in the locked room along with a letter Albeit wrote for his wife explaining how he 'died' in that temple and has arranged for all his possessions to be sold and the proceeds left for their son. Hidden in the wardrobe is a scale model of a temple, from their expedition. Finally, a letter outlining how Albeit was a slave while in Guatemala but had won his freedom. After talking to Albeit again, where Holmes learns that Albeit's son visits sometimes. Albeit also reveals the model is from the temple they found and entered in Guatemala, although they never uncovered its secrets. There is a larger model that piece connects to hidden in the globe in the clubhouse.
Holmes decides its time for himself and Watson to break into the Foundry office, so they make haste to go there during that night. After picking the lock to the main Foundry door, the pair are unable to get into the office and must find another way in. Holmes and Watson work together to manoeuvre the equipment in the Foundry, allowing Holmes to climb across and over them, finally balancing over a beam to get into the open balcony door. Holmes searches around, noticing a common theme of the Mayan period, along with a Mayan pyramid and a mysterious coffin next to it. The coffin can only be opened with a dagger by the inscription above it, therefore Holmes and Watson need to forge one. Once Holmes has created the required dagger, he uses it to 'stab' the coffin, revealing a door to a secret room within the pyramid.
Within the room Holmes discovers a myriad of things, from broken down clocks for their parts and a locked safe, to another statue that moves when Holmes touched it. However, part of its mechanism is missing, and there is no real danger. Holmes however does warn Watson to be careful not to get speared. There is a picture on the wall beyond the statue depicting a mechanical globe, similar to the one in the clubhouse. Holmes interacts with the statue once more, putting the gears back in place to complete the statue. Once complete, the statue is operation and the pair watch on as it throws a spear at a nearby set of drawers, destroying them in the process. Holmes finds a key in the destroyed drawers, which he uses on the nearby locked safe. Holmes discovers a part of a map which should belong to the globe in the clubhouse, a page from Bernard's diary, and a statue in three parts, with the middle part made entirely from gold. Its almost daylight so Holmes and Watson hurry and leave the scene and head back to 221B Baker Street.
The following morning the pair make their way to the bowls club where they make their way to the clubhouse and interact with the globe. Once Holmes inserts the missing piece of the globe, the entire globe transforms to reveal a model of the temple. The model Holmes discovered at Albeit's home fits into this model perfectly. From there Holmes uses his imagination and is brought into the model of the temple, leading him to explore his way through until Holms finds himself trapped in a large room with a puzzle for a once. Once Holmes walks across the safe steps and onto the correct tiles to reach the end, Holmes finds himself entering another room with more symbols.
These puzzles are connected to levers and time symbols, which Holmes must turn in the correct order to reveal paths. Once Holmes has unlocked these paths and levers, the door will open and he continues forward deeper into the temple. Once Holmes climbs and wall made of boulder, he finds himself outside the temple and an Indiana Jones styles escape where he is running from a giant boulder happens. Holmes ducks and hides in the crevice's to the sides and eventually frees himself, leading to another trap room. This time Holmes must walk the correct path or risk falling to his death, all the while with the walls closing in on him. Once the detective gets past this he goes deeper into the temple until he reaches another puzzle. This room is full of columns with smiling and unhappy faces, with the safe route along the smiling faces and the unhappy ones shooting poison at Holmes. After navigating his way through this room and more of the temple, Holmes reaches a semi broken rope bridge. Once Holmes safely works his way beyond the holes in the bridge, he arrives at the inner temple.

Upon climbing the steps and entering, Holmes sees a Mayan statue and calendar, along with a treasure room. The statuette is the miniature golden statue the three men shared, which Holmes found a singular piece of in Bernard Marley's Foundry. To access the treasure room Holmes must solve one final puzzle, one which Holmes deducts was the way Albeit lost his arm; abandoned by his fellow explorers with his arm trapped as they made off with the golden statue.
Holmes returns from this imaginative voyage into the temple and makes his final deductions in the case, which can be one of the following:
The curse is real. Holmes can conclude that the curse from the Mayan temple is real, which led to Zacharias Greystoke's death. From here Holmes has two choice, the first being to undermine Lestrade by allowing him to 'take the credit' which also taking the ridicule. Choosing this path leads to Holmes and Watson in Marleys foundry, with the detective explaining how he has let Lestrade deal with all the laughter and disdain from the press. As Watson queries why they are at the foundry, Holmes explains how he has requested for all the Mayan statues to be melted down and destroyed, therefore eliminating the curse.
The other option here is to accept defeat and failure in the case, as it is impossible to assets a stature. In a similar scenario, the pair are at the Foundry but this time Holmes is begging Watson to keep quiet about his failure in solving the case. Watson promises to do so, and once again we get to see the statues being melted and destroyed.
Albeit is guilty. With this choice Holmes can either condemn or absolve Albeit for the murders, which happened out of spite and bitterness. If Holmes condemns Albeit, then Holmes and Watson meet Albeit in his home. He is there with a small 'boy' whose face is shrouded and Albeit claims is his son. Holmes reveals the boy to be a pygmy by removing the cap, as the pair were slaves in Brazil before escaping and plotted Albeit's revenge from being left behind. The pygmy dressed in the statue and committed the killings on Albeit's orders.
If Holmes absolves Albeit, Holmes and Watson meet Albeit at his home and once again reveal the 'son' to be a pygmy. Holmes takes pity on Albeit, who plotted the murders as revenge and will be dead soon anyway, while the pygmy was just obeying its master. He will not hand them over to the police, but the pygmy must return home to Brazil.
Bernard Marley is guilty. Homes can either condemn or absolve Marley here, with the condemn option seeing Holmes blame Marley for cold blooded murder. Holmes and Watson confront Marley, where he denies being the 'right hand' of the curse. Holmes is not interested, and informs the Foundry owner he will be handed over to 'justice.'
Absolving Marley would mean Holmes sends him to be left in a sanitorium due to the man being insane. In this scenario Holmes and Watson once again apprehend Marley in his office, this time calming him by saying there is nothing to fear and that he will get the help he needs. Marley denies being insane or involved in the murders, but Holmes has already made his decision.
Sir Charles is guilty. If Holmes choses Sir Charles, he can condemn the man for murdering to steal the wealth of the donations, or absolve him due to the financial pressure Sir Charles was under at the club. The condemn option sees Holmes with Sir Charles in the police interrogation room, where Holmes explains that its time for Sir Charles to pass on the leadership of the club to someone else. Holmes go on to say it was because of money and power that Sir Charles killed Zacharias Greystoke, which Sir Charles refuses and claims he has powerful friends.
The absolve option sees Holmes explaining to Sir Charles in the police interrogation room that he understands the man was under immense pressure for his family, the club, etc, and that judges will take that into consideration. Sir Charles denies being involved in the crimes.
System Requirements
To run this game on your PC it will require a minimum of the following as per Steam:

As a little piece of trivia, Holmes never actually said ‘Elementary my dear Watson,’ although he is known to have said both ‘Elementary!’ and ‘my dear Watson’ at various points in their adventures. They came together in the idea of a meme, based around the thought that it conveys Holmes’s effortless superiority to his ‘dear’ friend. It was first noted in use in a P. G. Wodehouse novel in 1915 titled Psmith, Journalist.
Have a great day.
Peace. CryptoGod-1.
Referral Links and Follow Me:


