
Algorand is one of my favourite blockchain for one primary reason: User Experience. Everything from interacting with any dApp or even creating one is so smooth that once you try it, there is no going back. The blockchain has had 100% uptime since its genesis block, fees is almost negligible and it is stupidly fast (approx 3.3 second/block). One further point is that once a block is added to blockchain, it is marked as final. So, as soon as a block is entered, the transactions that it contain can never be reverted.
Up until now, one of the issue with decentralization was that running a participation node was quite challenging for a person who is not much familiar with the CLI etc. The developers however have been working on "1-click Node setup" which is going to ease the stuff out and abstract one of the techy stuff. The beta versions are out now which we will be using throughout. Albeit there is still some pre-requisite like Installing Docker, but they will be fixed with the upcoming updates to the node setup pipeline.
What are Nodes and why you should run one?
Nodes are piece of software that validates (optional) and store (either full or partial) blockchain. They basically allow people to communicate with blockchain in decenteralized way. So, if you are running a node:
- You can create blocks that are to be added to the blockchain.
- Validate existing or newly created blocks to check for double-spend etc.
- Just store the blockchain as archive so that if anyone wants, they can access the whole history through your node.
Algorand provides two different types of node: Relay and Non-Relay.
1. Non-Relay nodes: This is the one which we will setup in this article. These nodes are primarly responsible for creating new blocks and interacting with the chain. Also known as participation nodes, you can set them up to store either complete blockchain (archival mode) or just the last 1000 blocks (non-archival mode) which is default. They have comparatively low hardware requirements. Since they actually propose blocks, more nodes means more unique entities producing block. This helps in decentralizing the blockchain.
2. Relay nodes: These nodes are the whisperers in the system. When a new block is proposed, they provide that information to every non-relay node. So, participation nodes can quickly get the information from relay nodes. They run in archival mode by default and have high hardware requirements. Low network bandwidth means, they will not be able to spread the block around fast, which defeats their purpose. Also, these nodes don't participate in consensus. So, they don't actually create any block, they just spread the information around.
With all that clear, we can start the process of running a node. Make sure your system has the following specifications. These aren't actually forced and you can get away with running a node in even Raspberry Pi if you would like. Also, the guide is for windows. If you are using *nix based system, the only major difference will be installing docker (which i gurantee will be far more easier for you)
- Windows 10/11 with WSL2
- Docker
- Atleast 8GB of RAM
- Atleast 100GB of free storage (preferrable SSD)
- A good enough internet connection
Setting up WSL2:
WSL2 provides a way to run Linux environment within your Windows. It is much more optimized then using a full fledged VM created with VirtualBox or even Hyper-V. Docker, which we will talk about next, requires you to have WSL2 or Hyper-V enabled.
- If you are using Windows 10 version 2004 and higher (Build 19041 and higher) or Windows 11, the process is kinda streamlined. Open Command Prompt in administrator mode or PowerShell and run the following command:
wsl --install --no-distribution
This single command will setup wsl for you. By default, it install the Ubuntu distribution. Since we don't need it, we use the "--no-distribution" flag. - If you are using older version of windows 10 or the above command does not work for you, then:
- Open Search and type "Turn Windows Feature On or off". Click on the application and turn on "Virtual Machine Platform" as well as "Windows Subsystem for Linux" as shown:
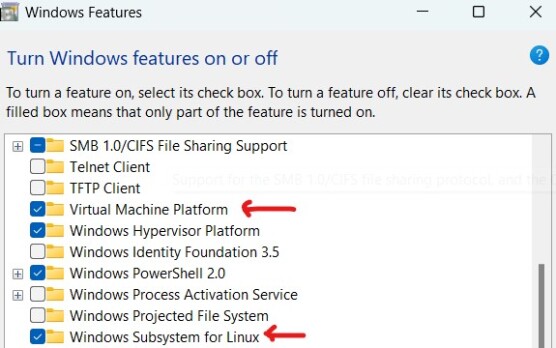
- You will have to restart the system after that. Once done, open command prompt and run "wsl --update". This makes sure you are using the latest version.
- Open Search and type "Turn Windows Feature On or off". Click on the application and turn on "Virtual Machine Platform" as well as "Windows Subsystem for Linux" as shown:
Additionally you can also set the default version of WSL to 2 using the command "wsl --set-default-version 2".
Setting up Docker:
If you were able to set up wsl correctly, then head over to Docker website and download the application. Execute and make sure to select "Use WSL2" instead of hyper-v etc. Once your setup is completed, restart the system.
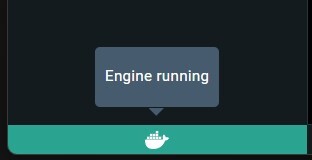
Run the docker engine and if you see something like the screenshot in the bottom left, then you are good to go with next steps.
Setting up Node:
Make sure your docker engine is running and then open Powershell. Type "docker pull algorand/algod". This will get you the latest image to setup your node from foundation. Once downloaded, open your Docker and you should see something like this in the Image tab (select from navigation bar in left):
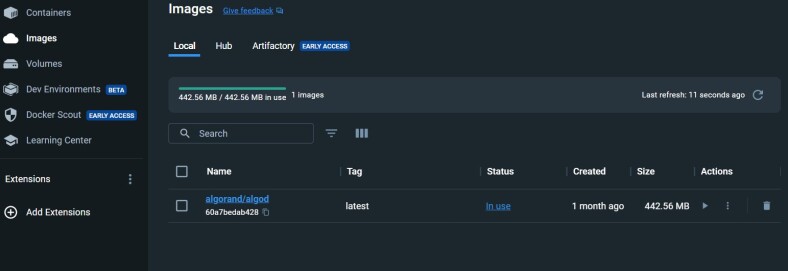
If you see the image created then it means that image was successfully downloaded. So now your system has a node software that can go and interact with blockchain. Before running it, we need to create a Volume for it. A volume provides the node with a storage space.
- Head over to the Volumes tab.
- You will see a "Create +" button there. Click on it and provide it some name like xyz.
- That's it. We now have a volume which we can associate with our node so that it can store the data there.
To link them up, head back to the Images tab. Click on the "Play" icon in the Action column for our node. Click on the optional settings and provide the following paramater:
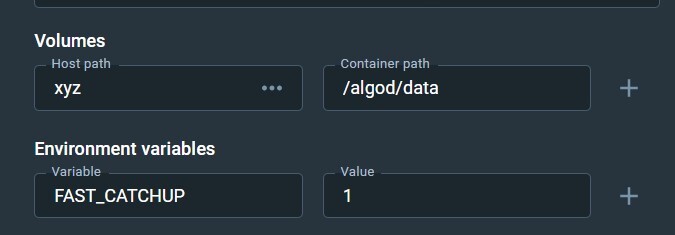
Everything is case_sensitive. So make sure to provide the exact name of your created volume in the "host path". This volume is mounted in container under "/algod/data" so don't change that. When you provide the "FAST_CATCHUP" with a value of 1 in the environment variable, your node will not verify all the blocks in the blockchain, intead it will use catchpoint to go through them rapidly (done in 2-3 hours depending on your network speed). Just click Run and that's it.
To verify, head over to "Container" tab and there you will see a new docker container running. You can click on it and then go to "Terminal" inside the container:
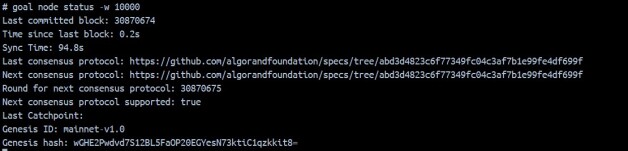
Type the command "goal node status" and it will show you the current status of the sync. Provide a "-w 1000" and it will refresh the status every 1000 millisecond (1 second). Let the node sync. When the "Time since last block" shows up (and is within 0-1s), it means your node is now synced.
By now, your node is running perfectly fine. To participate in consensus you can either use your Escrow account from folks finance or create a new wallet.
- For separate regirstration, find the information here.
To participate using folks finance:
- Login to Folks and go to Algo Liquid Governance Page.
- There you will find your Escrow address.
- Go to Algoexplorer and get the latest round.
Run the following command in docker container terminal:
algorun goal account addpartkey -a ESCROW_ADDRESS --roundFirstValid=ALGOEXPLORER --roundLastValid= NUMBER_FROM_ALGOEXPLORER+3 MILLION
The block number from Algoexplorer is your roundFirstValid number from whereon you are marking your node as active. For last valid block, use the same number and add 3 Million to it. This means your account will be active for approximately 115 days after which you will have to generate the keys again. To marks yourself as active in Folks, copy the required stuff from the output of "goal account partkeyinfo" in Folks and you are done.
If you have reached here, it means that you are now successfully running a node on algorand and helping further in decentralization, scalability and robustness. Congratulations and thanks.
If there are any feedbacks and suggestions, feel free to comment. You can tip me NA4VOZFZFSGZM6AQMMUMEIDSPQXN4GLEDE7OD4SFVNHV7APXIIWNL62AT4. Gives me a reason to keep contributing ;-)


