
Uniswap is now competing with centralized exchanges such as Coinbase, but many people are afraid to dip into the world of decentralized finance and take the same types of risks they would in centralized finance; like the lottery, you cannot win if you do not play.
“Let the future tell the truth, and evaluate each one according to his work and accomplishments. The present is theirs; the future, for which I have really worked, is mine.” ~Nikola Tesla
I discovered Uniswap when I wrote a contest-winning article on the Statera Project (STA Token). I went through a pretty thorough analysis of the project and demonstrated Delta pooling, resulting in a first-place prize. As a result, I later ended up getting 400 Uniswap (UNI) tokens in an airdrop, which I was able to flip for $1,500 USD+ with less than $30 USD invested, including gas fees to withdraw the funds and what it cost me to write the winning article, which is currently growing via pooling, staking and CeFi/DeFi market flips with the rest of my portfolio. This article is a pictorial walkthrough for convenience to viewers, particularly those who are inexperienced, but I hope it will help anyone curious about the process.
When I announced my successes due to writing that article contest, my followers quickly asked me about other opportunities to earn Uniswap tokens for future gain. The token shows great promise for a solid return on investment.
My follower’s interests and the high profitability quickly encouraged me to research Uniswap further, and I was immediately directed to Uniswap Liquidity Mining. Uniswap liquidity mining truly isn’t cryptocurrency mining at all; it’s liquidity pooling in pairs almost precisely the same as with Delta in Statera Project, but it pays in UNI tokens, and you won’t be using STA tokens.
Long story short, you put crypto assets up as collateral on a connected wallet, and they pay you a percentage of every transaction that happens on Uniswap in the form of UNI tokens. The more you put up for collateral and the longer you wait during the eligibility period, the more UNI tokens you will get back upon withdrawing your funds – you do not lose them. You can withdraw or spend them at any time, but I recommend you go for the full stretch due to ETH gas fees being very high and maximizing profitability. You would lose money by investing too little and withdrawing too quickly due to ETH gas fees.
I am using MetaMask in this pictorial because that is the wallet that qualified me for the UNI Airdrop and the wallet I use for Delta pooling already. It’s not my favorite wallet, but it’s reliable if you want to hold your own private & public keys and not worry about ERC-20 and BEP2 support; you can send ETH & DAI to the same universal ETH address. Having a universal ETH address is excellent for people that are new to Uniswap or cryptocurrencies in general.
There are four options for Uniswap Liquidity Mining that come in pairs of currencies, and they go as follows: ETH-DAI, ETH-USDC, ETH-USDT, and ETH-WBTC. What this means is that you can choose any of these two currencies, connect those funds to a Uniswap compatible wallet, and then deposit a ratio of these currencies for pooling, which results in Uniswap (UNI) token rewards.
Other wallets are compatible with Uniswap, such as Trust Wallet. The concept is the same; you need to connect your wallet to Uniswap so that they may approve or deny exchange transactions. In this pictorial, you will need to link either your pre-existing MetaMask wallet or download the MetaMask plugin for Brave/Chrome/iOS.
For people who have not yet connected and set up a wallet, Uniswap (app.uniswap.org) automatically detects this and will direct you to a MetaMask installation download page upon clicking MetaMask in wallet options:
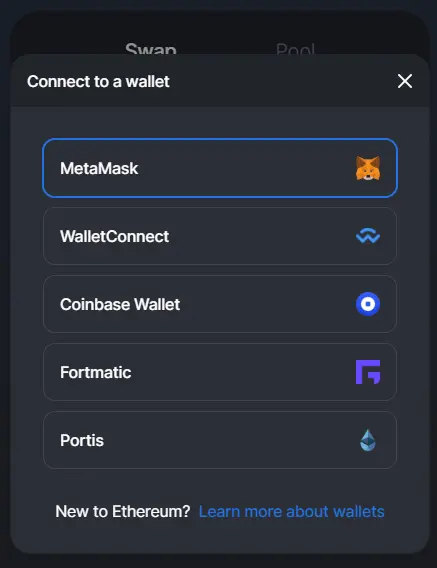
Select your OS/Browser: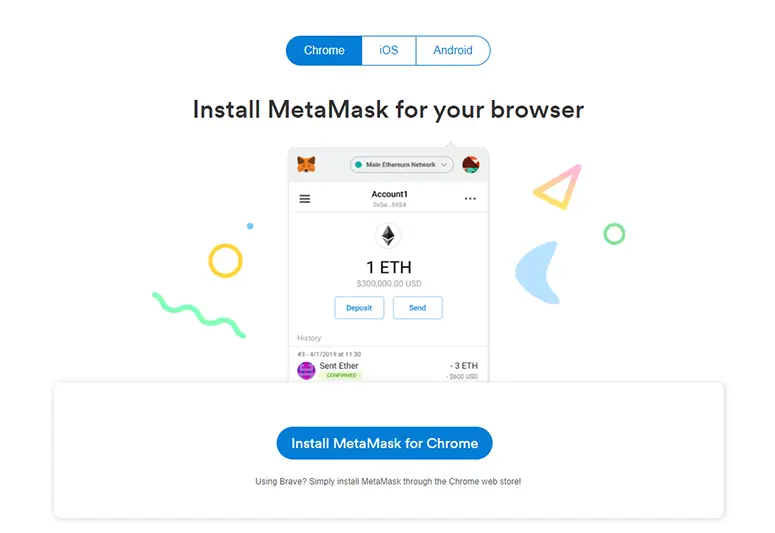
The Chrome version also works for Brave browser:

You’ll be walked through a setup process for your wallet, and you will need to remember a 12-word backup phrase, you can write it down. Otherwise, MetaMask offers the option of downloading a text file with that information for safekeeping in the bottom right-hand corner. You’ll need to save it one way or another, so this is the easiest option.
This 12-word security phrase will need to be confirmed to open the wallet, do not lose it. Upon launching MetaMask the first time, you’ll need to confirm the 12 words in order, and after doing so, you will see a congratulations notification for successful wallet creation.
You may need to activate DAI in your wallet by going to "Add Token" and typing DAI into the token symbol area. This action makes it so you can see your DAI balance; the wallet already has the capability of accepting DAI; you are merely deciding which coins and tokens to display in the wallet. This process will need to be repeated for different cryptocurrencies, and you can also do it by token contract address – don’t worry, it is not as tedious as it sounds!
Connect when prompted and confirm:
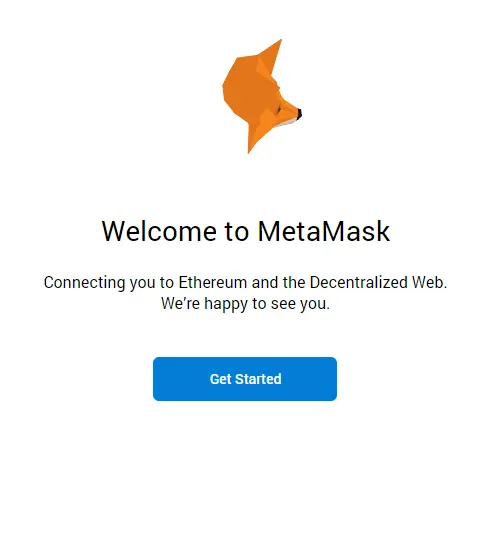
Click Get Started, and it’s time to make your passphrase: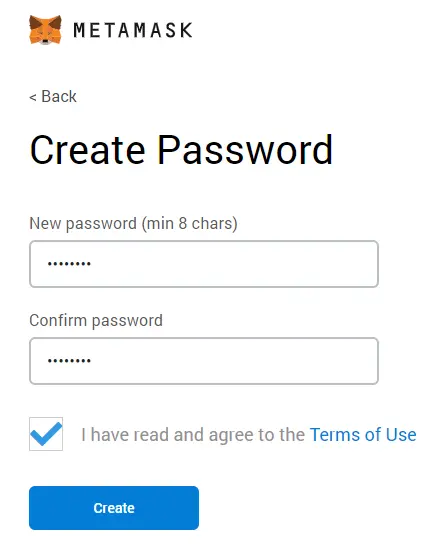
Once MetaMask is set up in your browser, and you can view both ETH and DAI in your wallet, go back to app.uniswap.org and connect the wallet to Uniswap: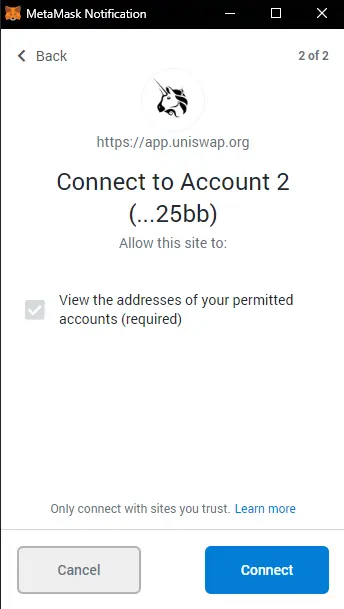
Now that you have successfully set up MetaMask, you can proceed with connecting Uniswap to your wallet: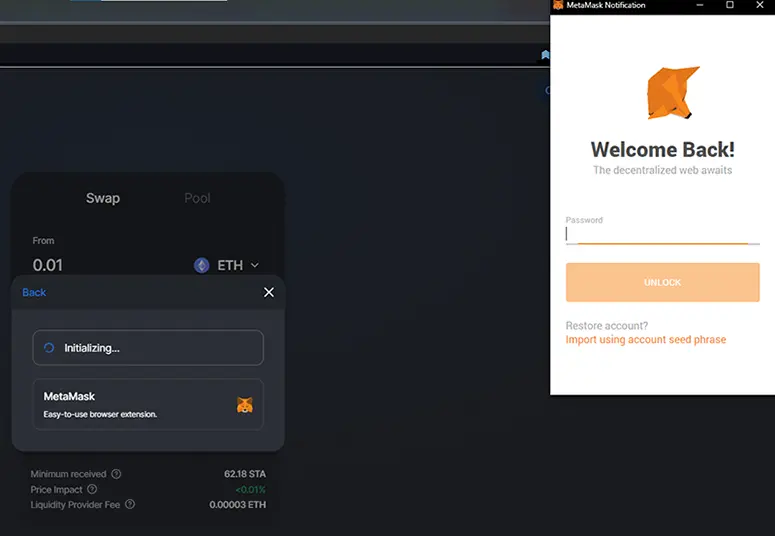
The window for earning via liquidity mining ends in 34* days and some odd hours, as seen below: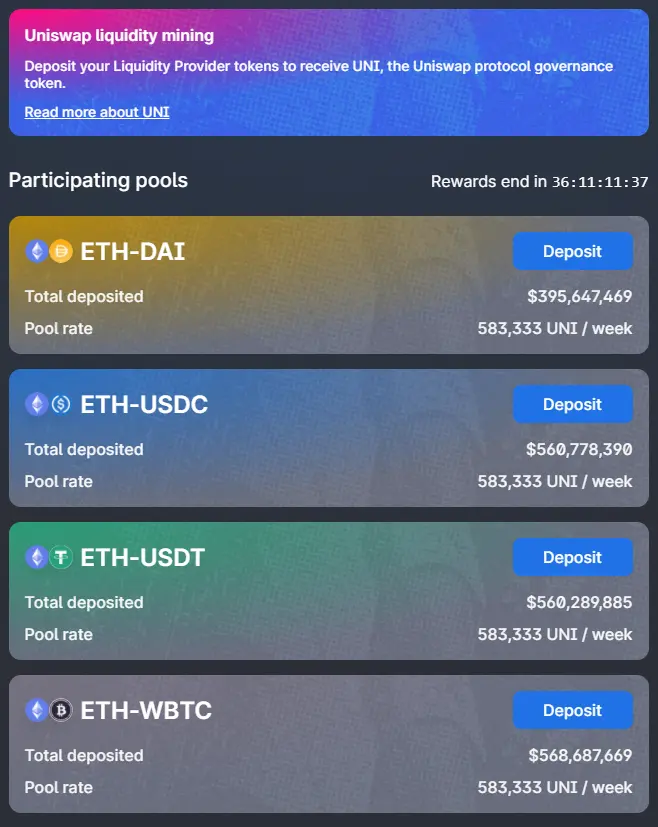
Since I already had some ETH and DAI on that wallet, I decided to deposit in that form. The only drawback with this is that the Ethereum (ETH) gas fees are pretty outrageous at the moment, so I recommend if you are going to follow these instructions, you deposit enough to make it worth the gas fees. I spent roughly 20$ and got over $1,500 back on the airdrop. While I doubt you’ll make that much money unless you invest a lot into liquidity mining, Uniswap v2 is rumored to send the UNI token price through the roof, especially with their increasing popularity and record-high volume of exchange transactions. Based on the fast recovery I’ve seen from them after a recent crash, I don’t doubt at all they are just getting started, and I am still holding 100 UNI, which I bought during the crash at a lower price than I sold the 400 for – and I am glad I made that move; and I doubt I will regret this one, either.
I started this process by sending DAI and ETH from another wallet to MetaMask – and I note that you will need more ETH than DAI due to gas costs, then I began the prompt for depositing ETH-DAI, which goes as follows: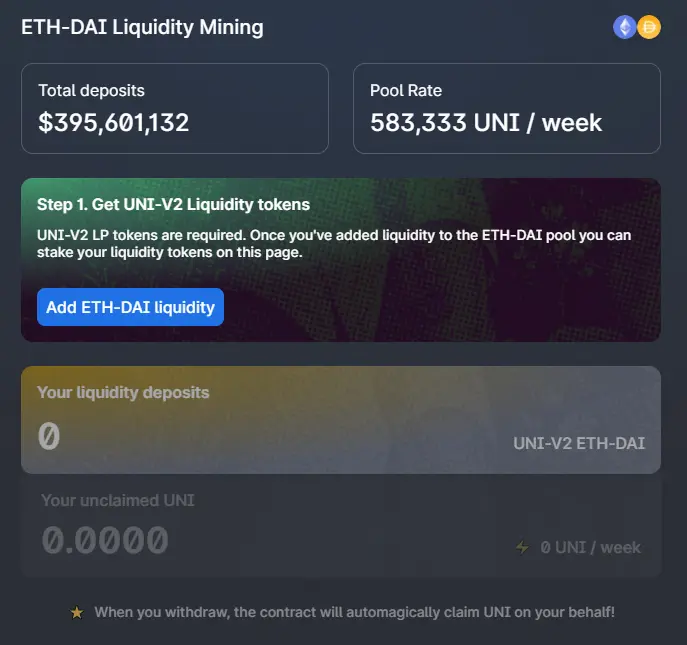
Click Add ETH-DAI liquidity and proceed to the next step: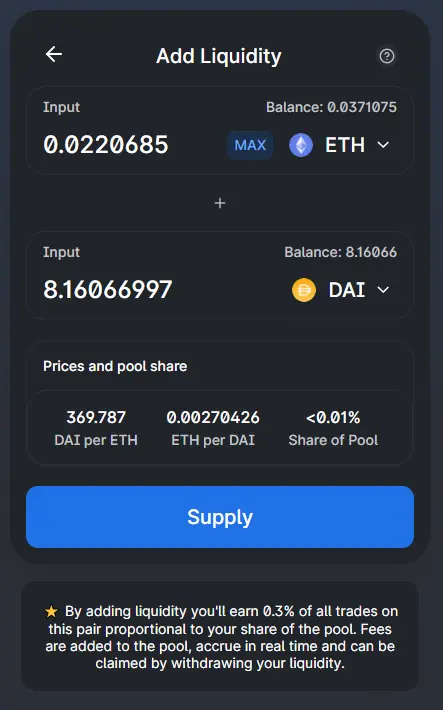
I used the ETH equivalent of my DAI balance, which was $8.16 USD; if you attempt to use all your ETH, your transaction will fail due to no gas leftover: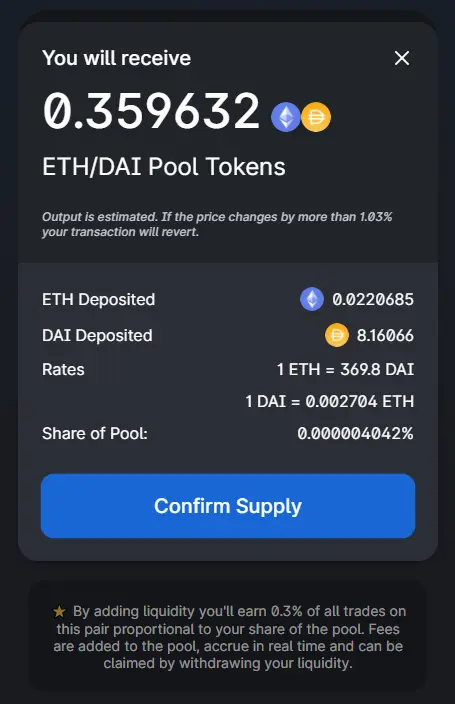
I will be adding to this later on after I cash out 4,000 BAT in the next decent market rise, but you can see the process is relatively simple and intuitive. I confirmed the supply: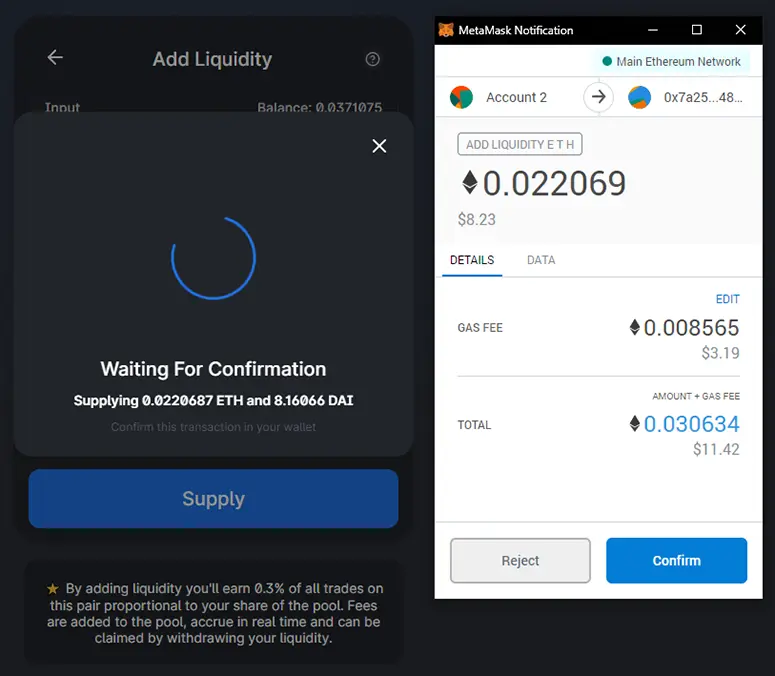
After confirming, it only took a moment (44 seconds) to process and here is my transaction on Etherscan: https://etherscan.io/tx/0x04939d0cb96f20dcb5da9eee57884ce3a4f5b2e043a172162c9d9d3b41a72ecf
You will be prompted when your transaction is complete: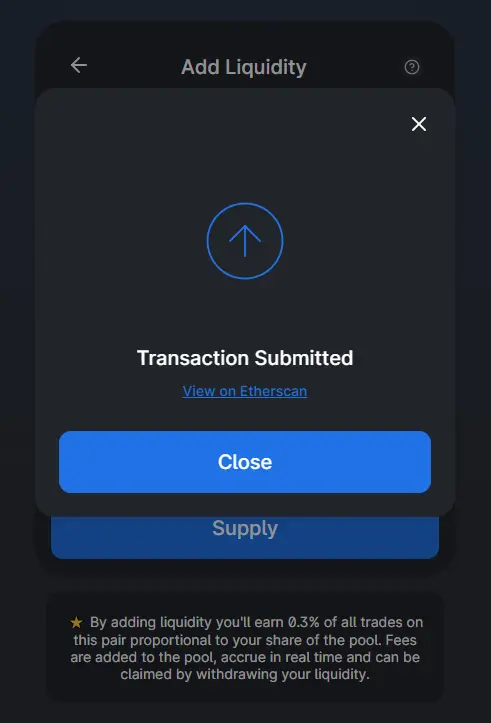
You can now see your position with liquidity pooling shares, and I will reiterate that I paid the fees for this purely as an example for this article; I recommend you invest more than this for a solid return on investment: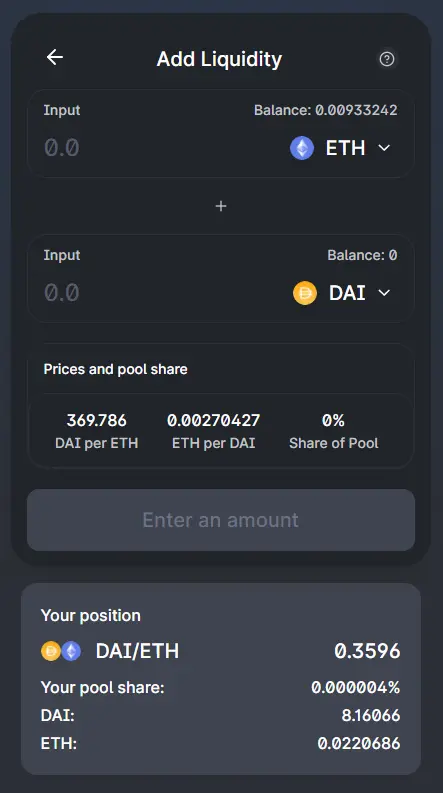
Click the back button, and you’ll be able to see what assets you have pooled, which includes a link to view the analytics on your earnings:
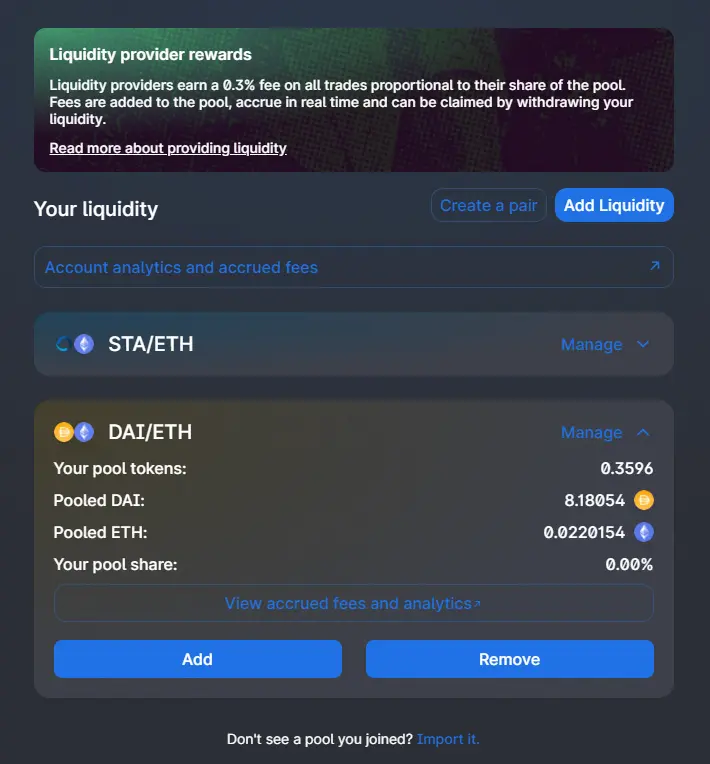
You can always add more liquidity to the pool later on, which I fully intend to do, or you can perform this same process with any of the other pairs to pool in one or more liquidity pool at a time.
For those curious about Uniswap as a whole, I highly recommend the article “Uniswap Explained” by William M. Peaster, published on August 10th, 2020. It is by far the most informative and appealing Uniswap article I have read.
Questions and comments are always welcome.
As always, stay smart & stay safe.
-Thomas Wolf
Follow Me
➡ Twitter: @WickedTheWolf
➡ Voice: @ThomasWolf
Follow Our Socials
➡ Twitter: @ethwriter_
➡ Telegram: https://t.me/ethwriter_broadcast
➡ Instagram: ethwriter_official
This article was originally published on Voice.com

My article on grinding to Rank 71 on Cointiply with earning techniques!
Honeygain - #1 Passive earner & My article on HoneyGain Legitimacy
Coinpot.co's Seven Faucets:
BonusBitcoin
BitFun
MoonDoge
MoonDash
MoonBitcoin
MoonBitcoinCash
MoonLitecoin
FaucetPay & My Top Picks of their Legitimate Linked Faucets:
FaucetPay - The #1 Microwallet Platform
ADBTC - The #1 FaucetPay faucet, check out their Ad Surfing!
DogeFaucet - 1/4 a Dogecoin every 60 minutes
xFaucet - BTC, ETH, LTC, Doge, Dash, Tron, DGB, BCH - Claim every 5 minutes
FireFaucet - I use their offerwall's paid You-Tube extension to boost levels
FaucetCrypto - An earning/faucet site that pays out small amounts right away
Konstantinova - BTC, ETH, LTC, Doge, Dash, Tron, DGB, BCH - 25 Claims Daily
Others:
Mellowads - Use faucet claims to create free ad campaigns for referrals
TipNano - A mobile earning & faucet App that pays instantly in Nano
Coinbase Earn - Compound, EOS, XLM
My Crypto Exchanges & Brokerage App:
Coinbase - Receive $10 in Bitcoin when you buy or sell $100 or more.
Binance - One of the world's most popular exchanges.
Robinhood - Free stock worth up to $200 when you sign up and deposit $100.
ChangeNOW - Anonymous, secure, fast, lowest-fee crypto exchanges!
I highly recommend you use Trust Wallet for all Publish0x withdrawals!
Brave Browser - If you don't already have it, you're living under a rock.






