This tutorial will guide you on how to set up an account and place your first trade with Loopring.io - a fully Decentralized Exchange (DEX) that doesn't require users to complete KYC.
During this tutorial, we will need to set up a MetaMask account, fund it, and link the account to Loopring.io
We will then go on to place our first trade on the DEX itself.
The tutorial will be separated into 4 parts;
Part A - Installing Metamask
Part B - Creating Ethereum Wallet (can be done via Metamask as well)
Part C - Signing up at Loopring.io
Part D - Your First Trade at Loopring.io
Part A - Installing MetaMask
Let us begin by installing Metamask. MetaMask is pretty much a bridge wallet that allows you to access any dApp straight from their browser extension. It is the interface for your own wallet that enables you to place trades on Loopring.io
NOTE: If you are accessing Loopring.io from the Brave browser, you can skip this step as there is already an in-built bridge wallet on the Brave browser itself. You can also skip this step if you already know how to use MetaMask. Furthermore, MetaMask is also available for Opera and Firefox, but for the sake of this tutorial, we will be using the Chrome version.
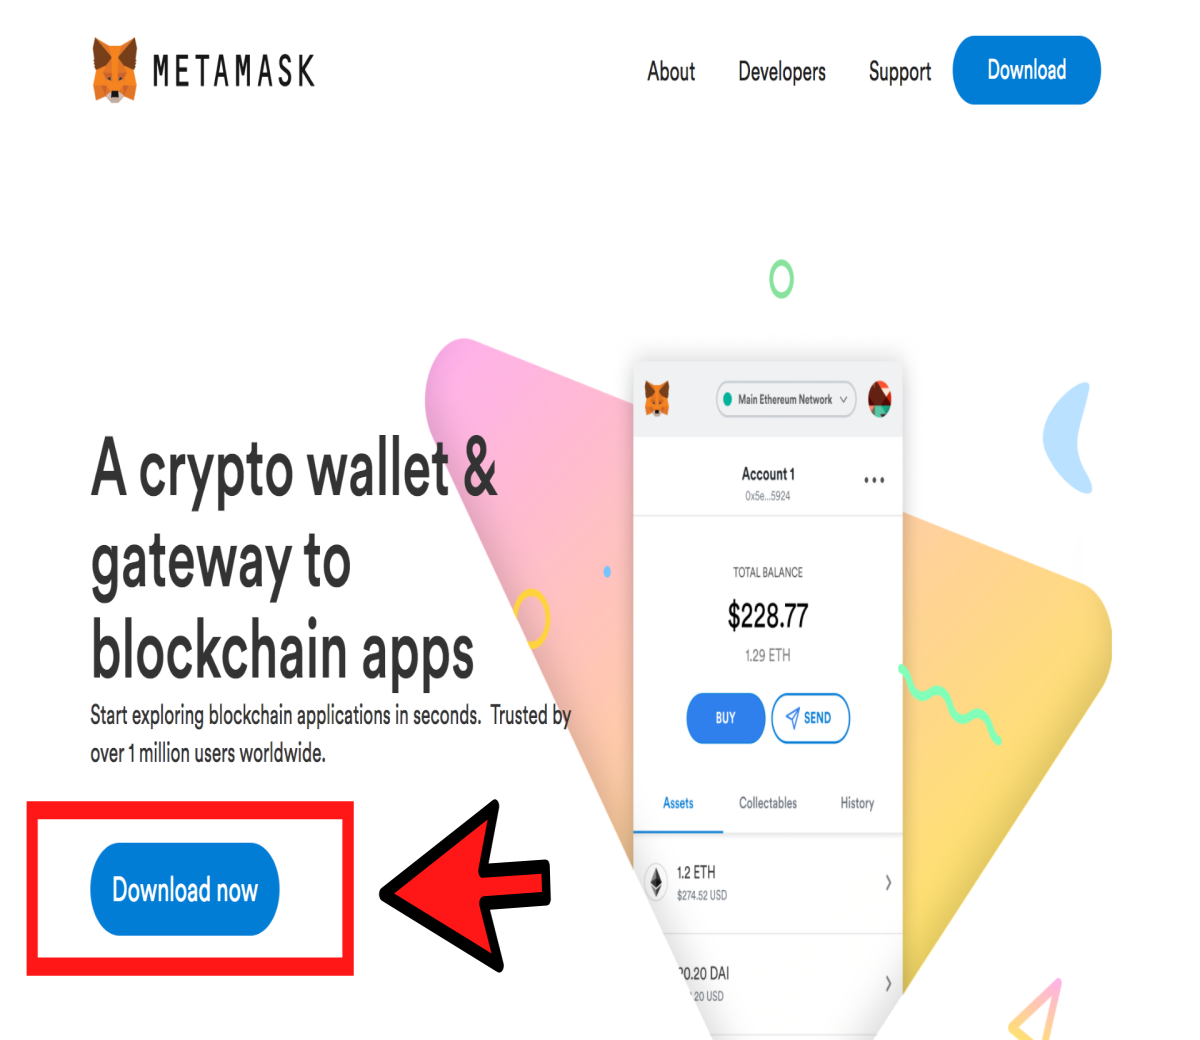
Head over to the MetaMask website and click the “Download Now” button.
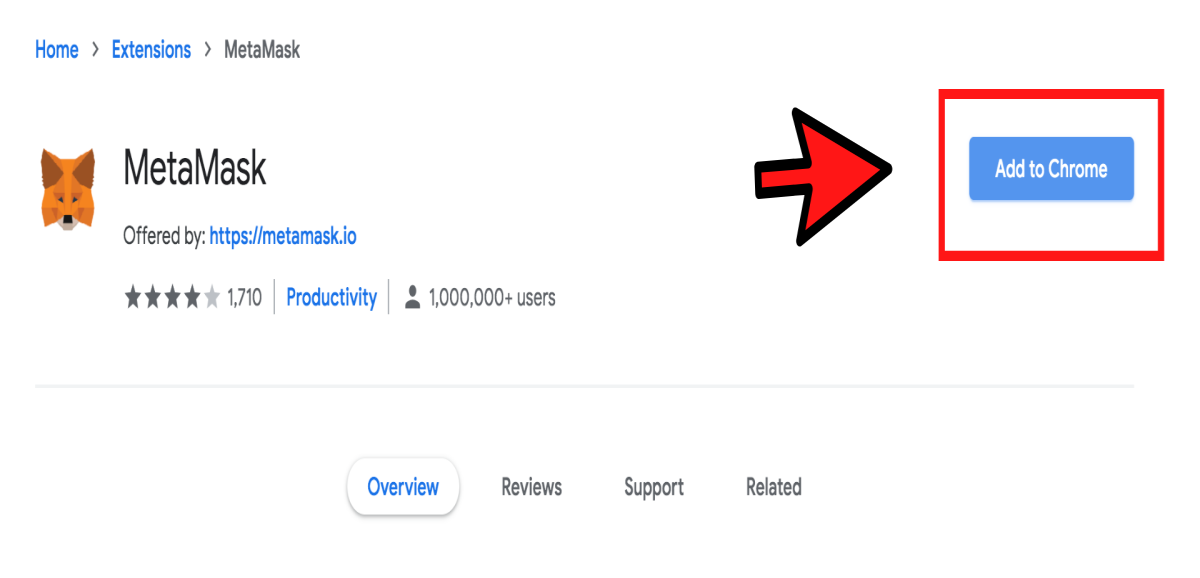
After clicking download now, you will be directed to the MetaMask extension on the Google Chrome Extension store. From here, simply click “add to Chrome”.
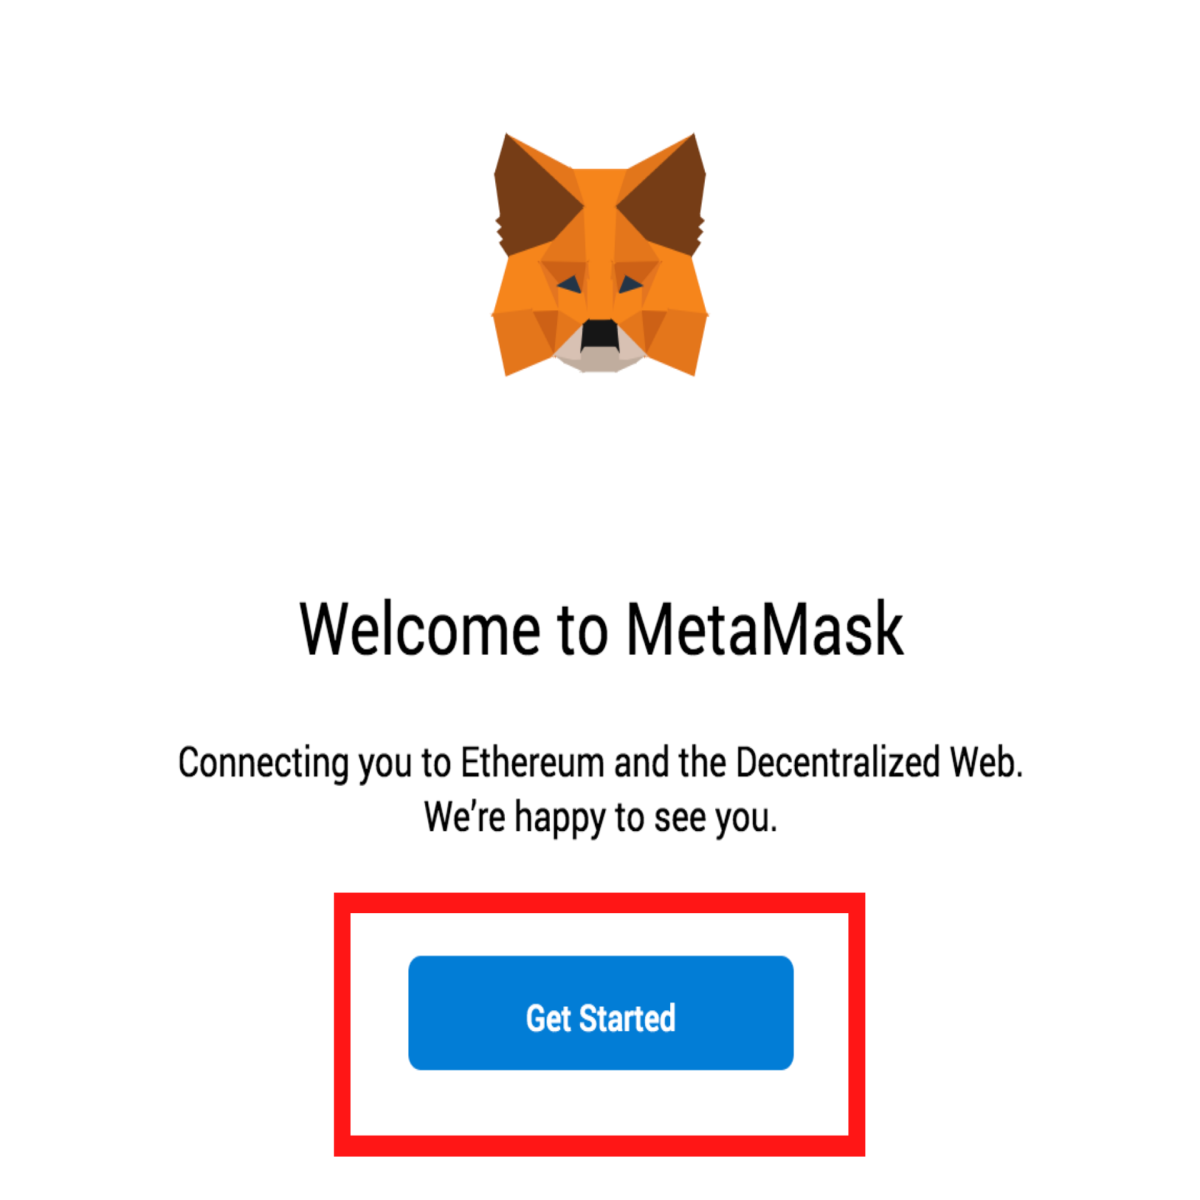
After the installation has completed, you will automatically be directed to the initial wallet setup for MetMask.
Part B - Creating an Ethereum wallet
Click “Get Started” to begin creating a wallet for your MetaMask extension.
Here, you will be asked if you are new to MetaMask. If you have previously set up a MetaMask you can simply enter your old seed phrase here. In this tutorial, let’s assume that you are totally new. In this case, hit “Create A Wallet”.

You will then be requested to create a secure password. Go ahead and enter a password of your choosing and be sure to remember it!

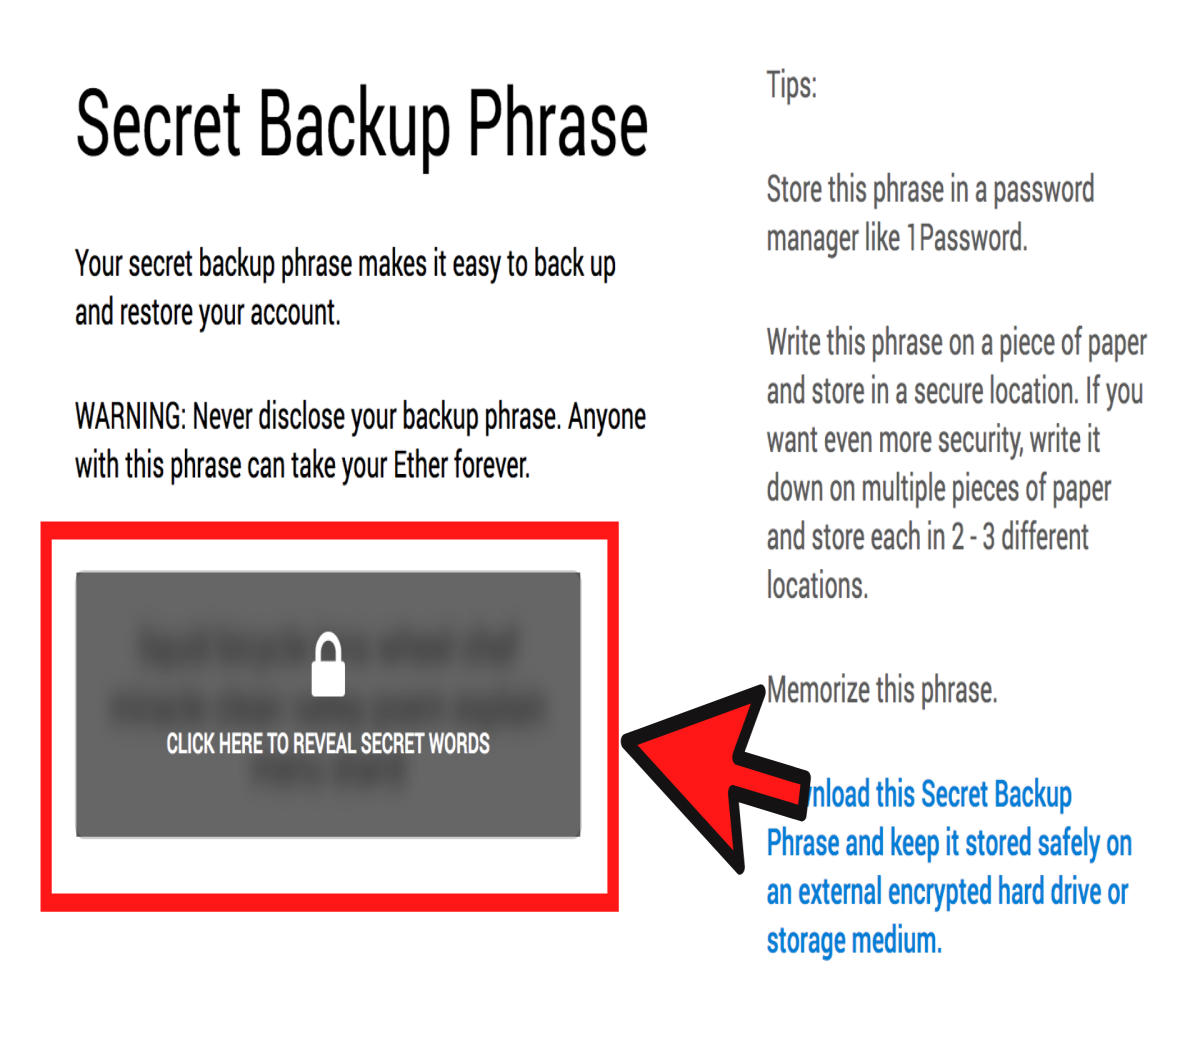
The next step is to ensure that you backup your wallet. It will provide you with a “Secret Backup Phrase” that you MUST write down and keep stored somewhere safe and secure where nobody will have access to look at it.
To see the Secret Seed Phrase, hit where it says “Click Here To Reveal Secret Words”. It will reveal a list of words in the window. You MUST write these words down.
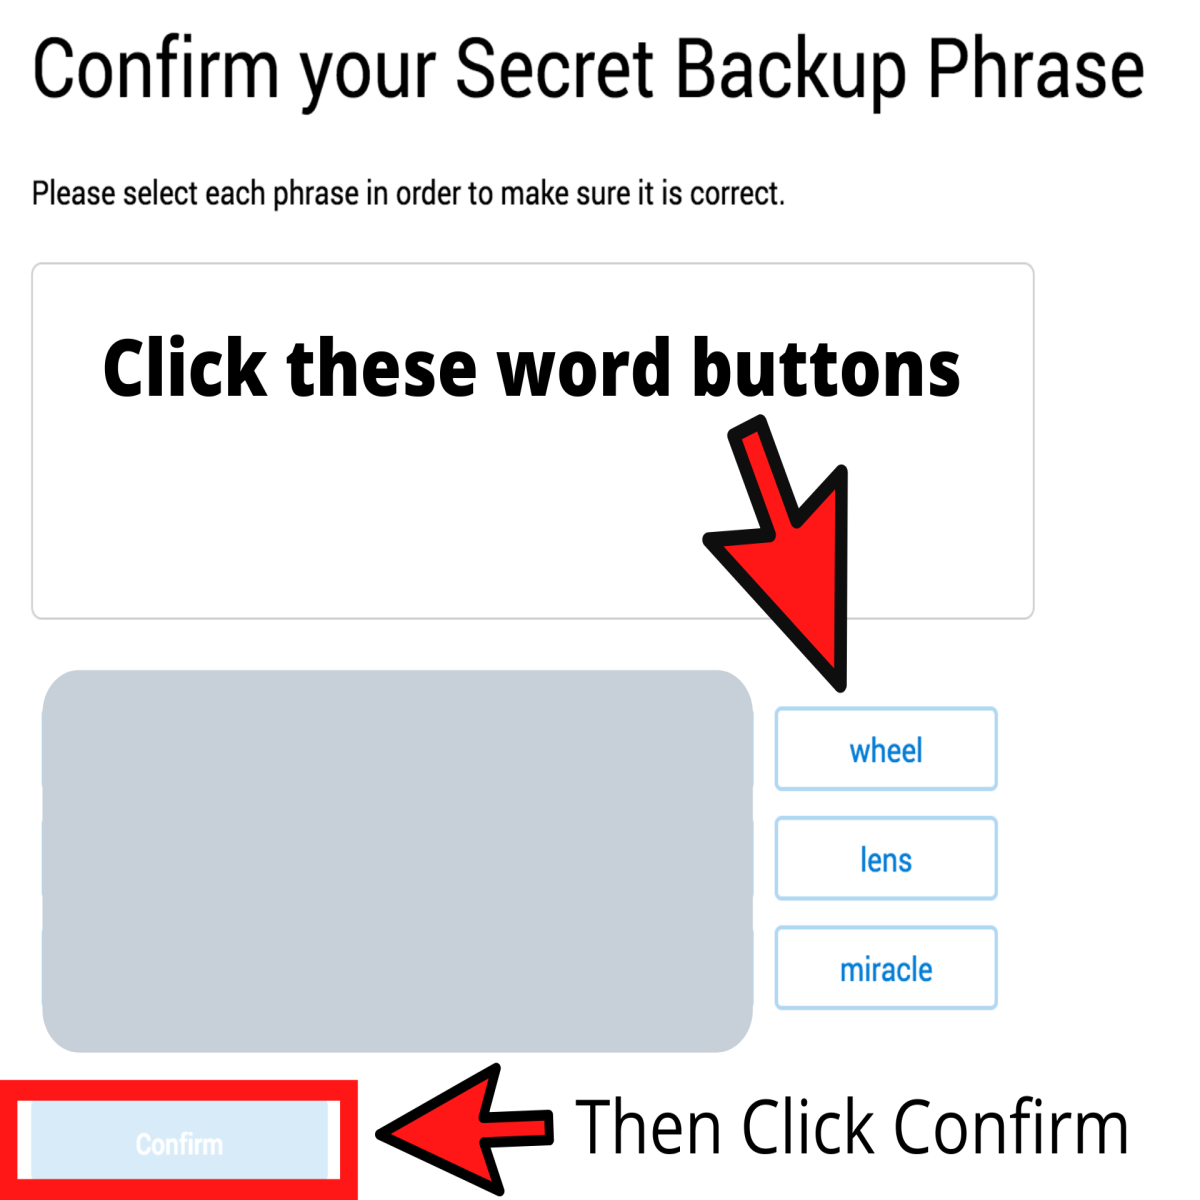
The next step is to confirm that you have written the words down correctly. MetaMask asks you to enter your seed phrase by clicking the individual words that are presented in boxes below. For obvious reasons, I cannot show you my seed phrase, but once you have entered the phrase, click “Confirm” to continue.
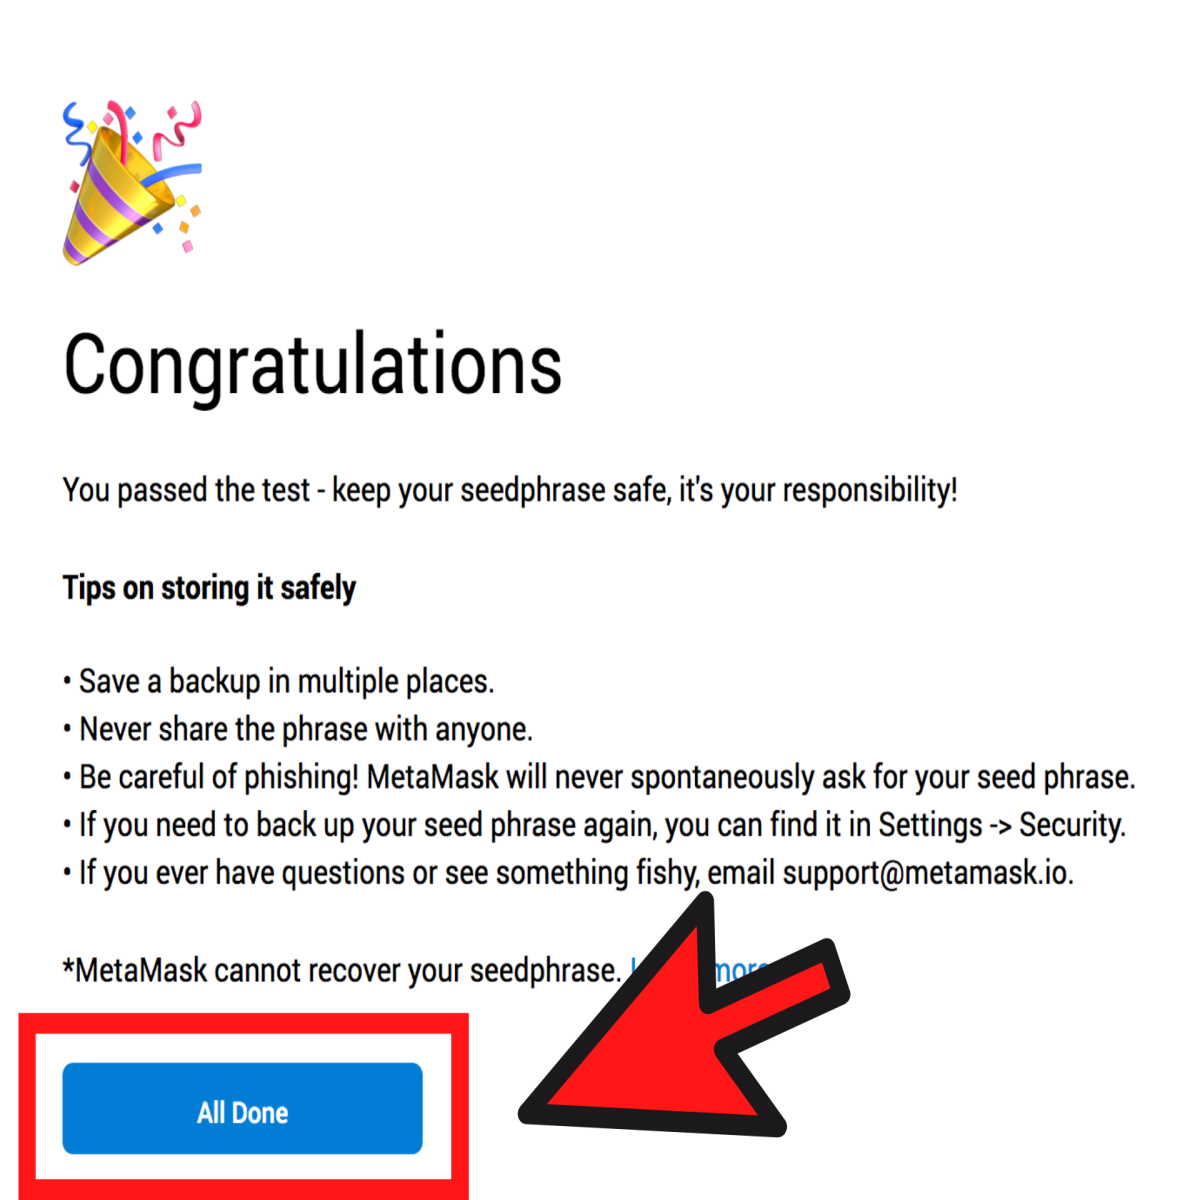
If you entered your phrase correctly, you should see the following screen. If you have reached this far, hit “All Done” to continue. If not, go back and make sure you entered the seed phrase in the right order.
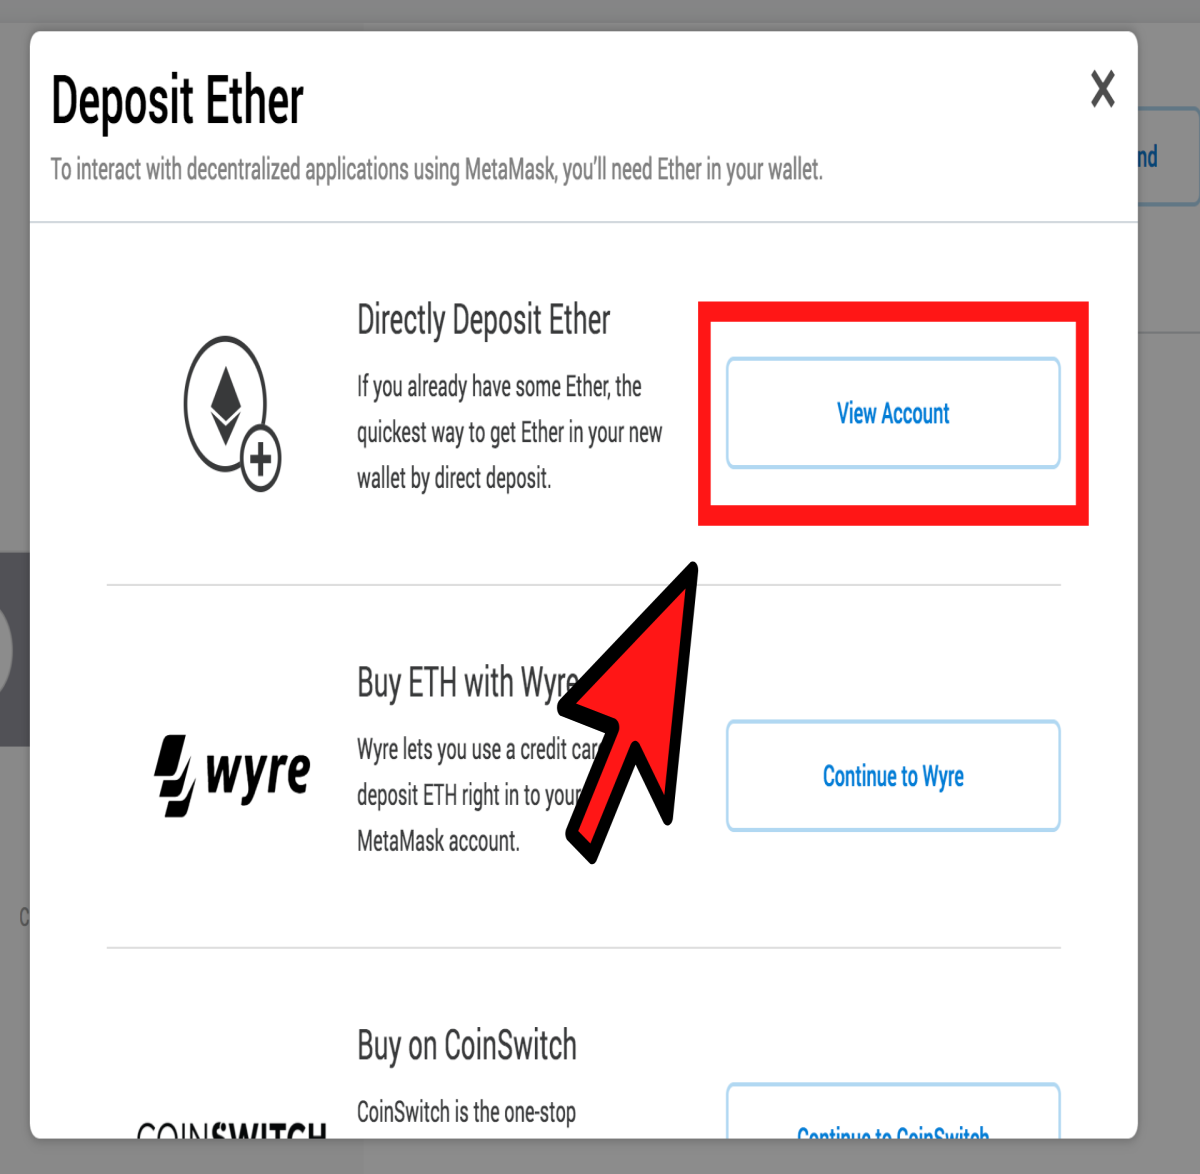
You will then be presented with the following screen. This acts as your wallet and it is where you will manage any cryptocurrency assets you have. We will need some cryptocurrency to link MetaMask to the Loopring.io DEX so let us go ahead and click “deposit” to load up the wallet with some cryptocurrency.

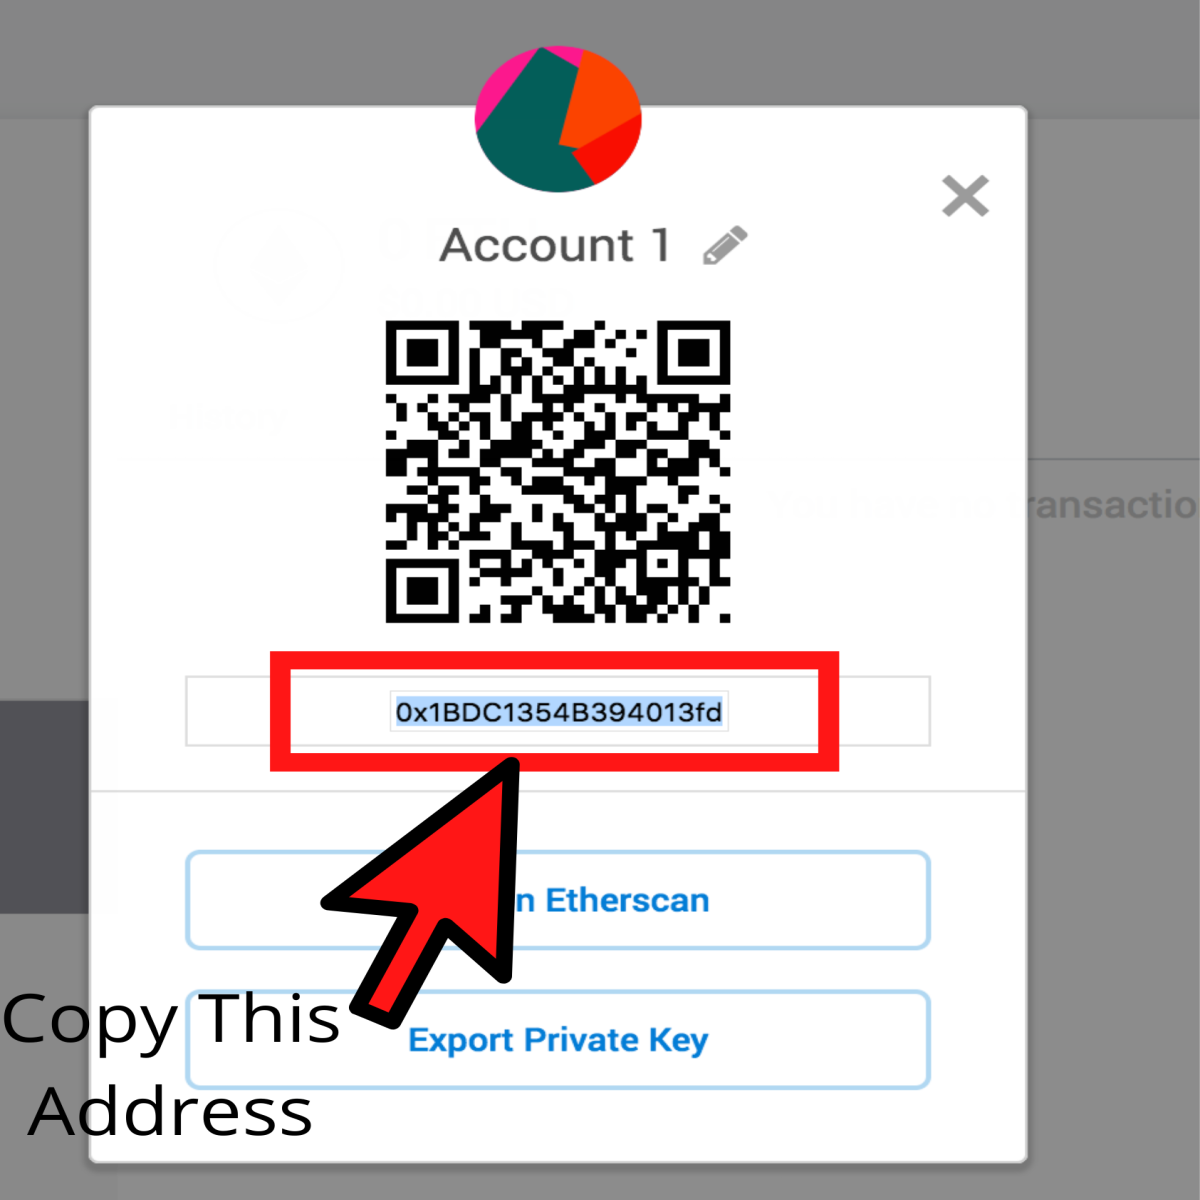
You will then be asked the method of deposit you would like to take. Let us choose “direct deposit” by clicking view account;
The next screen will show your deposit address. Copy your address and send some coins to the wallet.
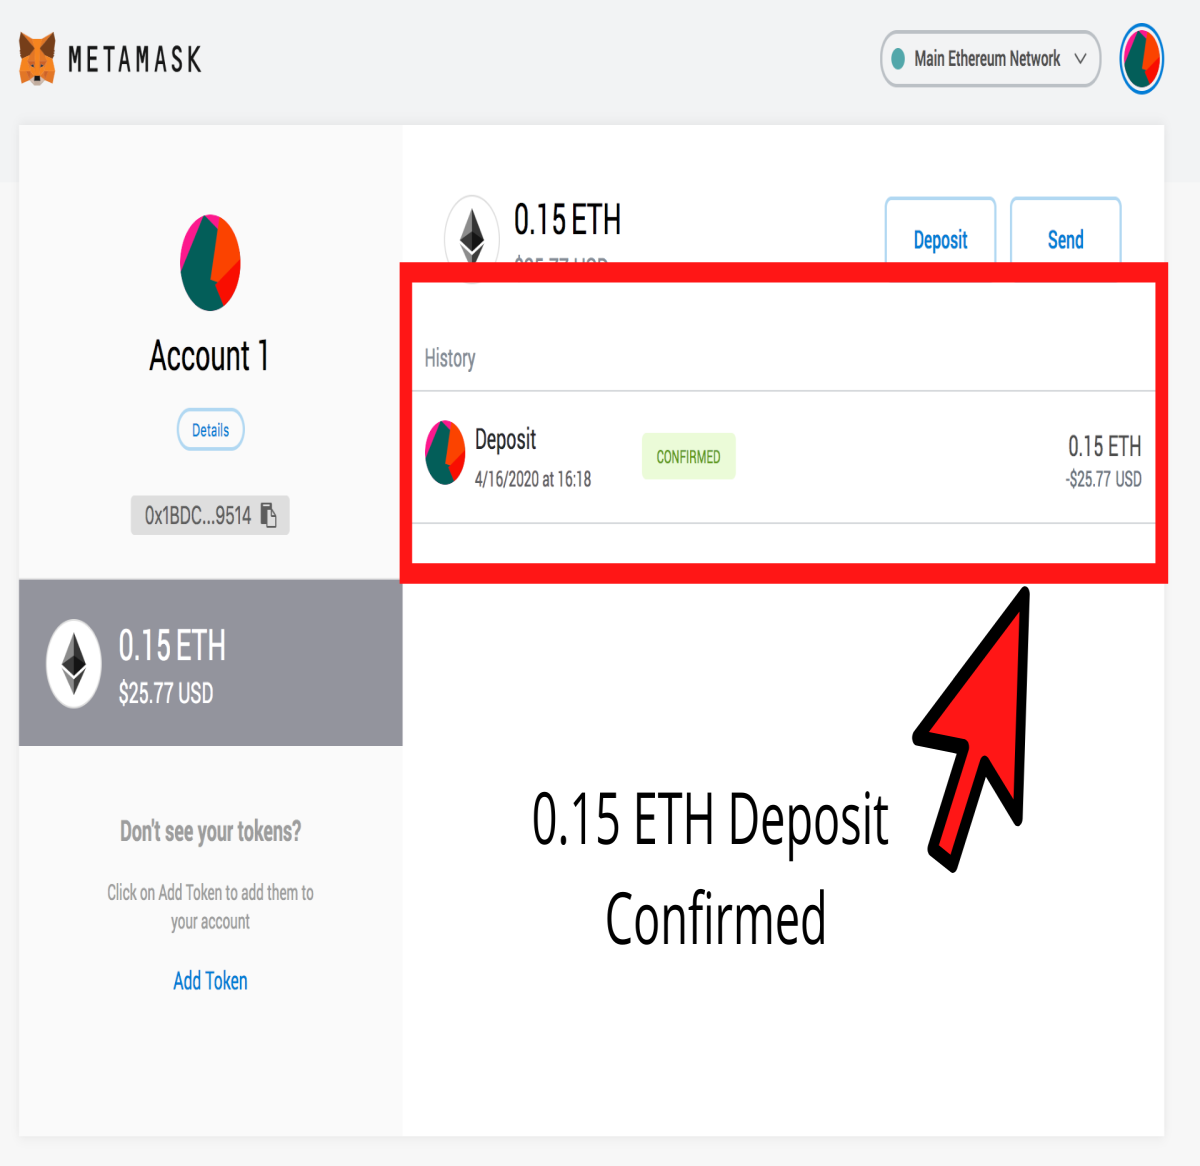
Once the deposit has been completed, you will see the coins in your wallet. You can see that I have deposited 0.15 ETH into the MetaMask wallet in the screenshot below;
We have now successfully set up the MetaMask wallet and are ready for part C of this tutorial - Signing up at Loopring.io
Part C - Signing Up At Loopring.io
When you first head over to Loopring.io you will see the following interface for the trading platform;
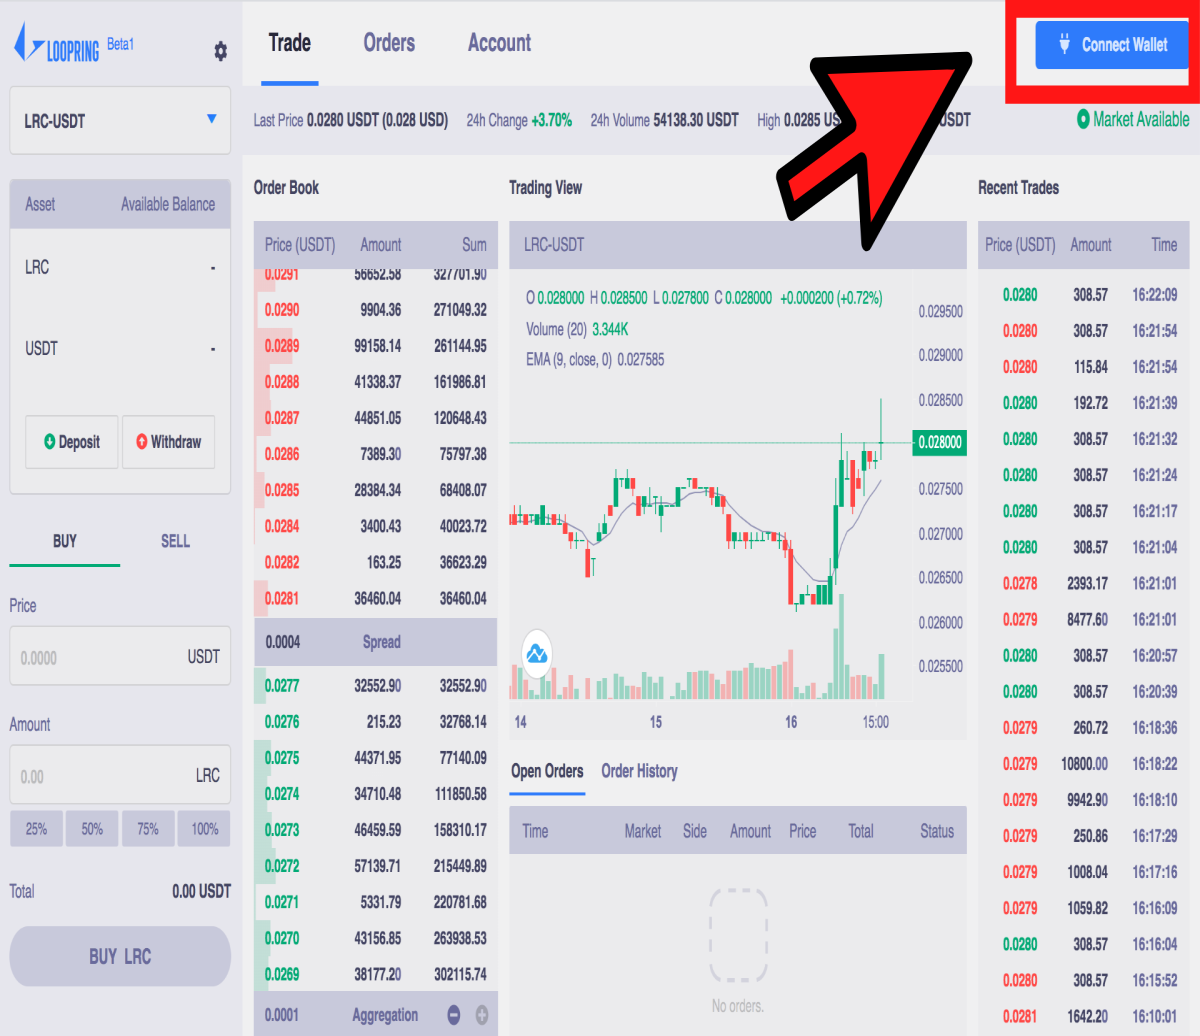
The first thing we need to do is to connect our MetaMask wallet to the Loopring.io DEX so we have funds available to place some trades.
Go ahead and hit “Connect Wallet” in the top right-hand corner.
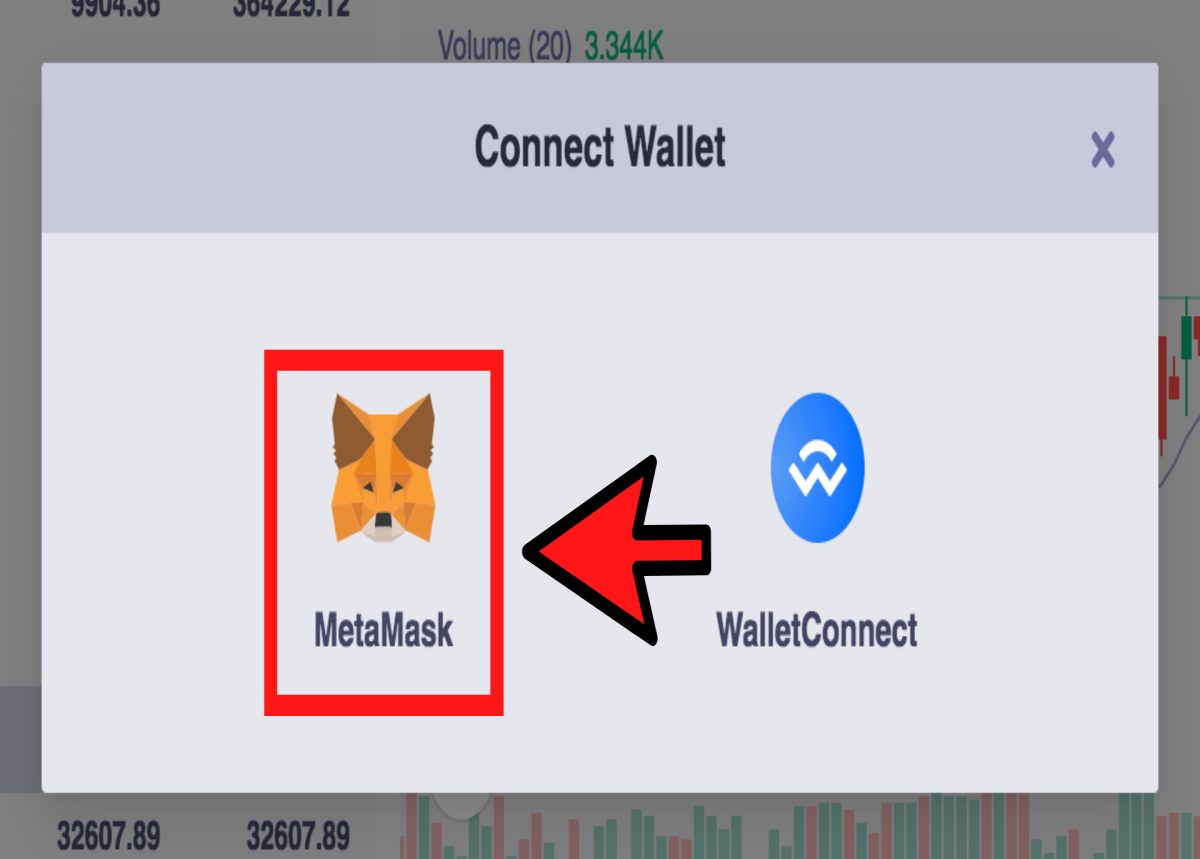
You will see the following screen, click “Connect Wallet” again;
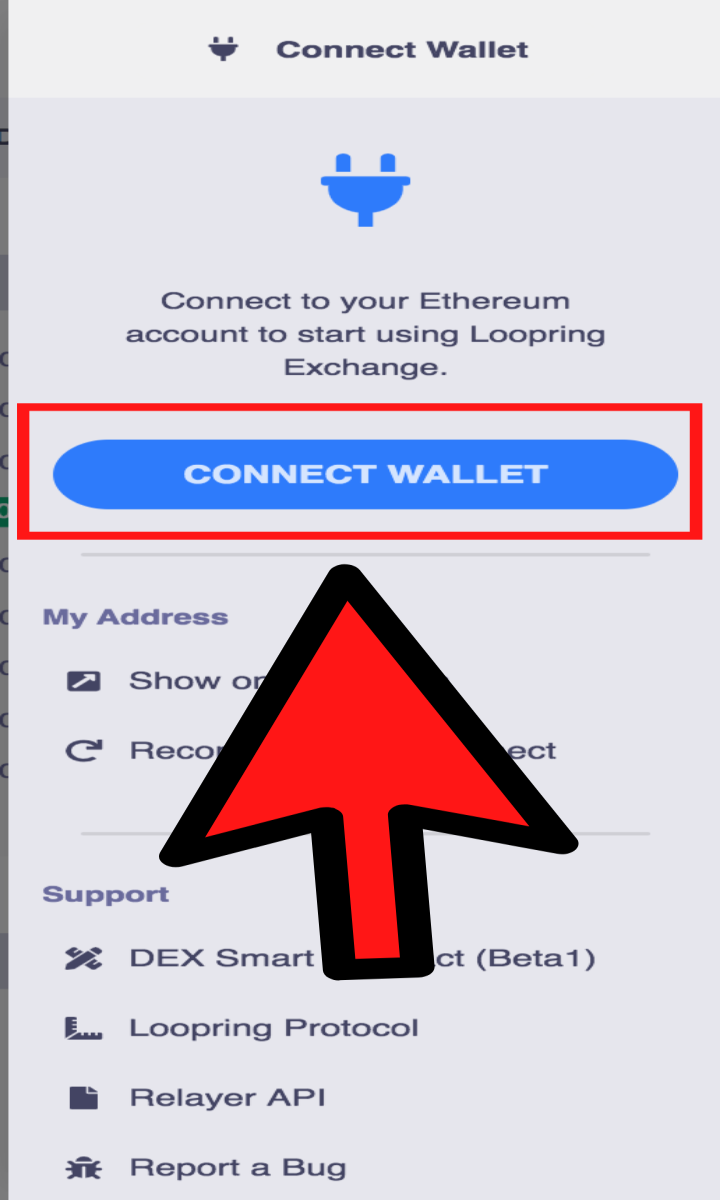
You will be given a selection of two bridge wallets to choose from. As we have set up MetaMask, this is the wallet we will be selecting.
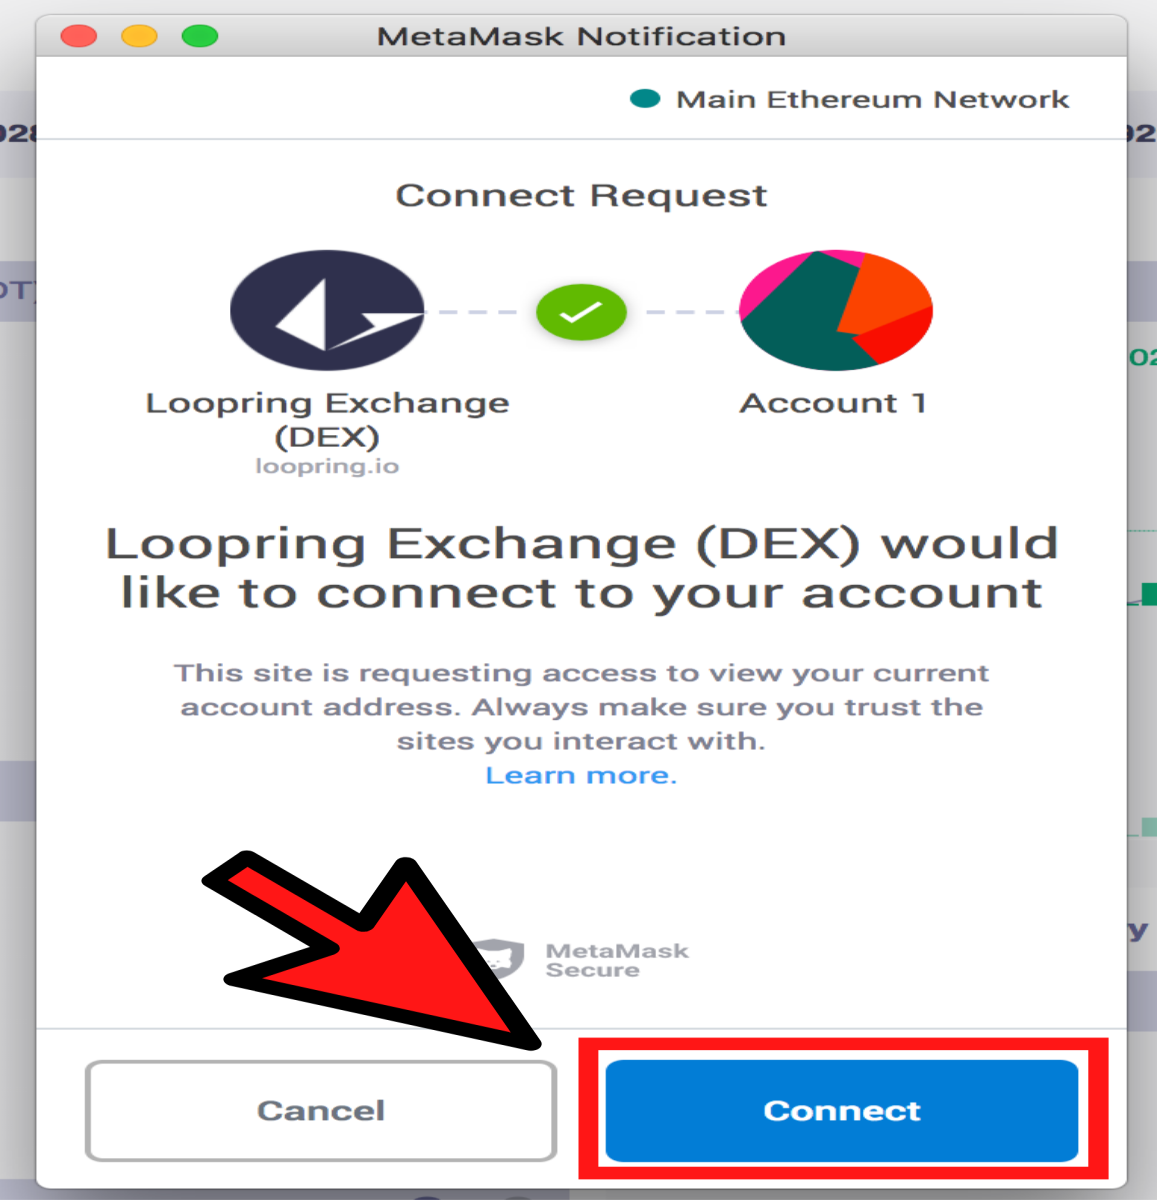
A separate Chrome window will open containing the MetaMask wallet with a request to connect the wallet to the Loopring.Io DEX. Click “connect” to set up the bridge between the wallet and the exchange.
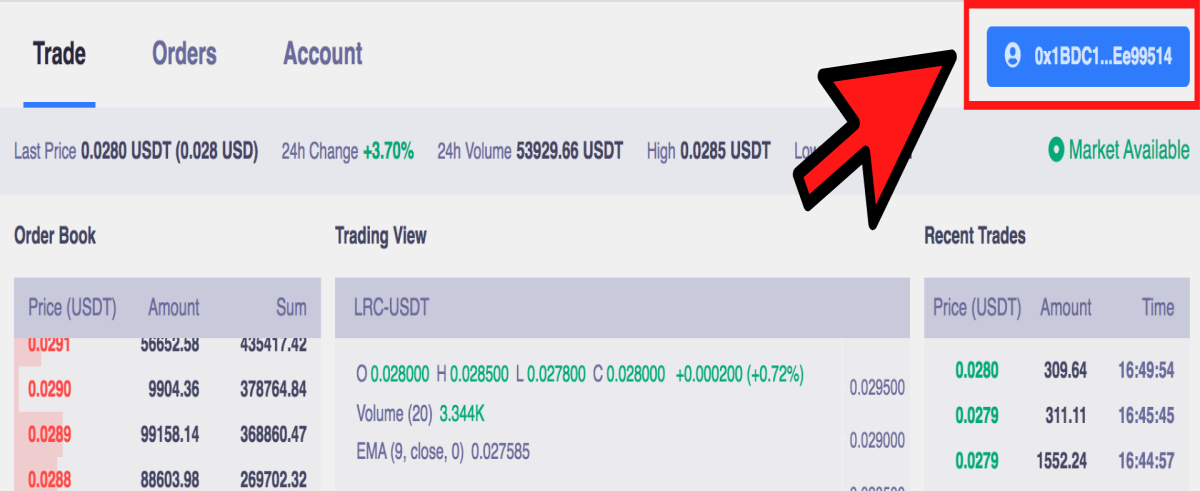
If everything worked smoothly, you should see that your wallet address is now connected and it will show your wallet in the top right-hand corner;
Next, we need to create an account with Loopring.io
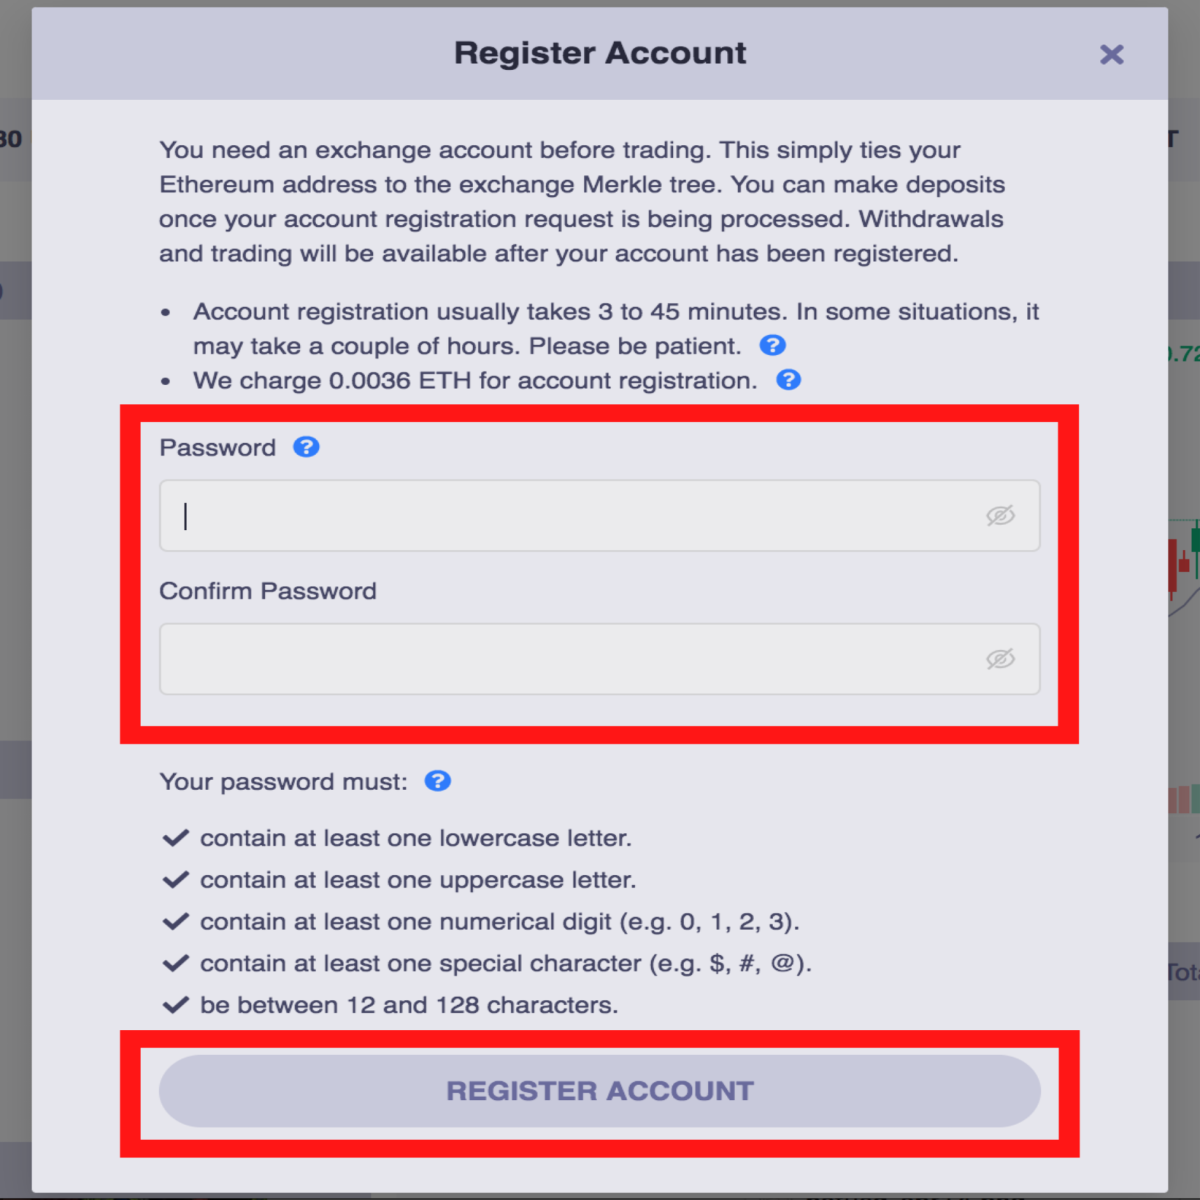
Click the wallet in the top right-hand corner to presented with the following screen. It is here that we will be registering the account, so click “Register Account”.
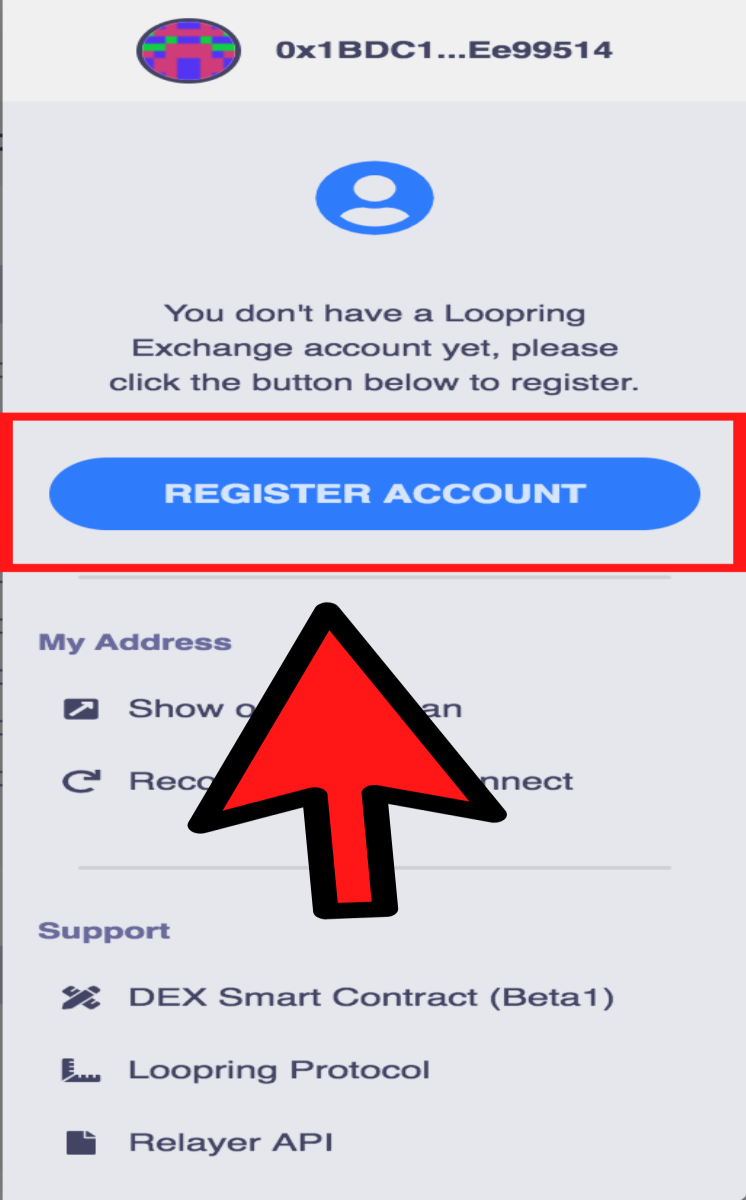
You will then be asked to create an account by entering a password. Choose a secure password and hit “Register Account”.
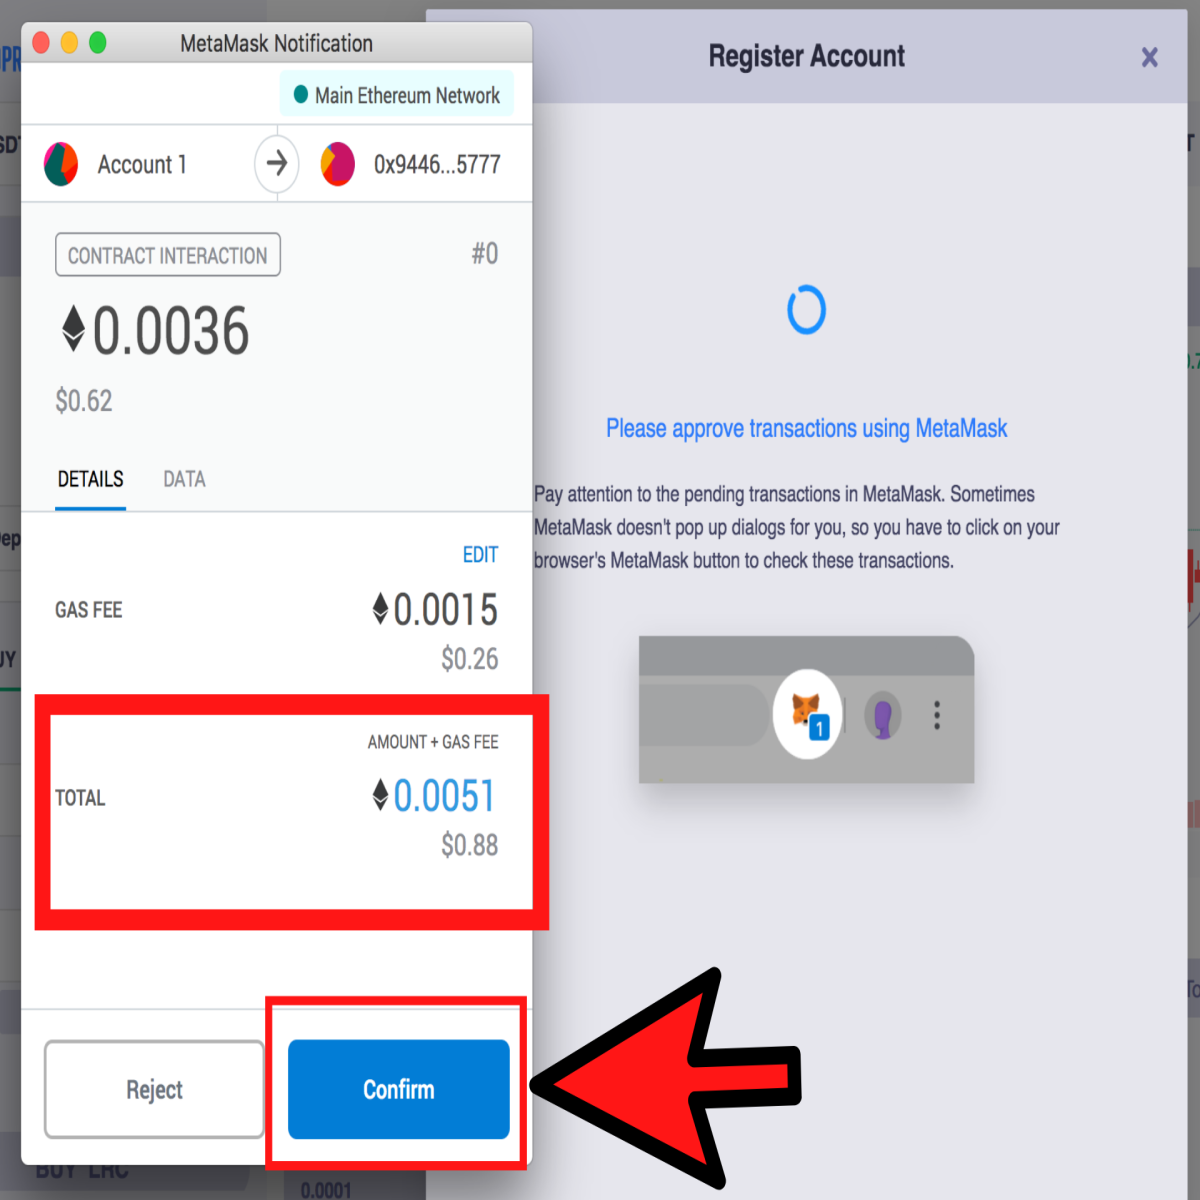
Another separate Chrome window will pop-up asking you to confirm a transaction to finish the account registration. There will be a small Gas fee to pay for this transaction. Typically, this is how real decentralized exchanges work as the sign-up process is all on-chain and therefore involves a small Gas fee. If you are happy to go ahead click “Confirm”.
You will then see that your account is being registered in the top right-hand corner. This usually takes between 3- 45 minutes to set-up. In the meantime, let us make a deposit so we are ready to trade. Hit where it says “Registering Account”;
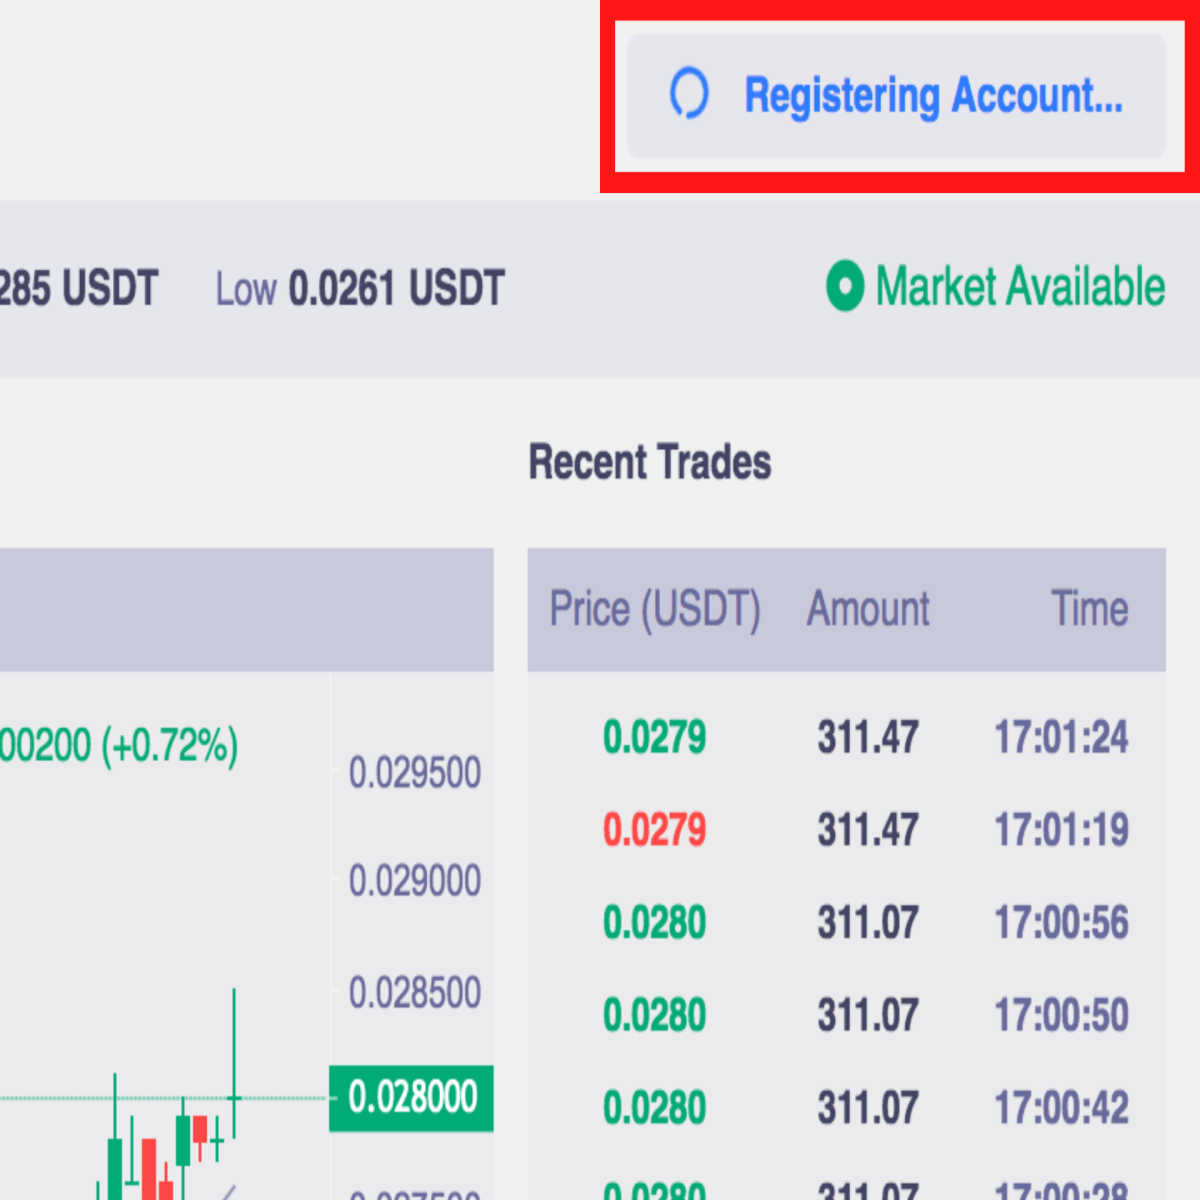
You will be presented with the following menu. We need to click “Deposit” to put some funds in the Loopring.Io connected wallet.
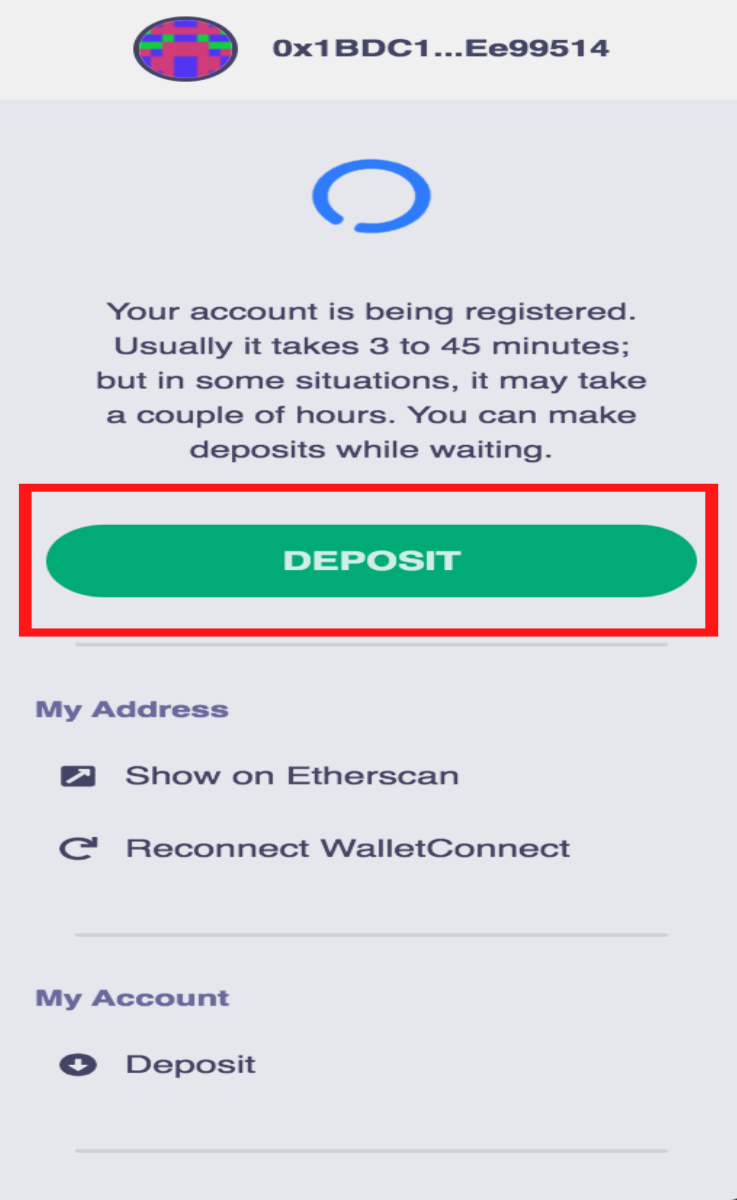
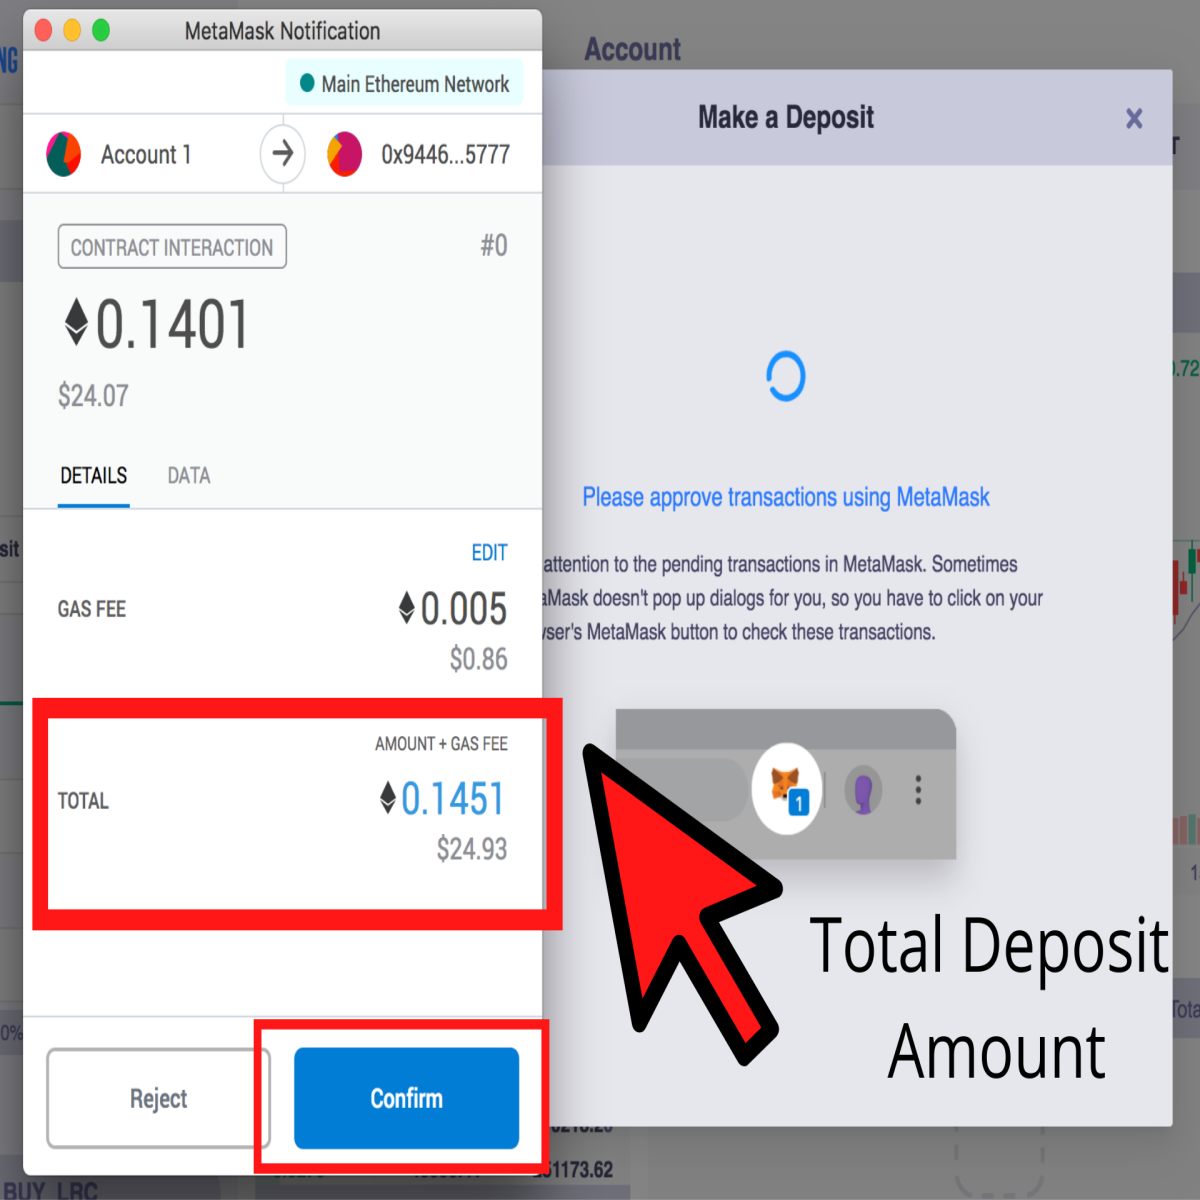
You will be presented with the following screen requesting you to make a deposit.  It is important to note that we are not sending funds to Loopring.io’s wallet at all. We are simply depositing them into our own exchange account which we just created. The wallet on Loopring.Io is completely non-custodial. This means that only we have access to our own wallets and nobody else, even Loopring.io, has any access whatsoever.
It is also important to note that we should keep some funds in the MetaMask wallet to process withdrawals. In this example, we have 0.15 ETH in our MetaMask and therefore we will send only 0.14 ETH to our DEX wallet.
After inserting how much to deposit, hit the “Deposit” button.
Again, another separate Chrome window will appear, asking you to confirm the transaction. It contains the 0.14 ETH that we selected to deposit plus a small Gas fee. If you are happy to go ahead, click “confirm”
After clicking confirm, you will see the following pop-up in the top right-hand corner of the screen;
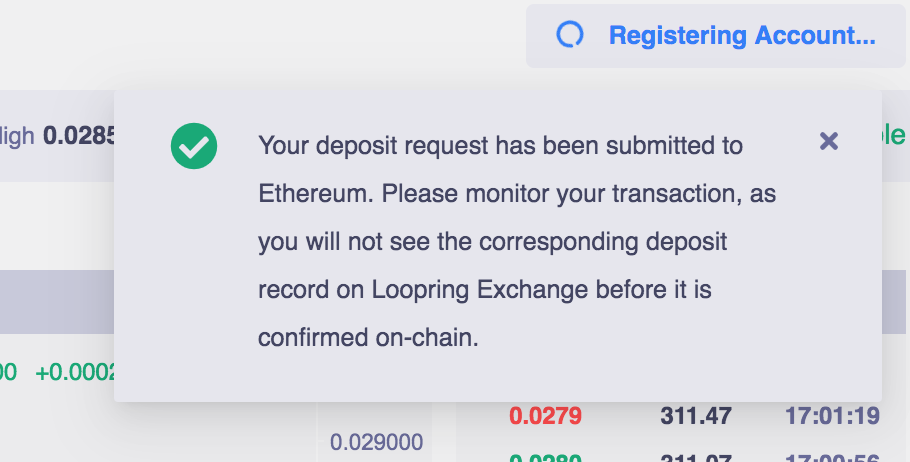
From here, we simply have to wait until our transaction has been confirmed and our Loopring.io account has been registered before we move on to Part D - Placing Our First Trade
Part D - Your First Trade at Loopring.io
Once your account has been registered and your deposit has been confirmed you will be ready to place your first trade!
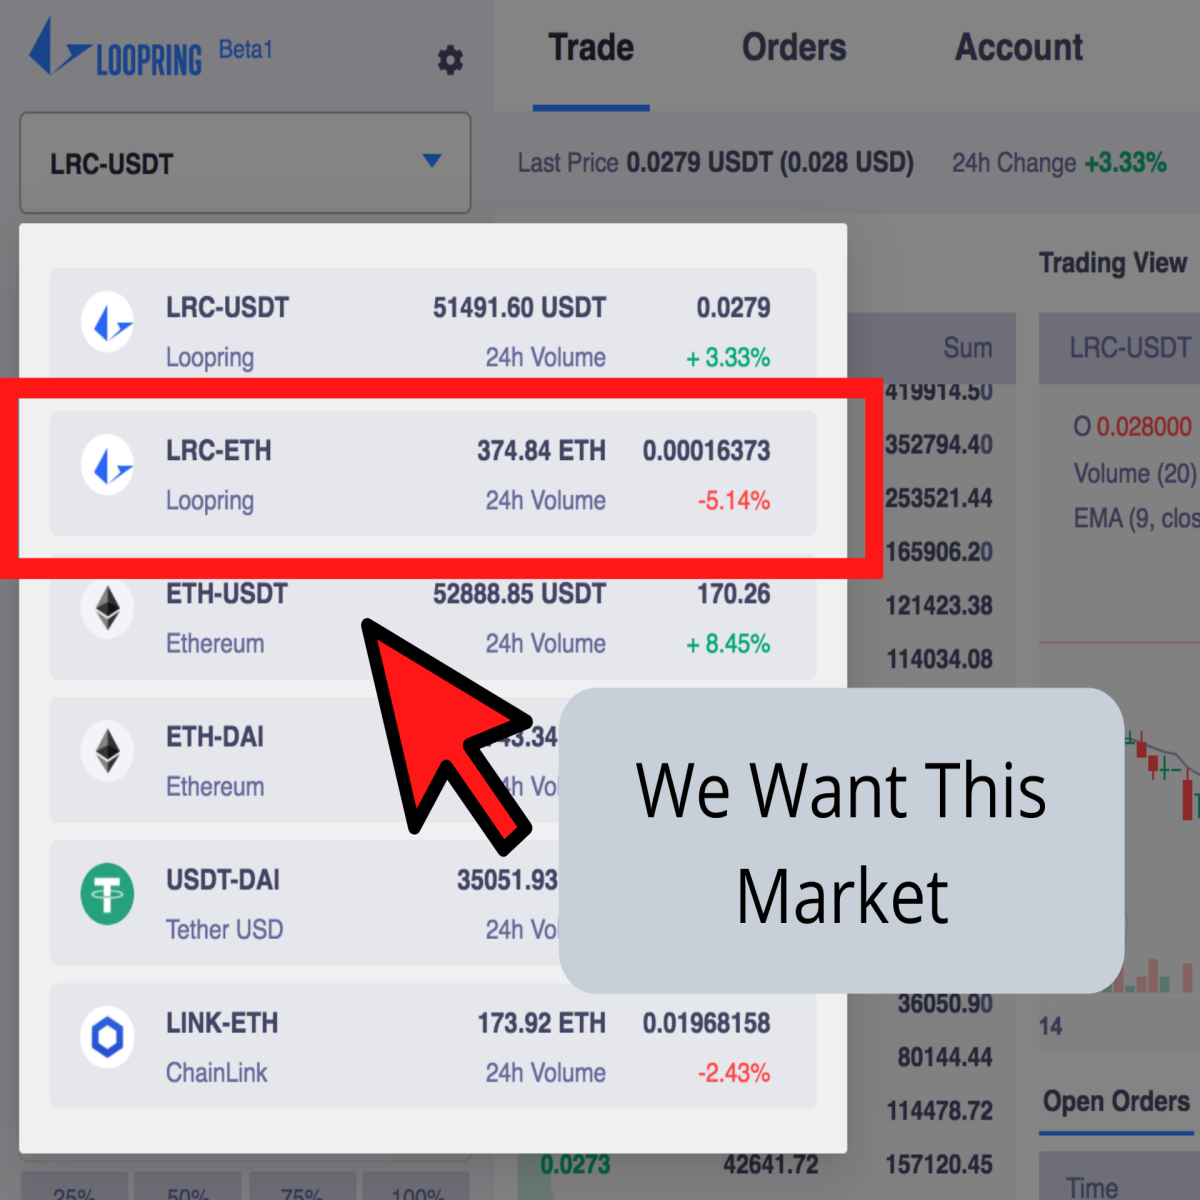
In this tutorial, we will be buying some LRC in exchange for our Ethereum. The first thing we need to do is to select the LRC-ETH market by clicking the following menu in the top left-hand corner;
This will bring up a menu of all the markets available to trade on Loopring.io. In this example, we want to select the LCR-ETH market;
Once the LRC-ETH market is selected, the trading panel for this particular market will be presented. Let us go through each component of the trading layout and explain what they all mean individually;
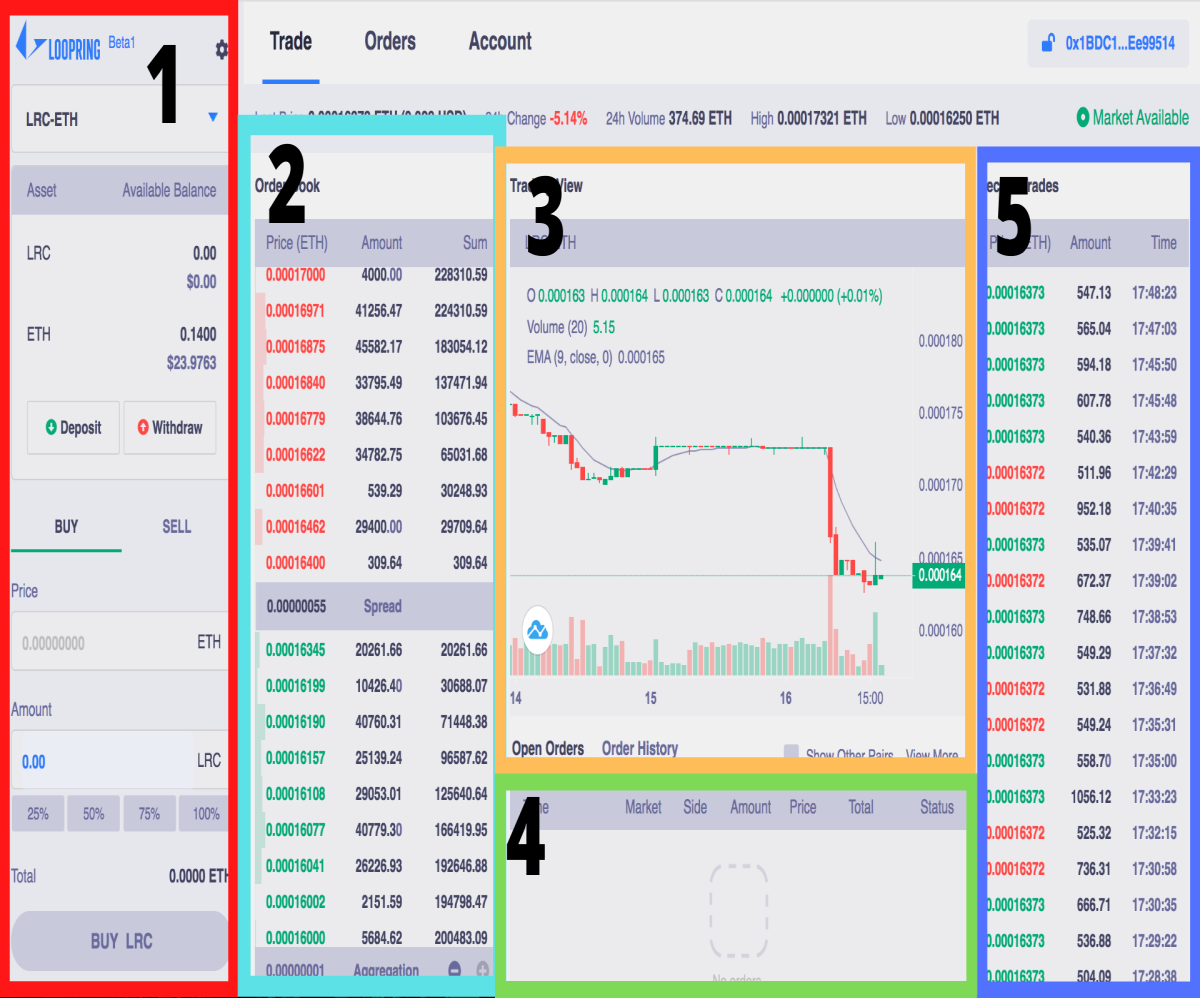
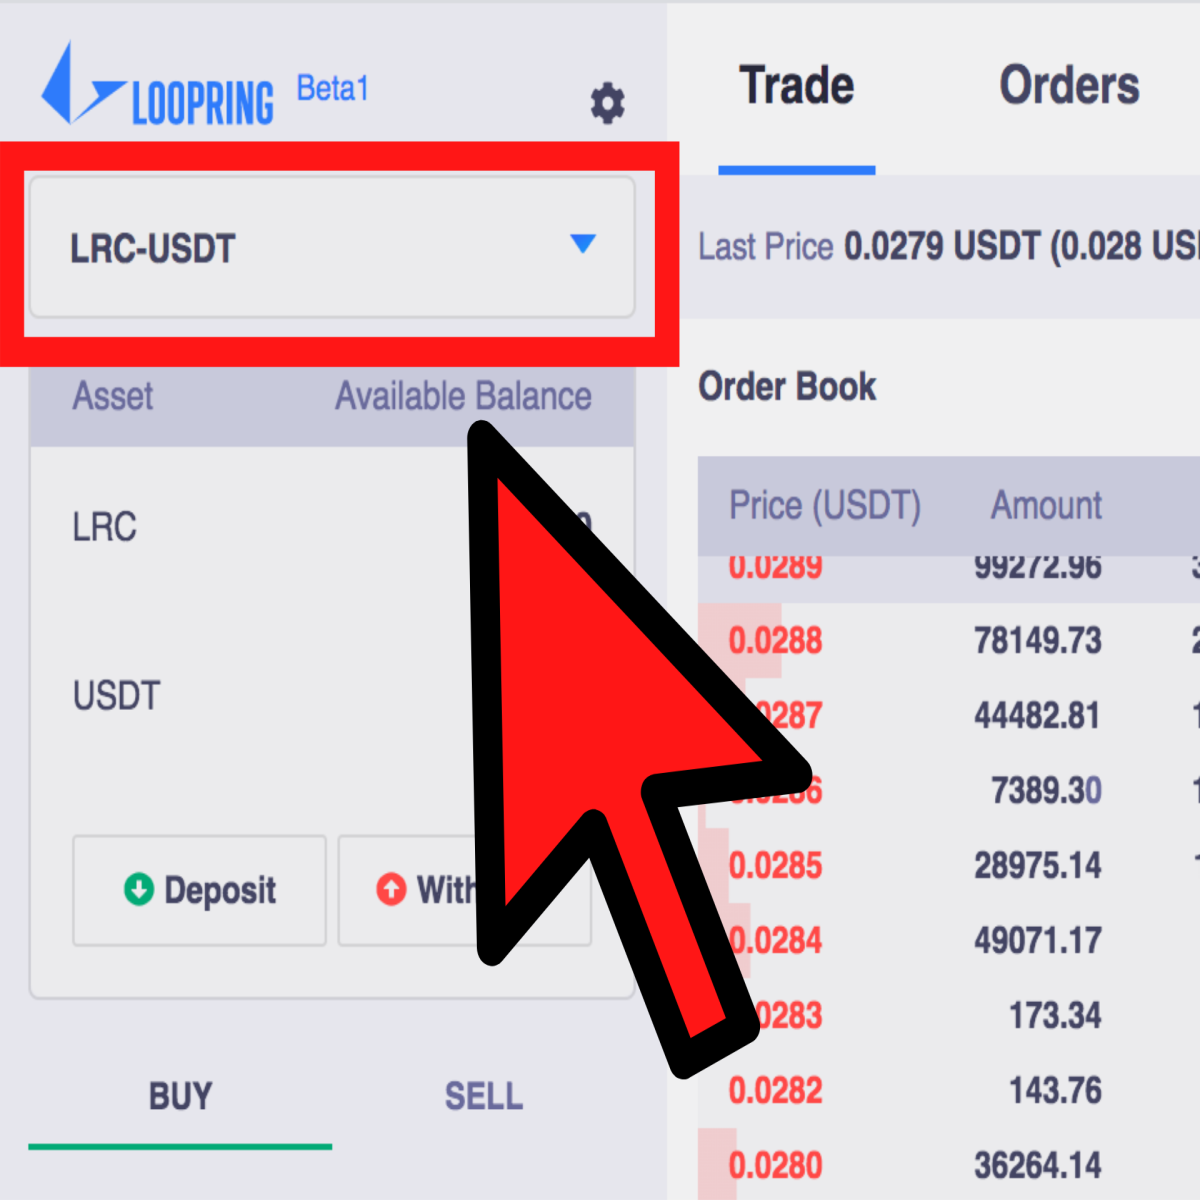
1 - This the panel were we place orders. The top half of the panel shows our current account balance in both LRC and ETC. We can see the 0.14 ETH that we deposited earlier credited to our DEX account. We have zero LRC at the moment.
Beneath this, we can see two options called “buy” and “sell”. As we want to buy LRC right now, we will keep the “Buy” option selected. However, in the future, if we wanted to sell our LRC back into ETH, we would select the “Sell” option.
Following this is the place where we enter our orders and select the amount of LRC we would like to buy at what price. We will go through filling this in in the next step.
Finally, the button to execute the order is at the bottom of the screen.
2 - This is the Order Book where we can see all of the orders that other users have placed on the exchange. The top half of the order book is the orders of LRC that people have placed to sell with the bottom half of the order book being the orders that people have placed to buy LRC.
3- This is the exchange chart where we can analyze the market. It is an integrated version of the popular trading platform, TradingView.
4 -This is our own Order book where we can see our open positions and order history. After we place an order, it will be shown here.
5- This is a list of all recent trades made by traders in this particular market with total amounts bought/sold, the price in ETH, along with a timestamp.
So, now we are ready to place our first trade.
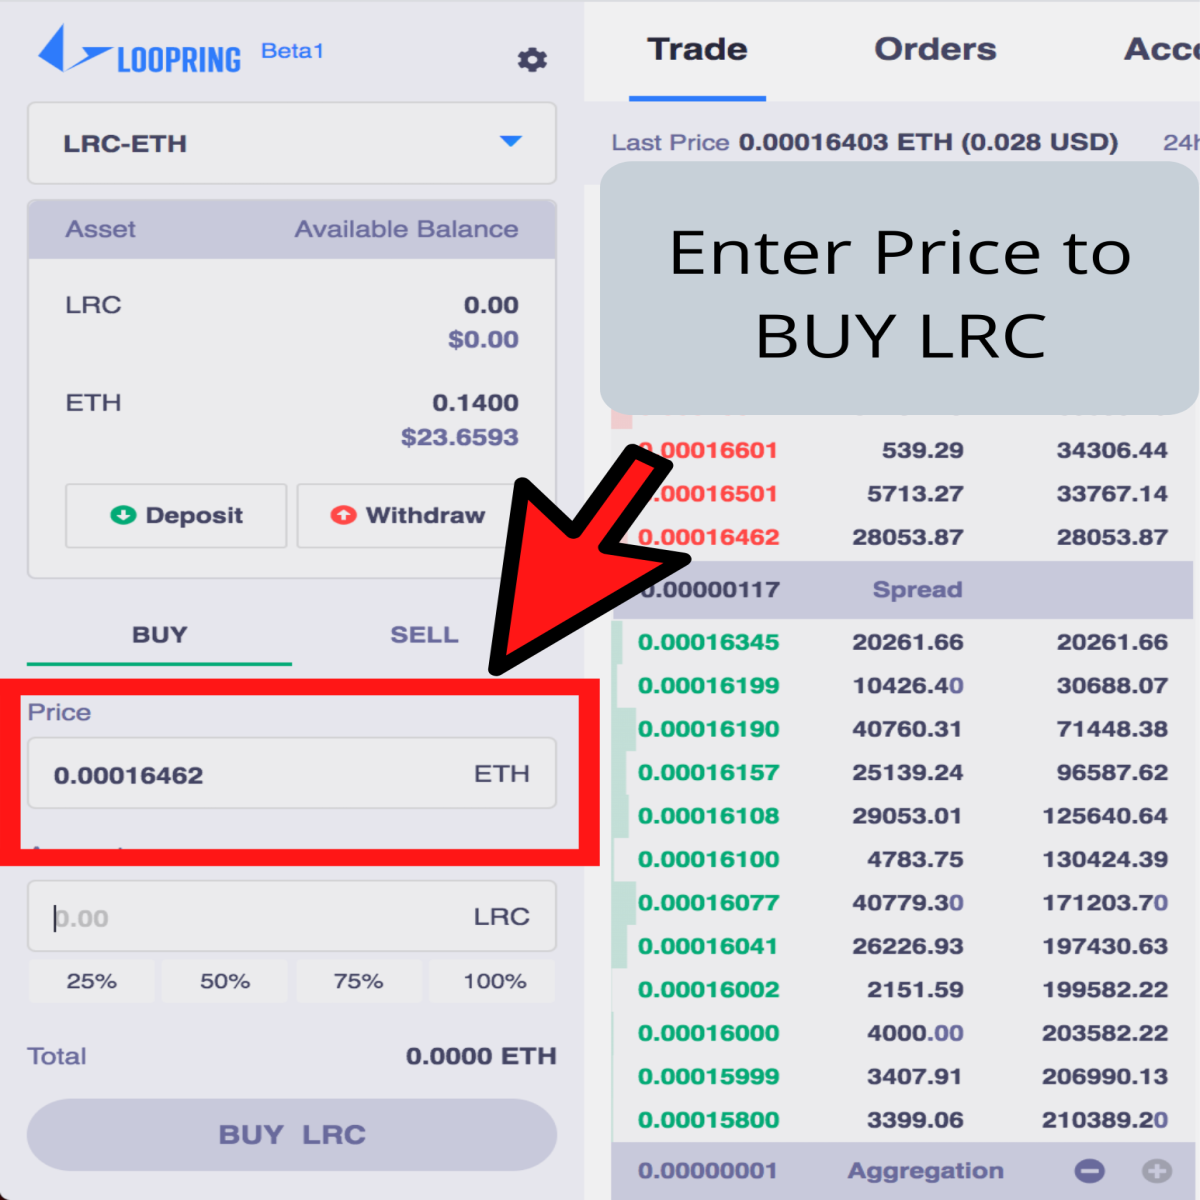
In this trade, we want to buy as much LRC as possible with the 0.14 ETH that we have in our exchange balance. The first thing we need to do is select a price that we would like to buy the LRC. Looking at the order book in section 2 of the above screen, we can see that there are some sell orders at price 0.00016462 ETH. This is the price we will buy.
So, we enter this into the “Price” section of the Order Panel (section 1 In the above screenshot), as shown below;
Next, we need to select how much LRC we would like to buy. In this example, we want to buy as much LRC as we can with our ETH account balance, so we will select the 100% option. However, you can buy as much or as little as you would like by simply just enter the number of coins you want to buy;

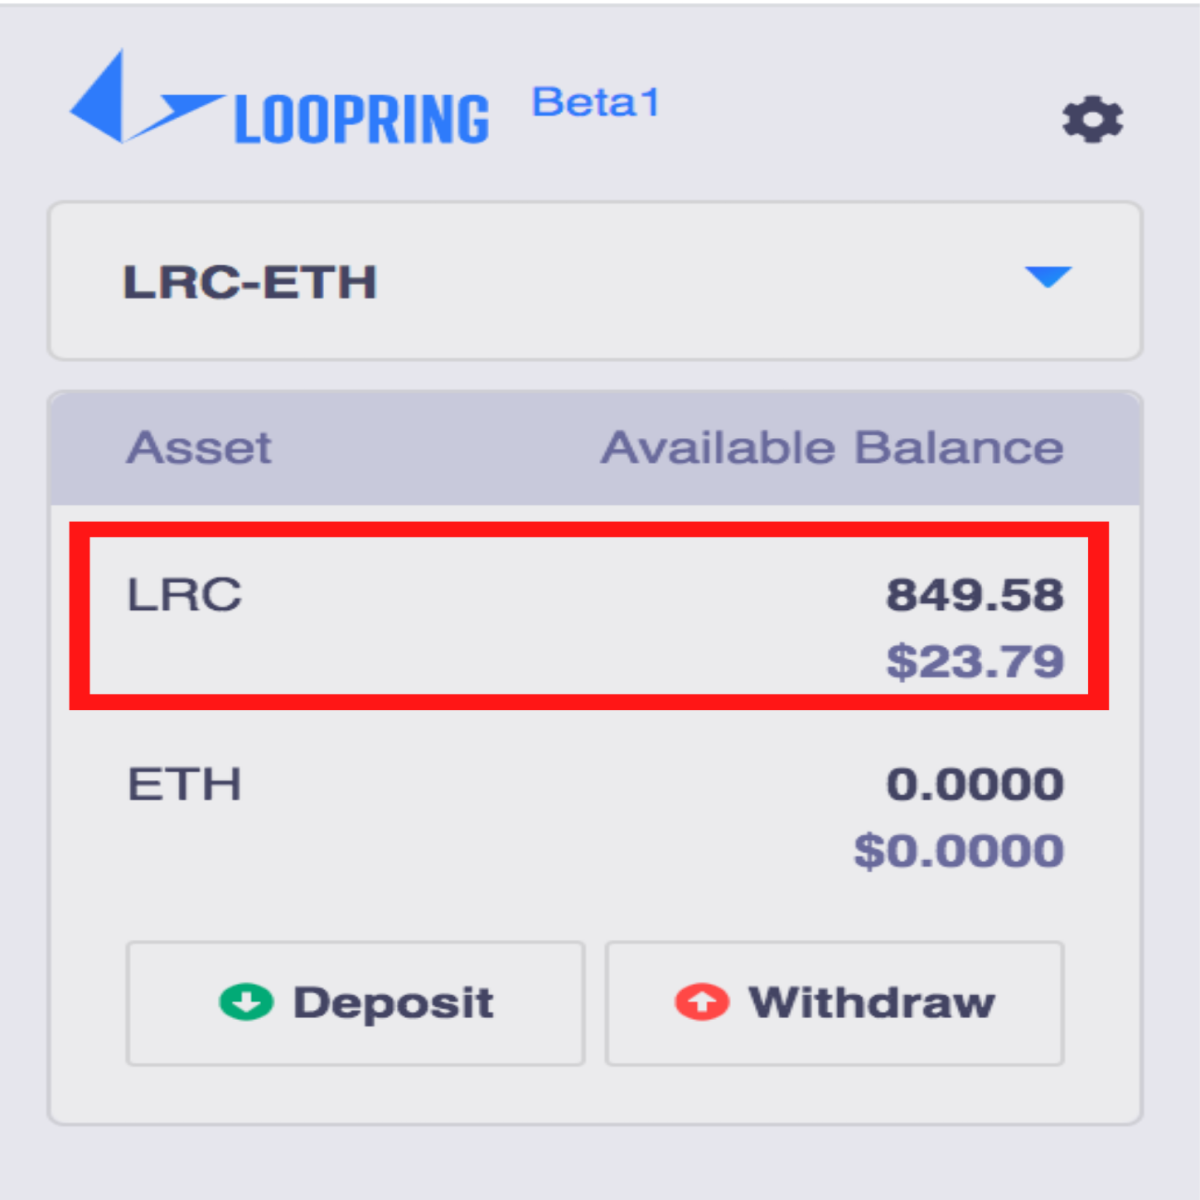
As you can see in the screenshot above, we can purchase a total of 850.44 LRC with our ETH balance and this would cost a total of 0.1399 ETH. Hit Buy LRC to execute the order and you have successfully conducted your first trade!
Once the trade is complete, you will see the LRC being credited to your account;