This blog post first appeared on the Remroll blog:https://www.remroll.com/blog/getting-started-remroll
Here is a quick fire guide to help you pay your distributed team with ERC20 tokens using Remroll.
Here’s how to pay your team with just a few clicks:
- Import a CSV of your employee emails in the Payees tab
- All your employees will now be invited to register as Payees
- Once registered you can invite them to submit an invoice by sharing a link
- Review the invoices yourself or invite another team member to review them
- Bulk approve and pay the invoices using MetaMask
Want to learn more? Here’s a more detailed introduction:
Remroll uses three simple concepts:
- Payees - Individuals or businesses that will receive the payment
- Invoices - Documents which record the recipients payment details
- Payments - The process of authorising and performing the transactions
Step 1 - Adding a Payee
The first step is to add your Payees.
As a business owner, your Payees would be your employees, contractors, freelancers or partners. If your running a bounty program, a Payee would be a bounty recipient.
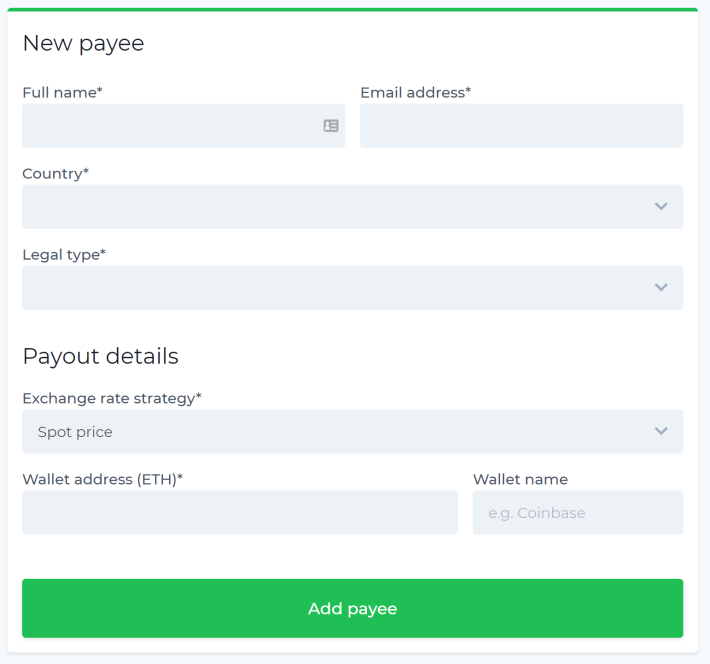
You can either enter the information yourself...
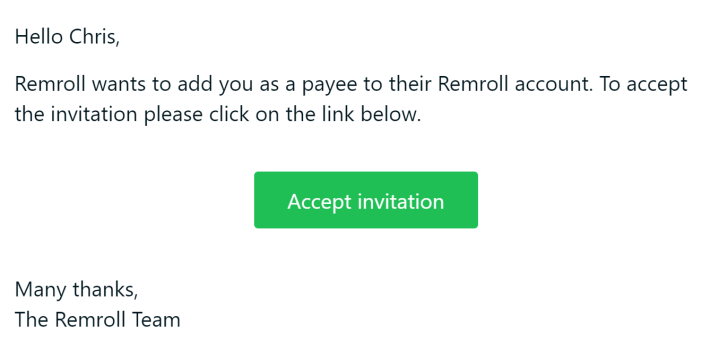
or invite your Payees to enter the information for you:
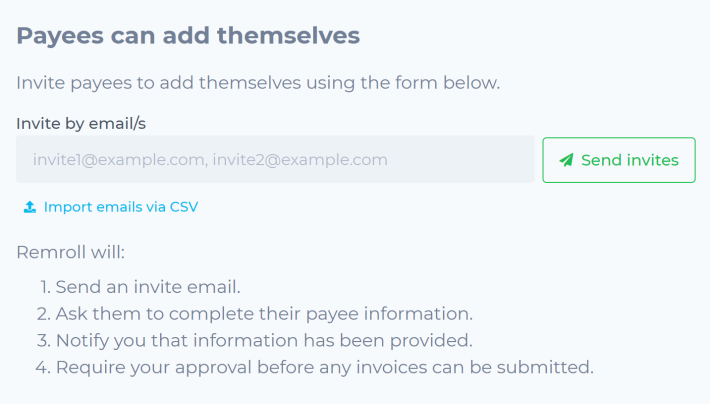
Payees can then easily add their own information once they accept the invitation.
If you want to invite a large number of employees quickly, you can simply upload a CSV file with their email addresses.
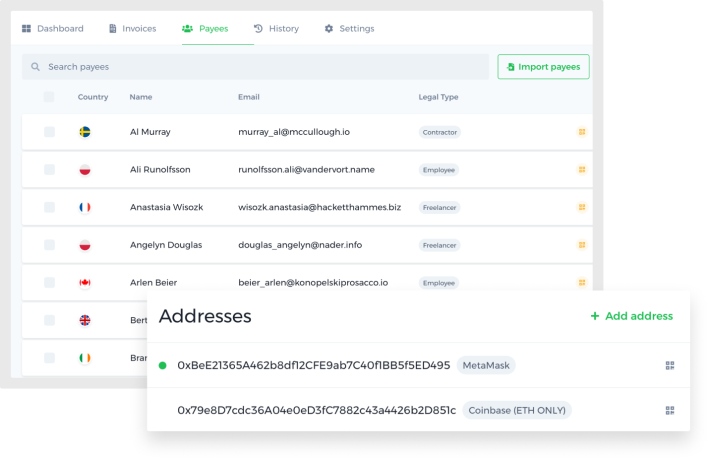
Once you’ve added your Payees, they will be displayed in the appropriate tab.
Step 2 - Creating invoices
Now that you’ve successfully added your Payees the next step is to create an invoice. Invoices are the documentation which record transactions between you and your Payees.
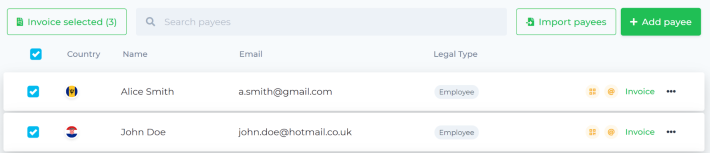
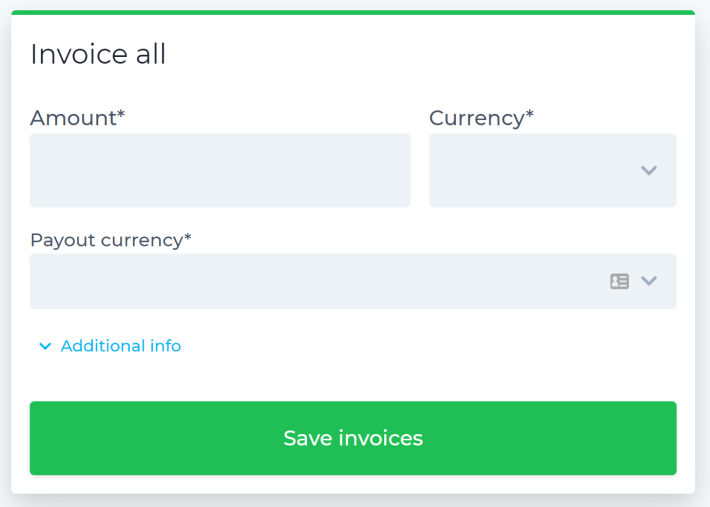
If all Payees are to receive the same amount, you can easily select them in the Payees tab and click on “Invoice selected”.
Now you can easily choose the amount, ERC20 token and payout currency.
For large teams receiving varying salaries, it makes sense to invite your employees to create their own invoices. You can easily do that by sending them the following link:
https://www.remroll.com/payee/login
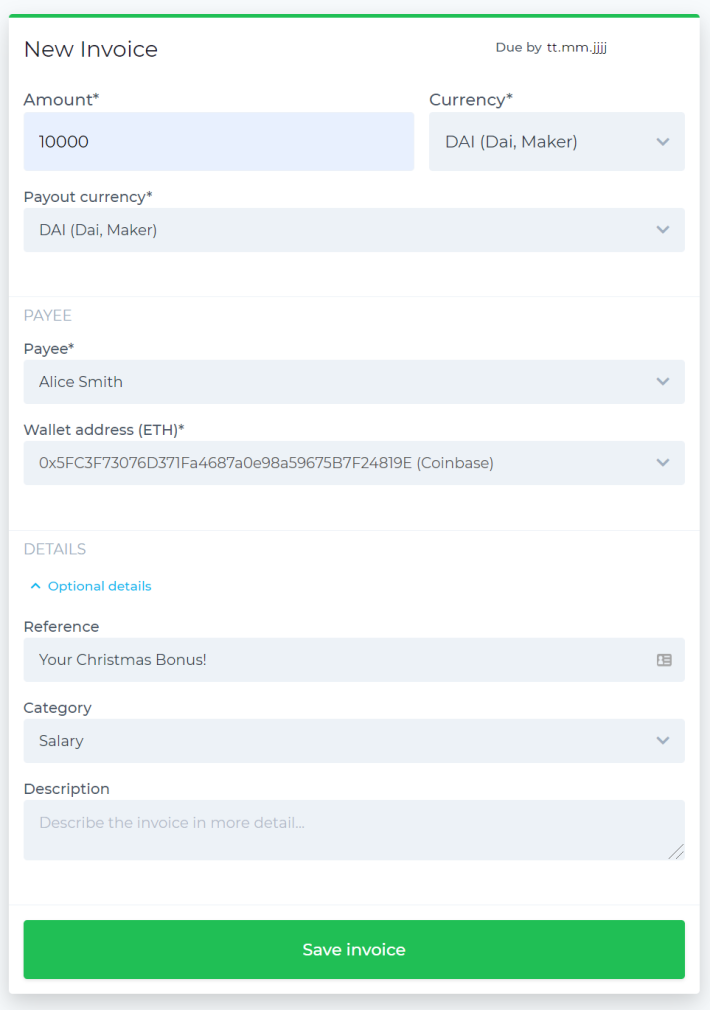
Of course you can manually create invoices as well by clicking on the green “Add invoice” button.
Now that you or your employees have created their invoices, they will appear in the appropriate tab in your Remroll dashboard.
Step 3 - Paying your employees
Excellent, your employees have been added as Payees and have created the invoices. The last step is to pay them.
The easiest way of doing this is by navigating to the “Invoices” tab. Then select the invoices and click on the “Pay selected” button.
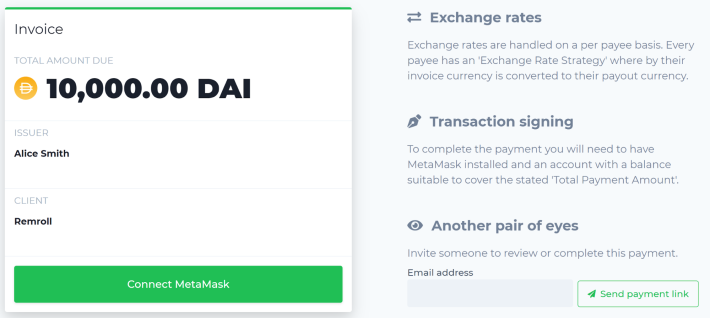
This is the perfect place to review the invoices one final time and even invite another team member to do the same.
Once you’re happy with the invoice you can connect MetaMask and confirm the payment.
Congratulations, you’ve successfully paid your employees with Remroll. 😍
Do you have feedback or want to share a product idea? Make sure to get in touch and find out more here:https://www.remroll.com/.
Thanks for reading.