
Since I have owned the Sirion, the clutch has been in a bit of a bad way. The bit point is almost at the top of the pedal travel and from cold you have to be careful moving off from standstill or you can provoke some serious clutch judder.
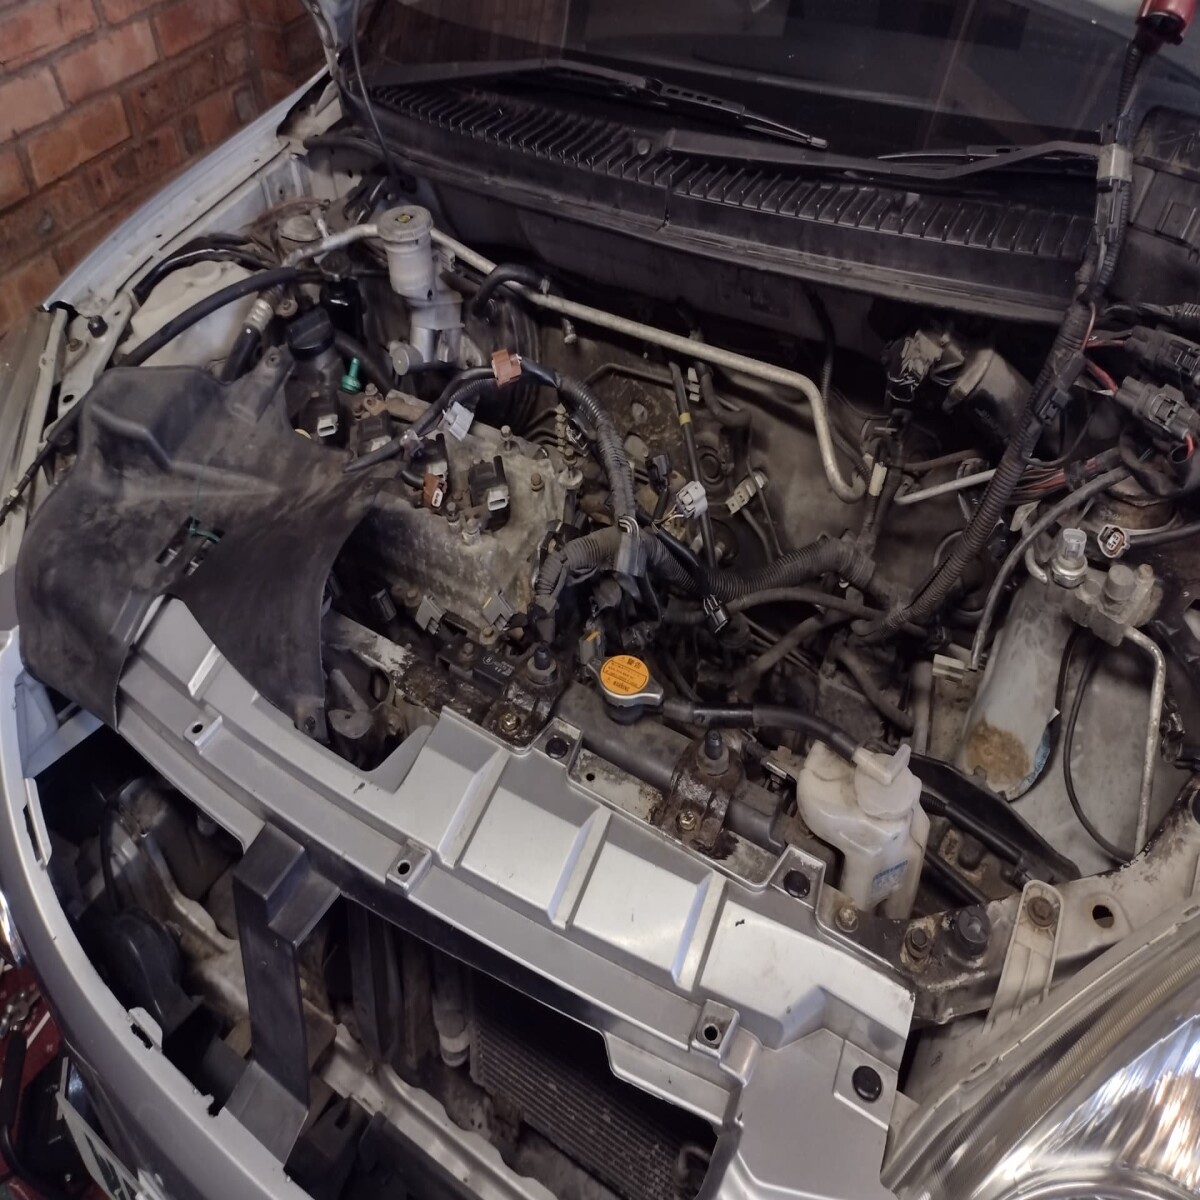
I need to replace the clutch, which on a Sirion rally 2 is an engine-out job. While the engine is out I will also replace the aux belt and its tensioner which is virtually impossible to access in situ. Last night I removed both front driveshafts, drained the gearbox oil after making certain the fill plug would undo (!), unbolted the gear linkage from the gearbox end, undid the bolts that hold the exhaust pipe to the downpipe, removed the battery and took the air intake stuff off as far as the throttle body.
Next I need to remove the throttle body and inlet manifold, then unplug as much of the wiring as possible in prep for pulling the engine out.
My plan was to hold the engine and gearbox on an engine crane, unbolt the subframe from the body, then lower the engine and gearbox on the subframe, while lifting the body up on my tilting lift. I reckoned that all I really needed was about 18" separation of the two parts to allow me enough access to pull the gearbox off the engine and get at the clutch. With the two parts separated, I could move it all over towards the passenger side to give myself much more access to the aux belt and tensioner on the left side of the engine so I can get a socket on the tensioner bolt rather than having to use an open-ended spanner and chew the bolt up even more.
One done, I would be able to rebuild it with the 2nd hand driveshaft on the passenger side which is a complete original unit, with both CV joints fitted, boots, the whole lot.
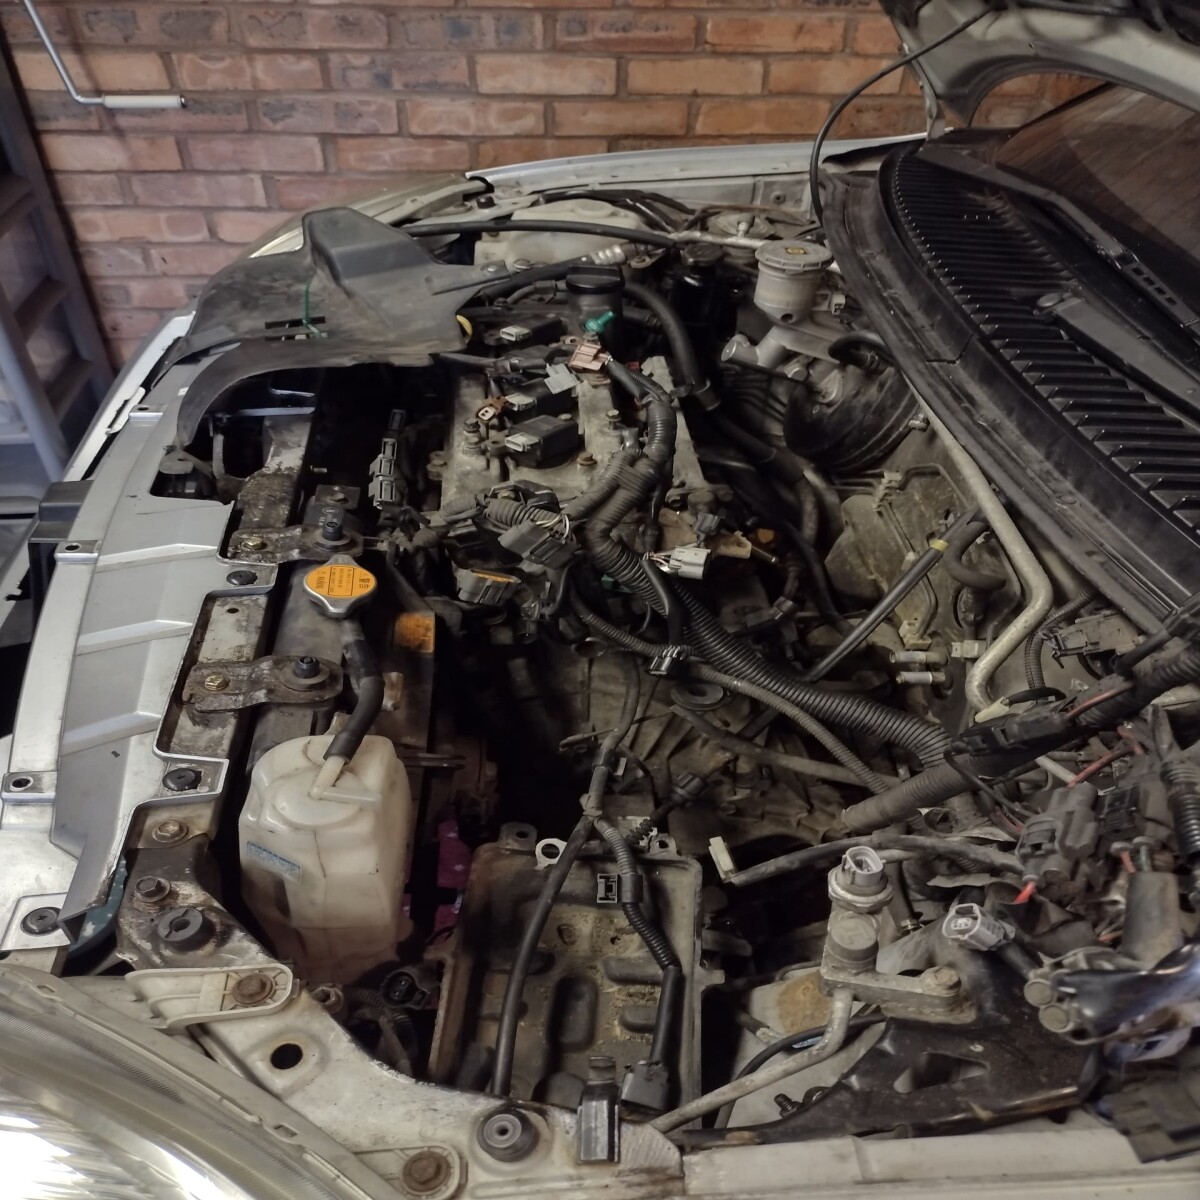
Further dismantling occurred, with the coolant system drained, and main radiator hoses removed. The clutch cable was slacked off and unclipped from the clutch arm on the gearbox, the throttle body and inlet manifold were taken off to improve access round the back of the engine, and most of the wiring was unplugged.
At this stage, I was still in 2 minds about how to do this - mostly hinging on the AC system which was is the way of everything. if I lowered the engine out the bottom on the subframe cradle, then lift the body off the cradle, it would be OK as I could lift the body just far enough to get clearance to pull the gearbox off. A lot of the cables and AC system have what I reckon to be enough ‘slack’ in them that I don’t have to pull them out entirely which will make reassembly quicker and easier.
If I had lowered the body/nose down to the ground and lifted the engine out the top, access will be better but I’ll have to basically undo the entire loom and work out how to disconnect the AC system without gassing myself. I think its possible to unbolt the AC compressor from the aux belt/engine and then leave it all behind as I lift out the engine and gearbox but access that end is utterly dire.
The main issue was what is the steering rack bolted to? The subframe cradle or the body? If I could get away with not having to unbolt the steering column from the rack that would make my life easier too…
Sadly, I was not in luck. I looked to undo the steering knuckle, as on the engine side of the bulkhead its covered by some sort of cover or sleeve so you can’t get at it - so it looked like its going to be some time spent upside down in the drivers footwell with a spanner for me! After several hours upside down and no real progress I gave up and had a look at pulling the engine out the top.
So, here we are. changing another clutch. Except this time the work is quite a bit more radical. Its managed 120k so I’m not too displeased with its innings. FWD clutches are a pain in general, the clutch in the sirion is easily a 5-spanner job. Because its a small car, with a transverse engine, the whole ruddy lot has to come out. The engine and gearbox are the entire width of the front inner wings, there is about 1" either side of the engine when its in, and with a full engine cradle subframe you can’t drop one side down to do the job.
I’d spent several evenings this week doing the prep work. I’d disassembled the front suspension, removed the driveshafts, drained the gearbox, drained the coolant, removed the intake manifold, throttle body, hoses, about 8 million connectors and the gear linkage from the engine end. I’d also disconnected the exhaust from the downpipe.
I had my brother coming down the following day to help with further work, but had some time before this to carry on the prep work, and made good progress. I ended up hiring an engine crane from a local place
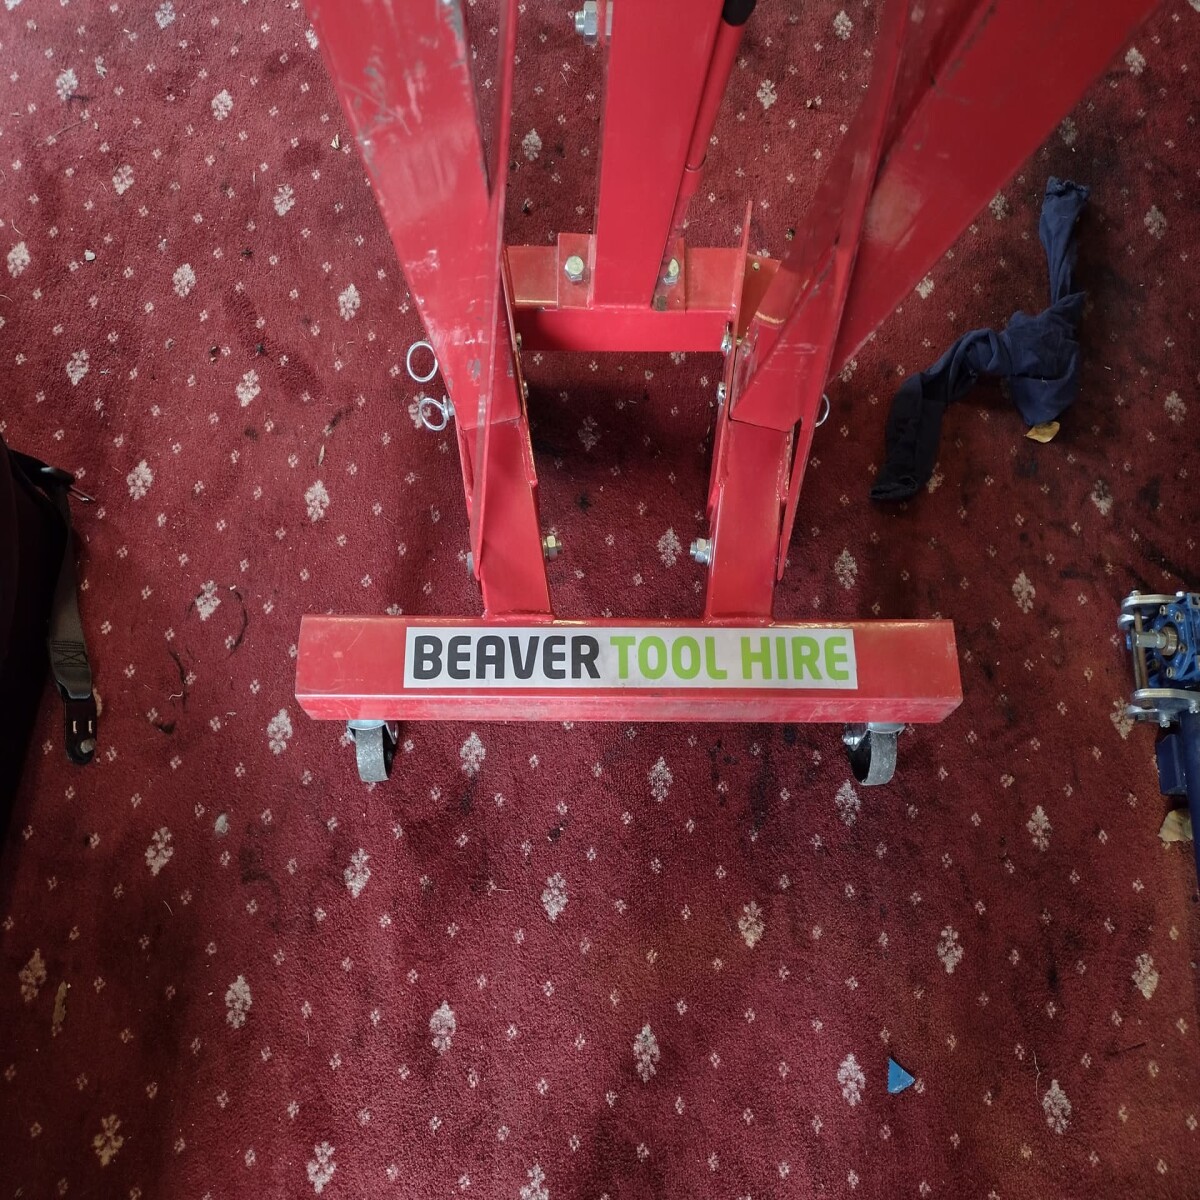
(Beaver Tool Hire, fnarr etc)
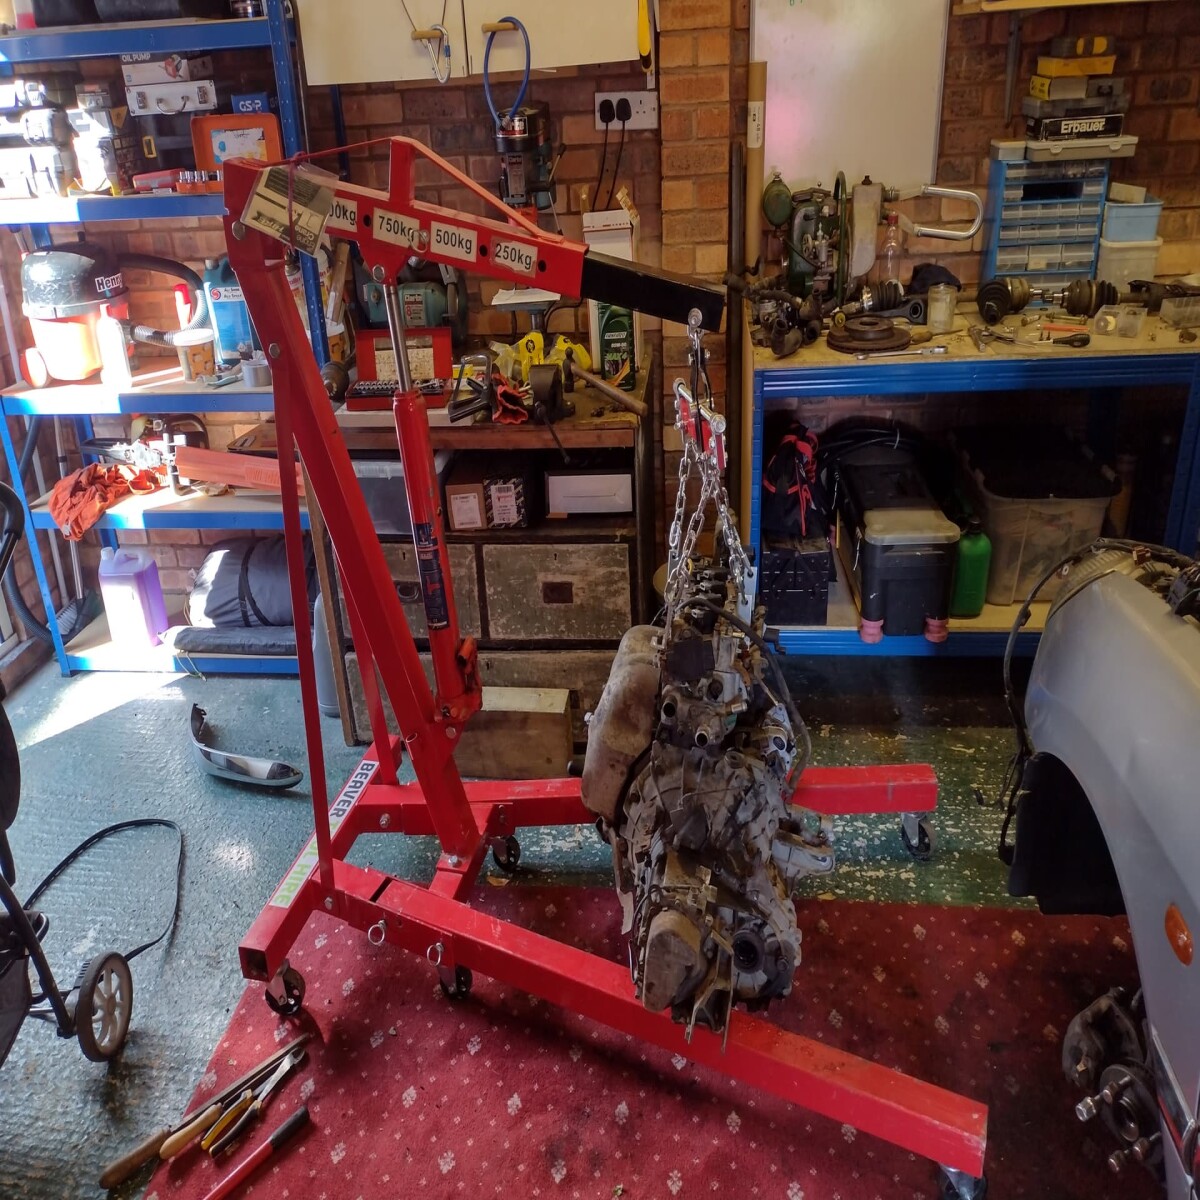
I bought myself a load leveller from ebay for £20 to make things easier. There are relatively few pics of the next bit because it was really humid, I had a very heavy engine on a crane swinging about and had limited access. I was able to undo the 3 engine mounts with relative ease, and had the engine firmly attached to the load leveller, but it became apparent that there wasn’t enough room to get it all out without further dismantling. I had to remove the front bumper, the radiator & the radiator support bar to clear the front up so I could swing the engine and gearbox out.
I was still having issues, as the PAS pipework and AC pipework was attached to the pump and compressor respectively. I couldn’t remove these until the engine was free, so had to be a bit of a redneck. With no choice, I had to undo the AC pipework from the radiator, letting loose a poison cloud of death r134a. I ran away for a bit to let the gas escape, not my proudest moment but needs must in this case. For the PAS pump, I ended up pulling the top hose off, I lost a tablespoon of PAS fluid but was able to then wedge the pipe up out the way.
This finally allowed me to lower the body down, lift the engine up and with an alarming thunk noise it was free
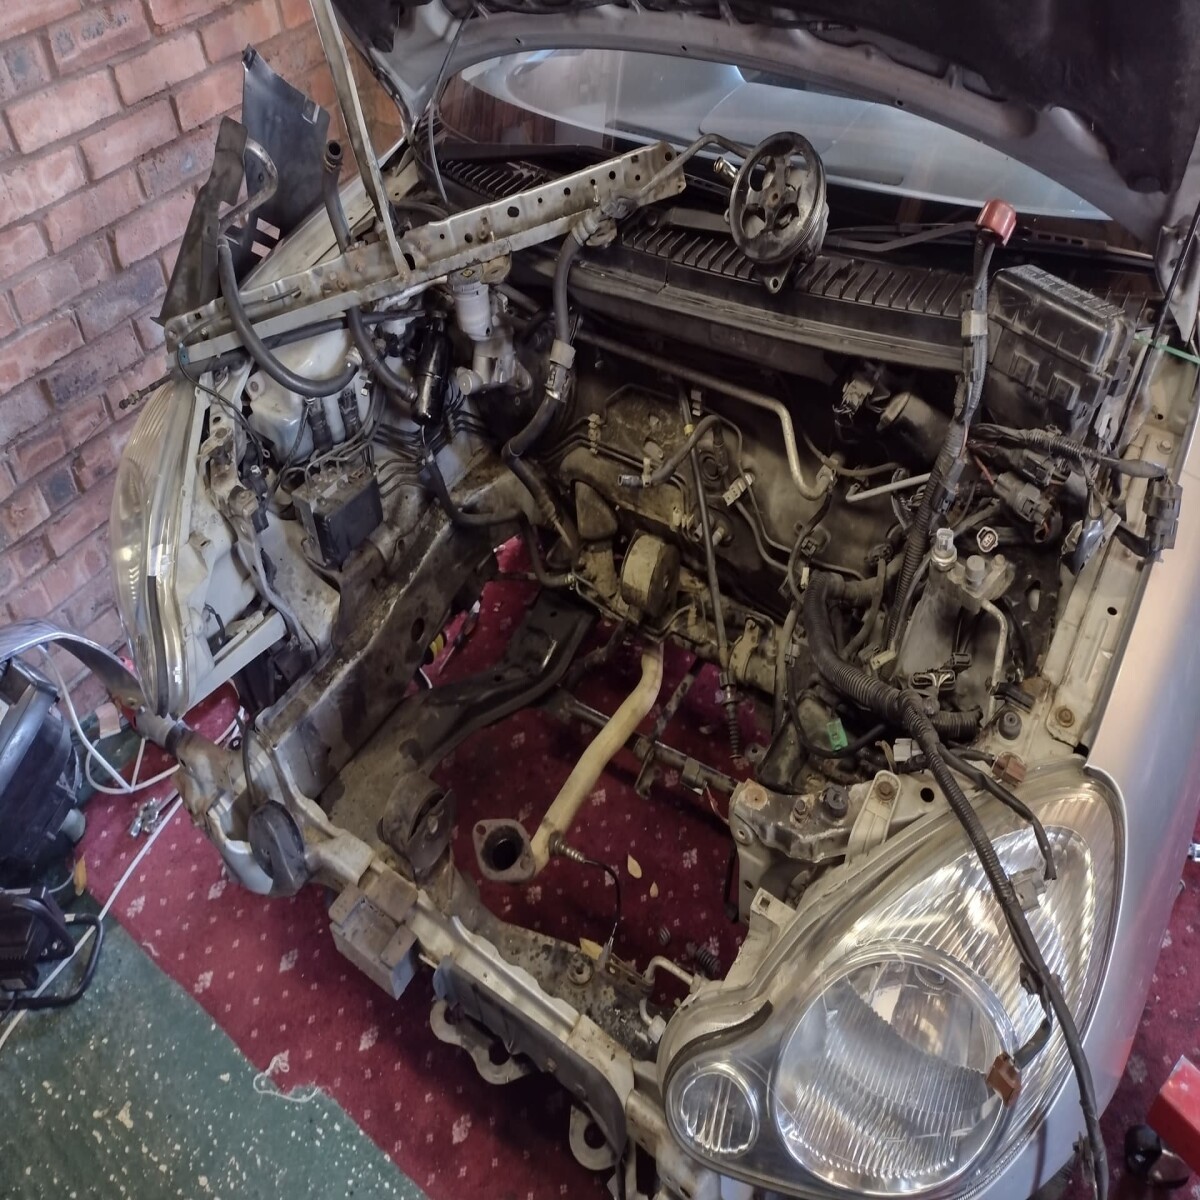
You can see the rad brace bar and the PAS pump folded back onto the scuttle and the loom tucked over the passenger side wing. The passenger side headlamp got a bit savaged by the engine as I wheeled the crane out the way, it might be OK with a polish but may need a new unit.
With the engine out, I could remove the aux belt tensioner. This was held on with a rather severely chewed bolt - the issue I had was that in situ, there is about 1" between the tensioner nut and the ABS block, so the only thing you can get on it is an open-ended spanner. Someone had been at this before I got there so I was unable to change the tensioner pulley or aux belt when I changed the alternator. With the engine out, I could get a snug fitting 14mm hex socket on the nut and undo it easily.
Spot the new part!
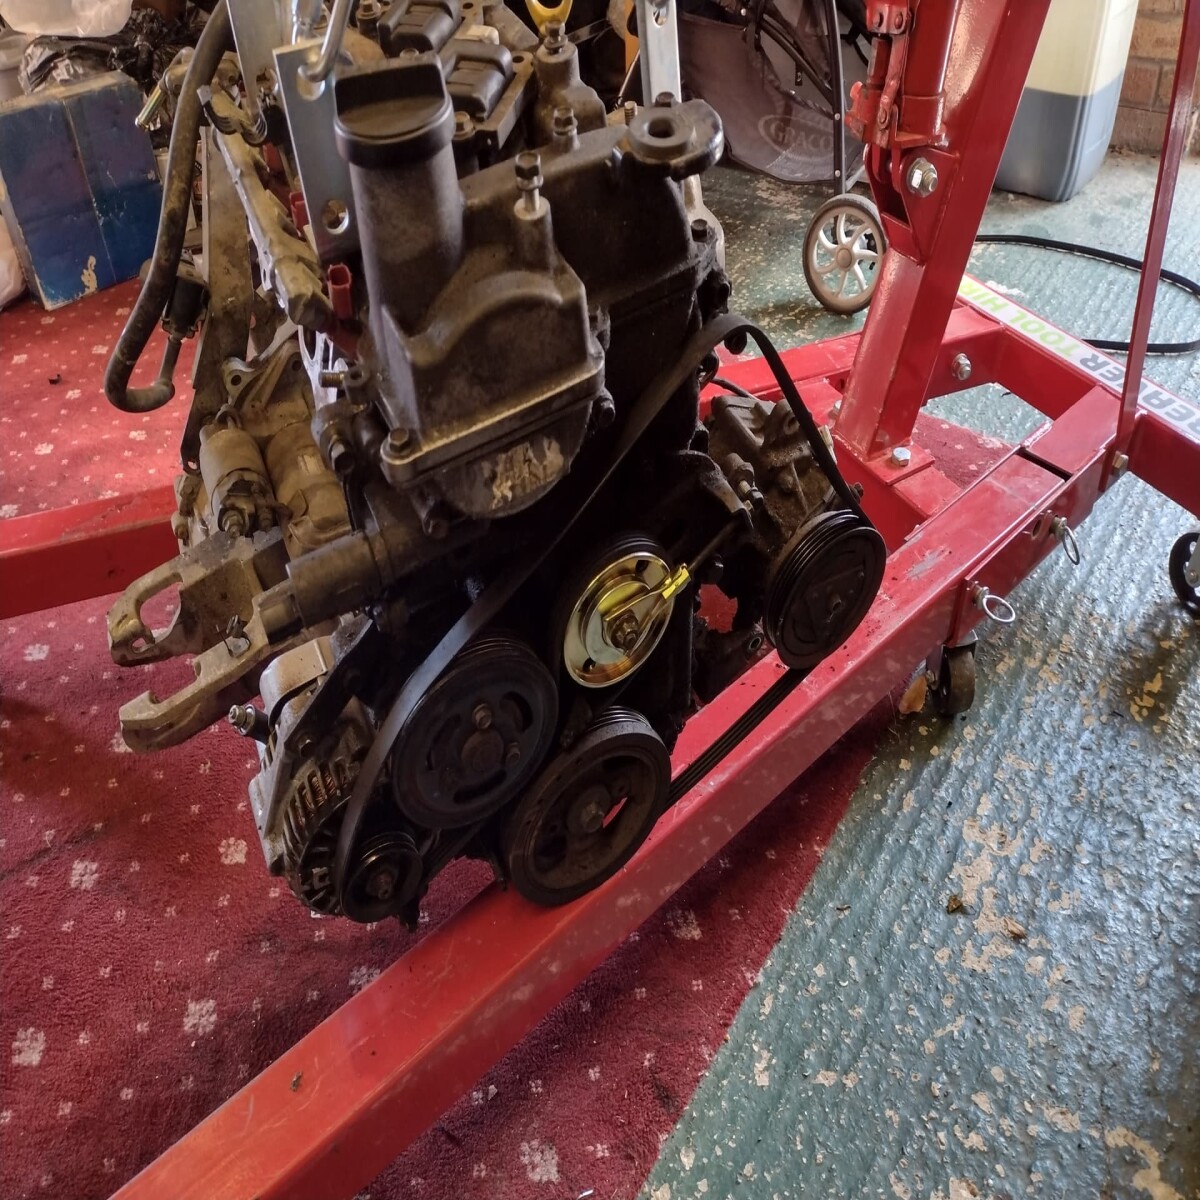
Its hard to see in this pic, but the tensioner (gold bit) is tensioned by a long threaded bar that goes into a bracket. This has the effect of trapping the aux belt until you remove the threaded bar, but is impossible to see in situ. Doing it with the engine out was a doddle though. I couldn't do it up tight yet because I needed to refit the engine, then reattach the PAS pump (top right), THEN tension the aux belt up. I also need to make sure I’ve run the belt correctly, I thought I had, but not 100% sure.
While I was in there, and the main reason that I left the downpipe attached, I could get a good look at the mounting flange. This joint leaks, and after having a closer look, the issue is that the captive nut on the downpipe side of the flange has rusted away and been replaced with a cut down spring and nut&bolted. The issue is that there are three ‘legs’ of captive nut left which means the nut on the downpipe side can’t tightened up properly so it doesn’t seal right.
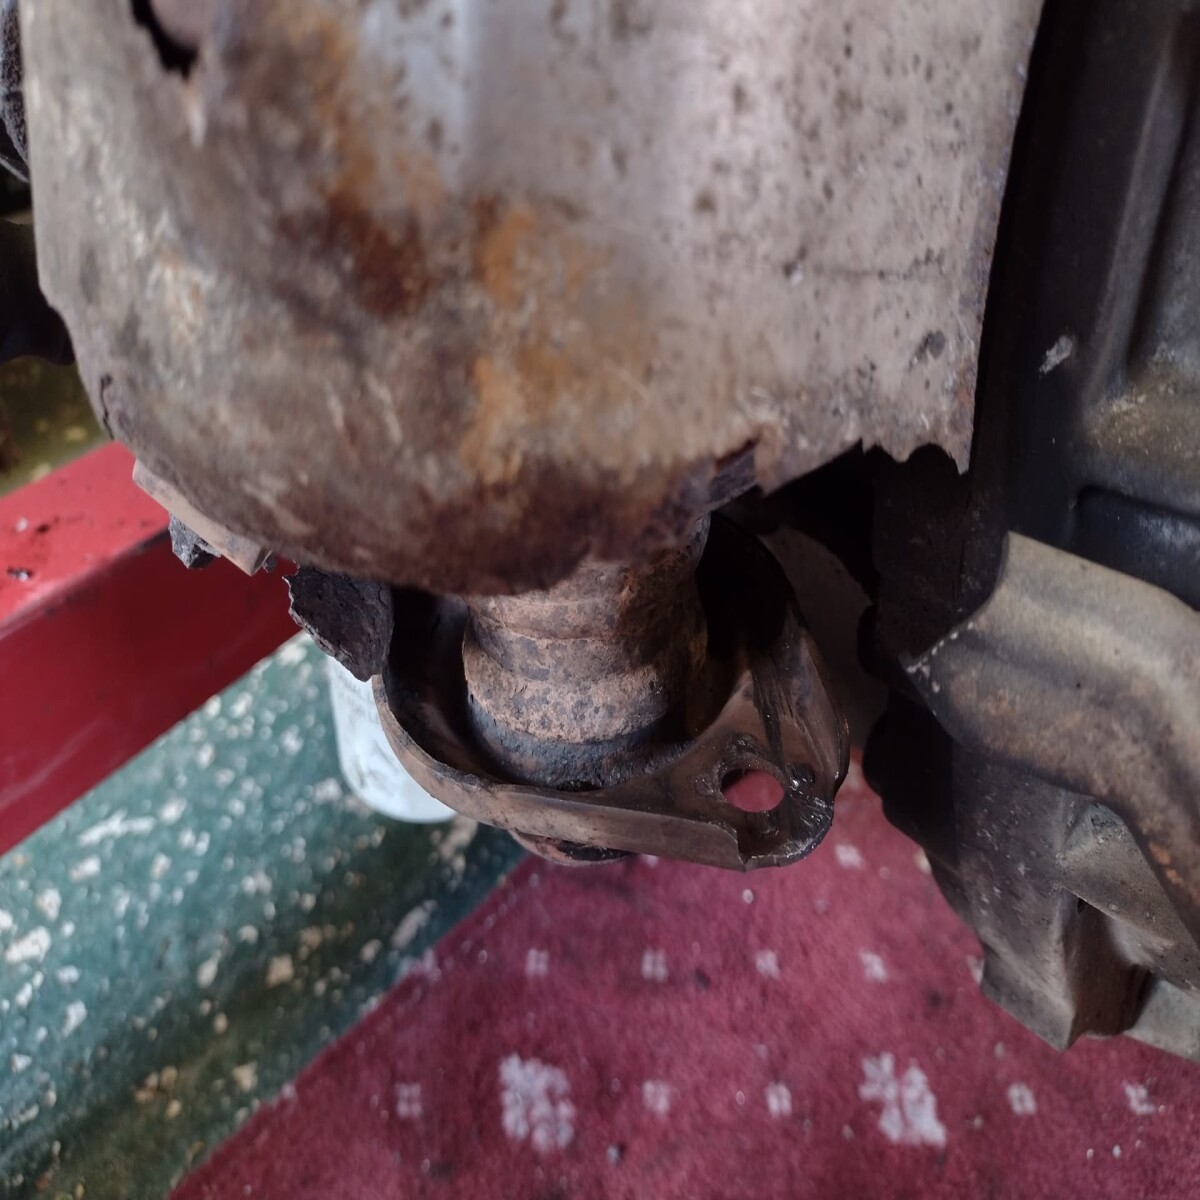
With this off the car I could get a rough file in and file the leftover ‘legs’ down flat so that when this all goes back together the nut will sit flush with the flange and should make it seal properly. I ought to have bought myself a crush gasket really, but I intend to have the exhaust replaced with a bigger bore stainless one next year so it’ll do for now.
I lowered the engine and gearbox down onto the legs of the engine crane so the ram isn’t taking the full weight, it was basically just keeping the arrangement upright with the weight taken by the crane legs for now.
Next, came reassembly, and I had run into some snags. Well, one big snag.
The clutch is in, engine refitted and as far as I was aware, all cables and plugs reconnected, the car turns over on the key, but won’t fire - there was no smell of unburnt fuel at the exhaust pipe, even after several minutes of cranking.
With the ignition off after cranking the ABS light and oil light are lit continually.
I have tried to get my diagnostic laptop to talk to the ECU but failed - it won’t/can’t establish communication with the ECU it seems?
I was very worried that somehow I had managed to fry the ECU and it was game over time. While I pondered what I might have done wrong, I looked at other things to keep me occupied. I was able to fit the driveshafts and rebuild the front suspension so the car could roll. The clutch worked as it should - tested by turning the engine on the starter in gear with clutch pedal up (wheels turn) and down (wheels don’t turn).
We removed the intake, throttle body and inlet manifold to get access to all the plugs, removed them all and then re-attached them to their correct positions. We then built the inlet side back up and tried to start it again.
Same result.
The engine turned over freely, but does not fire. Having removed the fuel hose from the injector rail there was no fuel there at all (I’d previously drained this down) and there is no noise from the fuel pump priming, so there was definitely an issue there.
The engine management light/check engine light did no illuminate AT ALL, I would expect this to light with the ignition in position 2. The diagnostic laptop cannot establish connection with the ECU via the OBD2 port on any protocol. The light definitely works as I know it came on when I was doing the troubleshooting of the idle issue a few months ago, so there is a problem with the ECU talking to other systems.
I found the ECU and all the plugs are connected as they are supposed to be, none of this wiring on the cabin side of the bulkhead was touched in any way.
The ABS and oil lights stay illuminated all the time - as in even with the keys out of the ignition. I decided to disconnect the battery to stop it being drained. from keeping the lights on continually.
I had a good look at the fusebox (why is it so difficult to access!) and noticed that fuse 14 (Engine) had blown so replaced it, all other fuses looked OK though. After the second try of starting it, fuse 14 had blown again so there is a problem somewhere.
I have a horrible feeling that what has happened is that by flexing the loom to get it clear of the engine, I’ve snapped a wire somewhere which is now shorting out. That would explain the blowing fuses, but there is potentially other things at play here. There is no communication between the OBD2 port and the ECU, and the fuel pump doesn’t work. I had a look and there is a fuel pump relay, I suppose its possible that the pump has seized, but it could also be that if I can’t communicate with the ECU, then the ECU probably can’t communicate with the fuel pump either.
Finally, we triple checked all grounds, cleaned them up to bright metal with sandpaper and reattached them so I’m quite confident its not an earth issue.
The entire loom is bound up in protective sheath, we checked the ends where it comes out the wrapping but it all looked fine, so I have a horrible feeling that its broken somewhere mid-loom.
So, the car was still immobilised, but in a different way to 2 days previous! It was able to roll and steer and could be driven short distances in gear on the starter if needed. The electrical issues however were going to be painful to resolve I fear. Electricity confuses and frightens me in roughly equal measures.
With this in mind, I called up a local mobile auto electrician who was able to come and have a look at it, but not for about 2 weeks.
He suggested that we might have trapped a wire on reassembly but I was pretty sure we haven’t as the engine and box were completely separated from the rest of the car by a good 8’ while we did the clutch change. He also suggested that I might have connected the wrong connectors up which is possible but I think unlikely.
Fast forward a couple of weeks, and the auto electrician came to see the poor stricken car. Within an hour we’d gone through and found the issue - a bad ground from the igniter/coils to the rocker cover.
I say ‘we’ because I actually managed to help! With the ignition on and the electrician in the footwell I heard a clicking noise which I initially though was a relay, on closer inspection though it was coming from the igniter and on even closer inspection is seemed to be the earth strap. I removed it and cleaned it up with sandpaper before attaching it to the rocker cover directly instead of via a crusty-looking bracket, the electrician then said ‘the ABS and oil light have gone out’ so he tried the ignition and it burst into life.
What a relief!
I built the intake back up, secured the battery, fitted the radiator and fan, the coolant pipes and refilled the rad with coolant. Next up I need to refit the front bumper, wire in the fog lights, fit the front wheels and then take it down off the lift and for a run to see if it works ok.
Moral of the story is ‘always check your grounds’!
Its a big relief and the car is now fully working again, the new clutch has much better bite, lower down in the pedal travel. It could do with some adjustment but that can be done later - I gave it a fresh sump of oil and new oil filter, as well as the new gearbox oil, coolant and fuses its doing quite well currently! I need to take it for a shakedown run soon but I'm generally happy with how it has gone. There were a few dark moments there.


