
A step-by-step guide on how to import external code into your smart contracts
Where to Start
Getting started in the world of smart contract development can be overwhelming. There is often a lot of assumed knowledge that’s not particularly well explained anywhere. For example, importing external contracts and libraries into your smart contracts.
You might know exactly what a contract does, and that your contract would be better off using it, but the semantics of actually importing it is a roadblock.
In my early days, I remember copying and pasting library code into my .sol files as a workaround.
This article explains how to import any external contract or library into your smart contracts.
Moving On From Remix
The first steps you take in smart contract development most likely use the Remix online IDE. It’s a fantastic tool for quick and easy access to the Solidity compiler so you can learn the language as quickly as possible.
Once you’re confident using Solidity, you’ll naturally progress into wanting to develop in a local environment, in a desktop IDE. Having code in a project directory, running locally, allows for rapid development and enables the use of version control and open sourcing.
This is where Truffle Suite comes in.
“World class development environment for blockchain DApps (decentralized applications) and smart contracts.” — Trufflesuite.com
It keeps all your code in one place without much configuration, and the learning curve to get something basic working is very shallow.
The next time you come to create a new project containing smart contracts, start with Truffle. Let’s do it…
Getting Started
Node
Truffle runs on Node.js, so if you haven’t already got it installed, head over to their website and follow the installation instructions.
Truffle
Use Node Package Manager (npm) to install Truffle by running:
npm install -g truffle
Text editor
Ensure you have an up to date text editor installed. I’m using VS Code.
Once everything is installed, navigate to your preferred workspace and create a new directory in which our Truffle project will reside, then initialize a Truffle project:
mkdir my-project
cd my-project/
truffle init
Open up the new project directory in your text editor. Your folder structure should look like figure 1. There should be three subdirectories: contract/, migrations/, and test/; and a file: truffle-config.js.
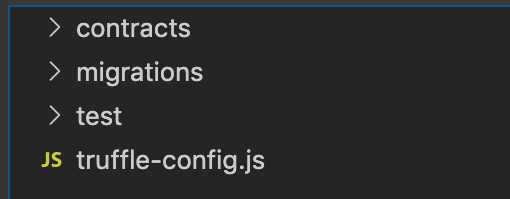 Figure 1: folder structure
contract/is where our Solidity smart contract code is stored. Truffle knows to look here for.solfiles to compile and migrate to the blockchain.migrations/is where our migration logic resides. Here we can describe the steps needed when deploying our contracts so that they are correctly deployed.test/is where we will write for our smart contracts to ensure they function as expected.truffle-config.jscontains information about networks, compilers, file locations, and other custom configurations for the Truffle framework to know where our things are. Don’t worry about this file for now.
Installing and Importing
OpenZeppelin is the gold-standard reusable repository for Ethereum smart contracts. In this project, we’re going to install the contract repo as a dependency, then import the Ownable contract so we can restrict access to certain functions.
You may have seen or used a similar pattern before. When the contract is initialized, the msg.sender address is stored in a state variable indicating the owner of the contract. Using a custom modifier _onlyOwner, certain functions restrict access by requiring that the msg.sender is equal to the owner.
In the repository root, run:
npm install @openzeppelin/contracts --save
Once completed, you should see a new folder in your root named node_modules/ (if you’ve used Node or npm before you know all about this).
Inside node_modules, npm has downloaded the OpenZeppelin/contracts repo, in which live all the contracts and libraries that OpenZeppelin has to offer. Take a moment to have a browse at what is on offer.
We’re going to use the Ownable contract, which, from the project root, lies in @openzeppelin-solidity/contracts/access/Ownable.sol.
In the contracts/ folder, create a new Solidity file that will import the Ownable contract. I’m going to call mine TestContract.sol.
The first thing is to declare the Solidity compiler version, we’re using 0.6.0; then we need to import the Ownable contract using the path we found it; and finally, we need to declare the contract and that it extends from Ownable.
Figure 2 shows the skeleton contract once we’ve done all this.
pragma solidity ^0.6.0;

import "openzeppelin-solidity/contracts/access/Ownable.sol";

contract TestContract is Ownable {
}
Figure 2: TestContract.sol
Believe it or not, that’s pretty much it!
When writing new functions in this contract, we can add the onlyOwner modifier just after the public, private, internal, or external modifiers to declare that the function should only be run by the owner.
Here’s a simple example:
// This function has no restrictions on who can call it
function noRestrictions() public { ... }// This function is restricted only to the owner. Anyone else
// who tries to call it will result in a reverted transaction
function restrictedFunction() public onlyOwner { ... }
To make sure the contract compiles when you’ve added your new restricted functions, run:
truffle compile
If all is well, you can start working on migrating your contracts to a local blockchain, writing tests, and deploying to a public testnet!
Learn More
If you’re interested in Blockchain Development, I write tutorials, walkthroughs, hints, and tips on how to get started and build a portfolio. Check out this evolving list of Blockchain Development Resources.
If you enjoyed this post and want to learn more about Blockchain Development or the Blockchain Space in general, I highly recommend signing up to the Blockgeeks platform. They have courses on a wide range of topics in the industry, from Coding to Marketing to Trading. It has proven to be an invaluable tool for my development in the Blockchain space.






