
Prerequisite: Experience developing with ReactJS and a basic understanding of Ethereum smart contracts.
The full working project code is available on Github.
Introduction
This article explains step-by-step instructions for how to use the Truffle Suite to create a React application that reads data from the blockchain. We are going to use the same smart contract described in this article. Instead of walking through the details of the smart contract, we’re going to focus on how to make a React web application that reads from the blockchain and displays the data.
There will be codebase checkpoints throughout this tutorial to let you see what your code should look like at each stage.
Create the Project
If you’ve followed this article, then you’ll have already installed the correct dependencies. If you haven’t, I highly recommend working through it to gain an understanding of smart contract development and the deployment lifecycle.
Firstly, create a new project directory and navigate to it from your terminal. I’m calling my project truffle-dapp:
mkdir truffle-dapp
cd truffle-dapp/
Truffle Box
We’re using Truffle Suite to create our DApp, a popular framework for developing full-stack decentralized applications on the Ethereum network.
Truffle provides some great boilerplate projects called Boxes that come pre-configured to let you focus on functionality rather than fiddling with configuration. We’re going to use the React Box, which comes with a React front end ready built. Inside your project directory, run the following:
truffle unbox react
This may take a little time, but once completed, you should see a folder structure like Figure 1 in your text editor.
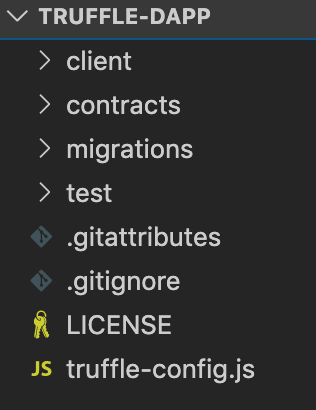
Figure 1: Folder structure.
client/contains our front-end React code. We’ll need to delve into here to make changes to our webpage once our contracts have been deployed.contract/is where our Solidity smart contract code is stored. You’ll notice that there are already two smart contracts in here: one calledMigrations.soland another calledSimpleStorage.sol.Migrations.solis used during the migration process, whereasSimpleStorage.solis an example contract that comes with the React Truffle Box. We’ll be adding another in this walkthrough.migrations/is where our migration logic resides.test/is where we test our smart contracts to ensure they function as expected.truffle-config.jscontains information about networks, compilers, file locations, and other custom configurations for the Truffle framework to know where our things are.
Migrating
Open up Ganache, our local blockchain, and make a note of the Network ID and RPC Server information. Copy this information into your truffle.config.js file in the project root directory so that it looks like Figure 2.
const path = require("path");

module.exports = {
  contracts_build_directory: path.join(__dirname, "client/src/contracts"),
  networks: {
    development: {
      host: "127.0.0.1",
      port: 7545,
      network_id: "5777",
    }
  }
};
Figure 2: truffle-config.js
Make sure your network name is development and not develop.
Next, run the following code in your terminal to migrate the boilerplate smart contracts to our Ganache blockchain:
truffle migrate
Once completed, run existing boilerplate tests to ensure the deployed contracts work as expected:
truffle test
The output should look something like Figure 3:
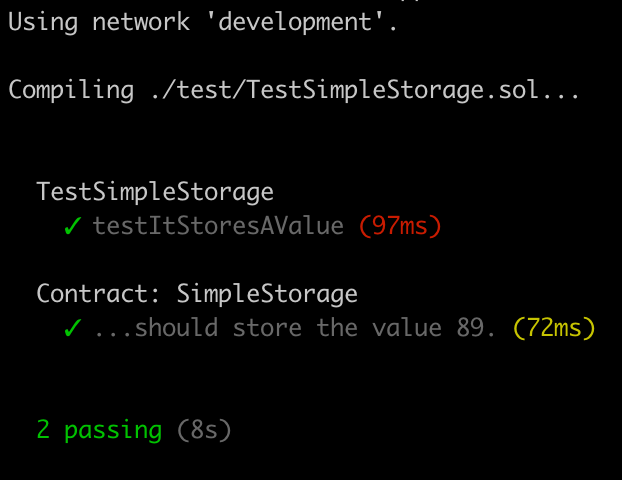
Figure 3: Initial test output.
Smart contract
Now we’re going to create our new smart contract. We’re using the same contract we used in this article. Firstly, create a new file within the contracts/ folder in your project called HelloWorld.sol. Copy the contents of Figure 4 into the file and save it.
pragma solidity >=0.5.0;

contract HelloWorld {
    string private greeting;

    constructor() public {
        greeting = "Hello World";
    }

    function getGreeting() public view returns(string memory){
        return greeting;
    }
}
Figure 4: HelloWorld.sol
Next, we need to ensure that our project deploys the correct contract. Inside the migrations/ folder, open up 2_deploy_contracts.js and copy the code from Figure 5 into it.
const HelloWorld = artifacts.require("HelloWorld");
const SimpleStorage = artifacts.require("SimpleStorage");

module.exports = function(deployer) {
  deployer.deploy(HelloWorld);
  deployer.deploy(SimpleStorage);
};
Figure 5: 2_deploy_contracts.js
Here, we’re instructing Truffle to deploy both our HelloWorld contract and the SimpleStorage contract.
Finally, run the following command to migrate the new contract to the network:
truffle migrate --reset
In the output, you should see our HelloWorld contract being deployed, as shown in Figure 6:
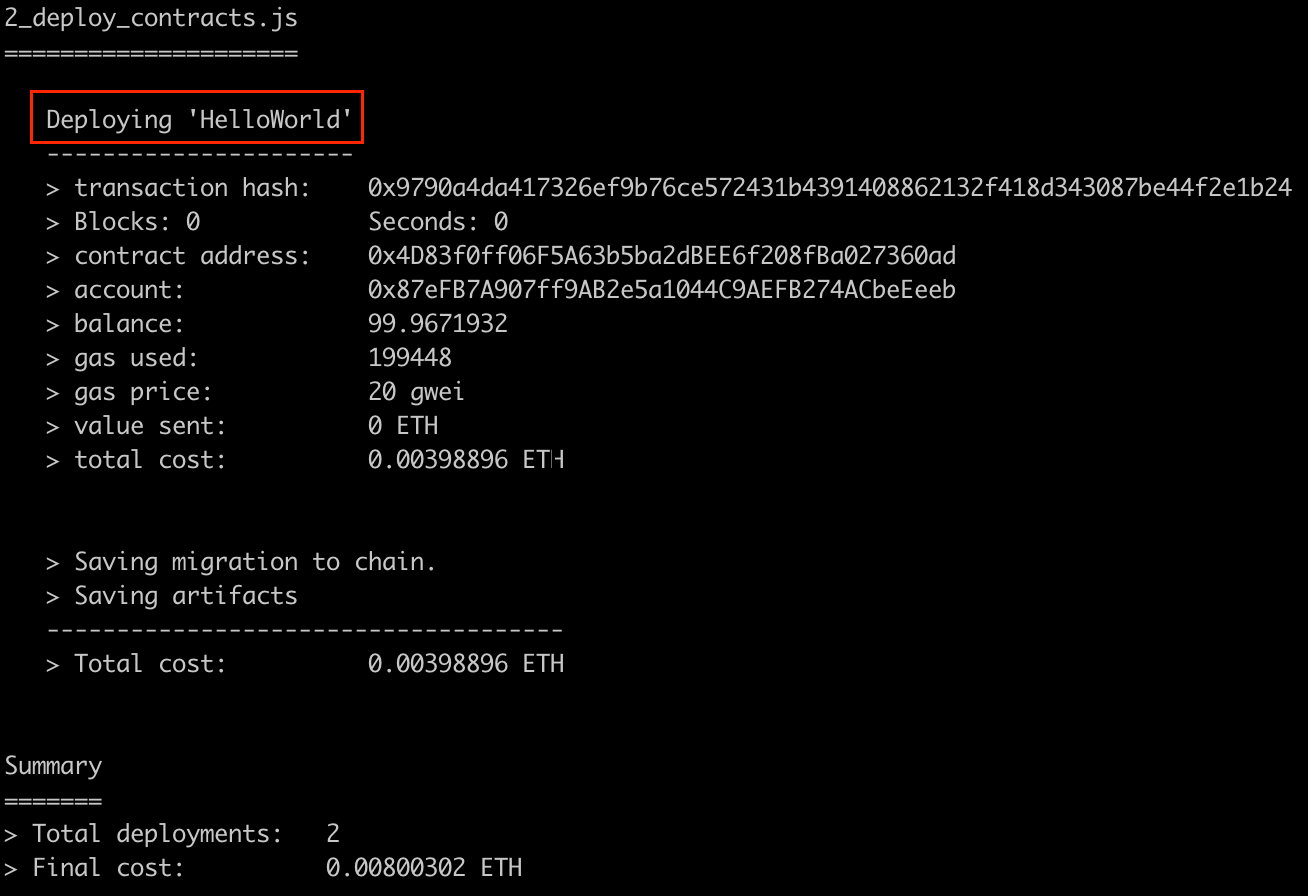
Figure 6: Deployment of HelloWorld contract.
Test
We’re also going to pull in a Solidity test file to test HelloWorld.sol. Create a new file in the test/ folder called TestHelloWorld.sol, paste the contents of Figure 7 into it, and save.
pragma solidity >=0.5.0;

import "truffle/Assert.sol";
import "truffle/DeployedAddresses.sol";
import "../contracts/HelloWorld.sol";

contract TestHelloWorld {
    function testItGreets() public {
        // Get the deployed contract
        HelloWorld helloWorld = HelloWorld(DeployedAddresses.HelloWorld());

        // Call getGreeting function in deployed contract
        string memory greeting = helloWorld.getGreeting();

        // Assert that the function returns the correct greeting
        Assert.equal(greeting, "Hello World", "It should greet me with Hello World.");
    }
}
Figure 7: TestHelloWorld.sol
Check that all tests pass by running the following command in your terminal:
truffle test
Codebase checkpoint: version 0.0.1
React Client
Before we do any React coding, we need to make sure our browser can interact with sites that access the blockchain. We do this by using a browser extension called MetaMask.
MetaMask
MetaMask is a browser plugin that allows users to make Ethereum transactions through regular websites. Head over to their website, install the extension and create an account.
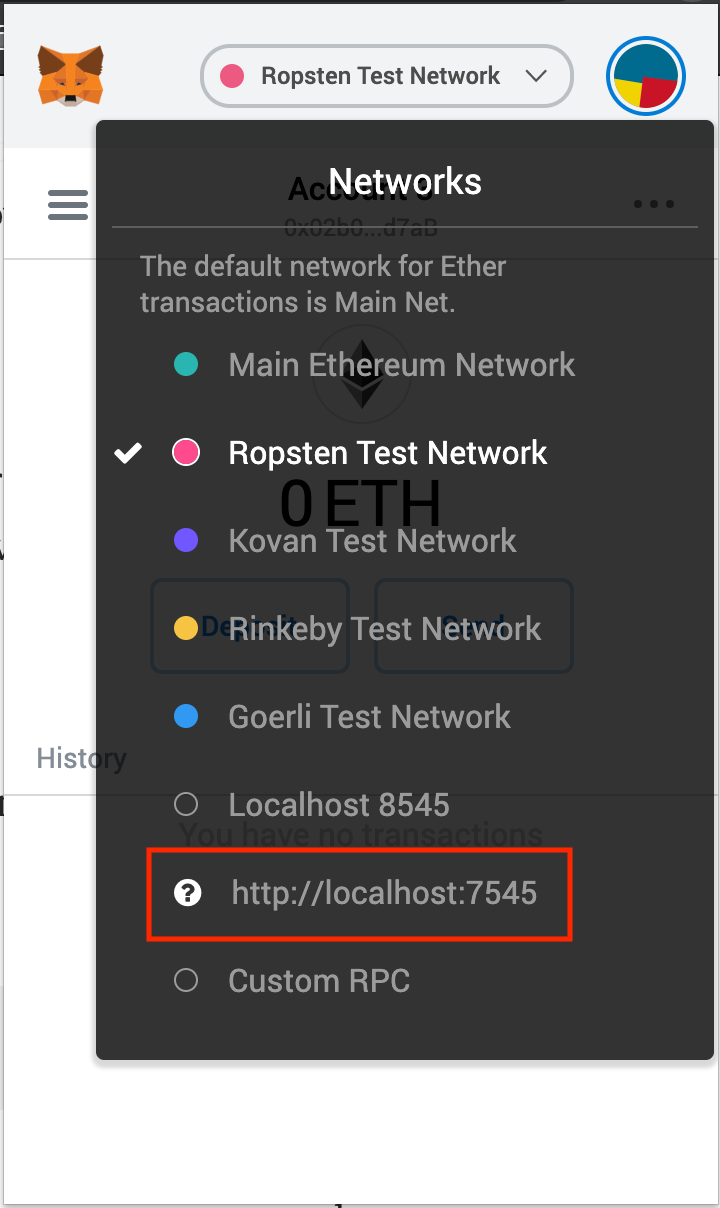
Figure 8: MetaMask networks.
Next, click on the MetaMask icon in your browser and log in. There, you need to add a custom RPC so the extension can access your local blockchain. Use the information from Ganache, head back to MetaMask, click Custom RPC, and enter the information. You should see it appear in the list of connections as shown in Figure 8 with http://localhost:7545. Connect to this network by clicking it.
MetaMask creates a wallet address when you create an account, but you can also import other wallet addresses provided you have control of the private keys. This is great for testing because we can use the accounts provided by Ganache to interact with our local blockchain.
Head over to Ganache and copy the private key from the first address in the list. You can display the private key by clicking the key icon on the right side of the row for each account, as shown in Figure 9.

Figure 9: Displaying the private key.
Head back to MetaMask in your browser and open the Accounts panel by clicking on the icon in the top-right corner, as seen circled in Figure 10.
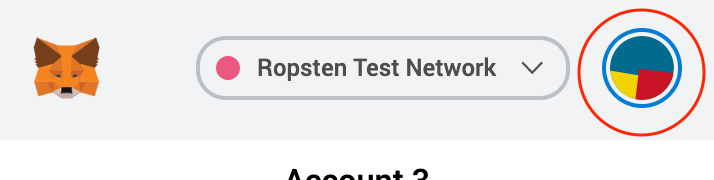 Figure 10: Accounts button in MetaMask.
Click Import Account, paste the private key in and click Import. This will add the account to your list of accounts. Select that account. Great! Let’s test it out.
Front end
Let’s test our React client. As I mentioned earlier, the Truffle Box provides some React boilerplate. In your terminal, navigate into the client/ folder and run the following:
npm run start
This should open a new browser tab and attempt to connect your browser to the blockchain. You’ll get a notification from the MetaMask extension attempting to connect. Confirm it. The webpage displayed should look like Figure 11.
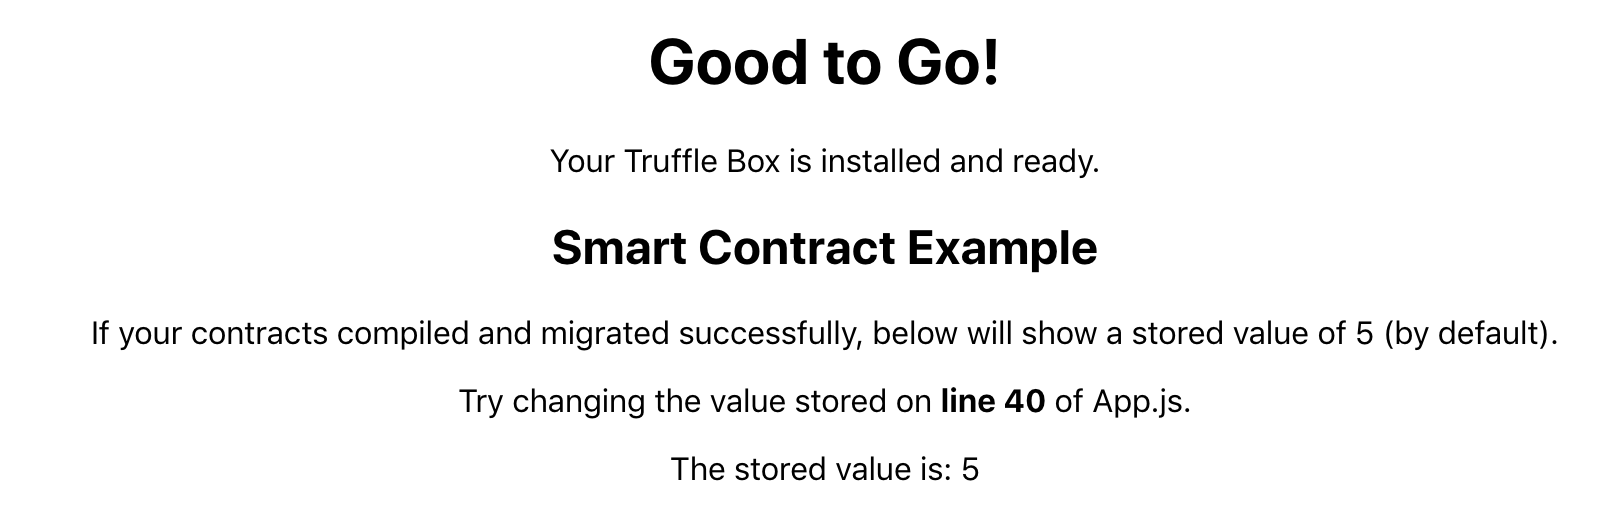
Figure 11: React front end.
Next, we’re going to load the new HelloWorld contract, retrieve the greeting by calling getGreeting(), and display it on this page.
Querying the blockchain
Head over to your text editor and open up App.js in the client/ folder.
First, import the compiled contract. Add the following line to the import statements:
import HelloWorld from "./contracts/HelloWorld.json";
Then we need to do the following:
- Inside
componentDidMount(), we needthis.setState()to include the HelloWorld contract, where it currently only has the SimpleStorage contract. - Once we’ve done that, we need
runExample()to use callgetGreeting()on the HelloWorld contract just as it callsget()on the SimpleStorage contract. - Finally, we need a new div in the
render()method to display the value.
Try this yourself and check the browser to see if your changes have the desired effect. When finished, your App.js file should look similar to the code in Figure 12.
import React, { Component } from "react";
import SimpleStorageContract from "./contracts/SimpleStorage.json";
import HelloWorld from "./contracts/HelloWorld.json";
import getWeb3 from "./getWeb3";

import "./App.css";

class App extends Component {
  state = { storageValue: 0, web3: null, accounts: null, contract: null };

  componentDidMount = async () => {
    try {
      // Get network provider and web3 instance.
      const web3 = await getWeb3();

      // Use web3 to get the user's accounts.
      const accounts = await web3.eth.getAccounts();

      // Get the contract instance.
      const networkId = await web3.eth.net.getId();
      let deployedNetwork = SimpleStorageContract.networks[networkId];
      const storageInstance = new web3.eth.Contract(
        SimpleStorageContract.abi,
        deployedNetwork && deployedNetwork.address,
      );
      deployedNetwork = HelloWorld.networks[networkId];
      const helloWorldInstance = new web3.eth.Contract(
        HelloWorld.abi,
        deployedNetwork && deployedNetwork.address
      );

      // Set web3, accounts, and contract to the state, and then proceed with an
      // example of interacting with the contract's methods.
      this.setState({ web3, accounts, storageContract: storageInstance, helloWorldContract: helloWorldInstance }, this.runExample);
    } catch (error) {
      // Catch any errors for any of the above operations.
      alert(
        `Failed to load web3, accounts, or contract. Check console for details.`,
      );
      console.error(error);
    }
  };

  runExample = async () => {
    const { accounts, storageContract, helloWorldContract } = this.state;

    // Stores a given value, 5 by default.
    await storageContract.methods.set(5).send({ from: accounts[0] });

    // Get the value from the contract to prove it worked.
    const storageResponse = await storageContract.methods.get().call();

    const greetingResponse = await helloWorldContract.methods.getGreeting().call();

    // Update state with the result.
    this.setState({ storageValue: storageResponse, greeting: greetingResponse });
  };

  render() {
    if (!this.state.web3) {
      return <div>Loading Web3, accounts, and contract...</div>;
    }
    return (
      <div className="App">
        <h1>Good to Go!</h1>
        <p>Your Truffle Box is installed and ready.</p>
        <h2>Smart Contract Example</h2>
        <p>
          If your contracts compiled and migrated successfully, below will show
          a stored value of 5 (by default).
        </p>
        <p>
          Try changing the value stored on <strong>line 40</strong> of App.js.
        </p>
        <div>The stored value is: {this.state.storageValue}</div>
        <div>The greeting response is: {this.state.greeting}</div>
      </div>
    );
  }
}

export default App;
Figure 12: App.js
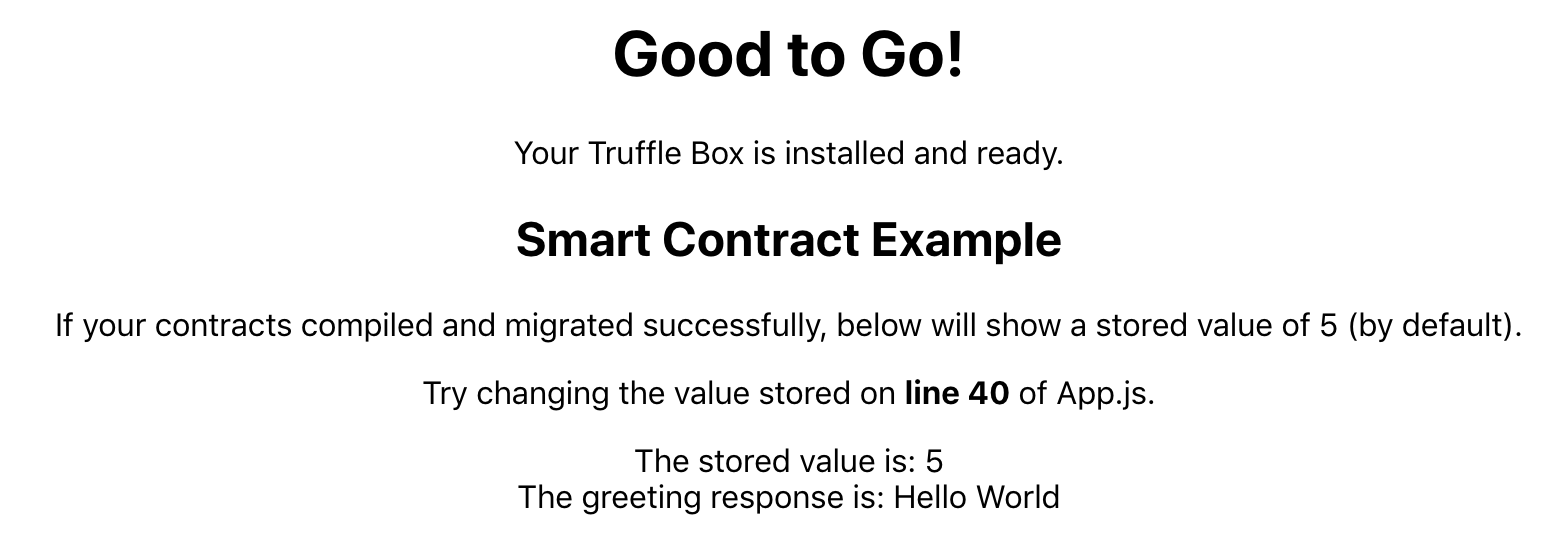
Figure 13: Webpage changes.
Congratulations! You have successfully created a Truffle project using the React Truffle Box, added a smart contract to the project, retrieved data from this contract, and displayed it in the React app. Well done! I hope this inspires you to explore blockchain development more and I encourage you to follow some of the links below to expand your knowledge.
Codebase checkpoint: version 0.0.2
Learn More
If you’re interested in Blockchain Development, I write tutorials, walkthroughs, hints, and tips on how to get started and build a portfolio. Check out this evolving list of Blockchain Development Resources.
If you enjoyed this post and want to learn more about Smart Contract Security, Blockchain Development or the Blockchain Space in general, I highly recommend signing up to the Blockgeeks platform. They have courses on a wide range of topics in the industry, from Coding to Marketing to Trading. It has proven to be an invaluable tool for my development in the Blockchain space.






