
If you've been diligently mining Pi Coin, you're probably eager to transfer your hard-earned coins to a secure wallet. Follow these steps to avoid losing your Pi Coins. Here's a simple guide to ensure your Pi Coins are safely transferred to your wallet and migrated to the Mainnet.
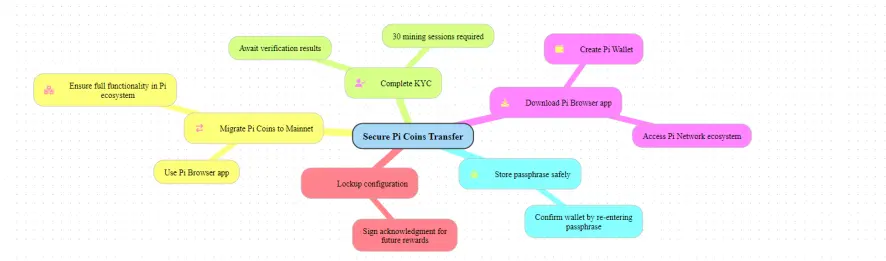
### 1. Download the Pi Browser App
The first step is downloading the Pi Browser app from your mobile app store. This app is essential for accessing the Pi Network’s ecosystem and performing various tasks, including creating your Pi Wallet.
### 2. Create Your Pi Wallet
Once you've installed the Pi Browser app, open it and create your Pi Wallet. This wallet will serve as the secure storage for your Pi Coins. Be sure to securely store your passphrase, as it’s the only way to access your wallet.
### 3. Confirm Your Pi Wallet
After creating your wallet, you’ll need to confirm it. The Pi Network will prompt you to verify your wallet by re-entering the passphrase. This step is crucial for ensuring that your wallet is set up correctly.
### 4. Commit to Lockup Configuration
Next, you'll be prompted to commit to a lockup configuration. This step involves choosing how long you want to lock up your Pi Coins and what percentage of your balance you want to commit. Locking up your coins can lead to future rewards, so consider this step carefully.
### 5. Sign Acknowledgment to Receive Completed Tokens
Before transferring your Pi Coins, you must sign an acknowledgement to receive your completed tokens. This step confirms that you agree with the terms and conditions of the transfer process.
### 6. Submit KYC: Required 30 Mining Sessions
To secure your Pi Coins, you must complete the Know Your Customer (KYC) process. You need to have completed at least 30 mining sessions to be eligible. The KYC process verifies your identity and ensures that you are a legitimate participant in the Pi Network.
### 7. Wait for KYC Results
After submitting your KYC application, you will need to wait for the results. The verification process may take some time, so be patient. Once approved, you will be eligible to migrate your Pi Coins to the Mainnet.
### 8. Migrate to Mainnet
The final step is to migrate your Pi Coins to the Mainnet. This is where your Pi Coins become fully functional and can be used within the Pi ecosystem or transferred to external wallets. Follow the instructions provided in the Pi Browser app to complete this process.
By following these steps, you’ll ensure that your Pi Coins are safely transferred to your wallet and ready for use on the Mainnet. Don’t miss out on securing your earnings—take action today!






