
If you’ve been into crypto for enough time then I am sure you might have heard about the project Cosmos with a native token with a $ATOM ticker. It’s popular among the developer communities as it provides SDKs (Software Development Kits) which are widely used across the world of crypto. ATOM is the native token that is used in the Cosmos network. In this article, we will look into a step-by-step process to stake $ATOM token on-chain so you can participate in the decentralization of the network along with earning interest over it.
Benefits of Staking On-chain
Before diving right into the staking process, let’s understand some of the benefits that you get to stake your token on-chain.
1. Decentralization
By staking your token on-chain you get to choose your own validators or delegate your tokens to multiple validators, this helps in diversifying the voting rights among the various validators and helps in keeping the network decentralized.
2. Extra Yield
There are some validators that do not take any commission and pay you 100% of the yield generated from it. There are multiple validators that charge a very small amount of commission, so compared to other centralized platforms like Binance and Nexo, you get a significant amount of extra returns on your holdings.
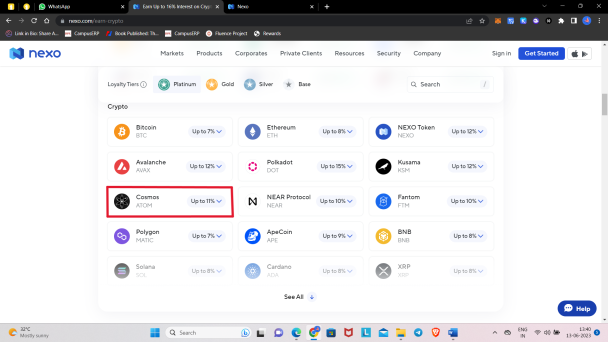
As you can see in the above picture, the interest rate on the Cosmos ($ATOM) token is only 11%, and that is for Platinum members, so if you have a Basic membership or a Gold membership then you would earn only 7-8% interest per annum, whereas you can earn up to 20% interest for delegating your $ATOM tokens directly to validators through Keplr wallet.
3. Control over your assets
Some centralized platforms like Nexo provide locking period staking for 1-2% of extra returns, this way you lose control over your tokens. So, in the case of on-chain staking, once you complete the 21 days period, you’re entirely in control of your tokens.
Step-by-Step Guide to Stake ATOM on Keplr
Keplr is one of the most trusted wallets in the Cosmos ecosystem, and as we all know it is better to go with the trusted platforms in the crypto space, so we will stake our $ATOMs with Keplr. Without wasting any time, let’s dive into it!
Step 1: Install Kelpr Extension
The very first step is to have a Keplr wallet. If you are using your laptop/PC then you can install the Keplr Chrome extension, you can refer to the following link – Keplr Wallet - Chrome Extension
Step 2: Create a Wallet
Now, after installing the Keplr Chrome extension, create a wallet and make sure you note down your seed phrases securely.
[NOTE: At any stage if you have to select the chain/network select ‘Cosmos Hub’!]
Step 3: Navigate to Keplr Dashboard
First, click on the Keplr extension that we installed in the previous step. You will see something like the following, you can see your available balance and staked balance on this pop-up.
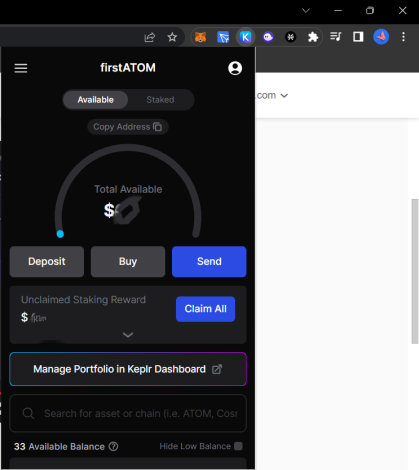
At the lower side of the pop-up you can see ‘Manage Portfolio in Keplr Dashboard’, click on it and you will be directed to the Dashboard in new tab, it’ll look like this-
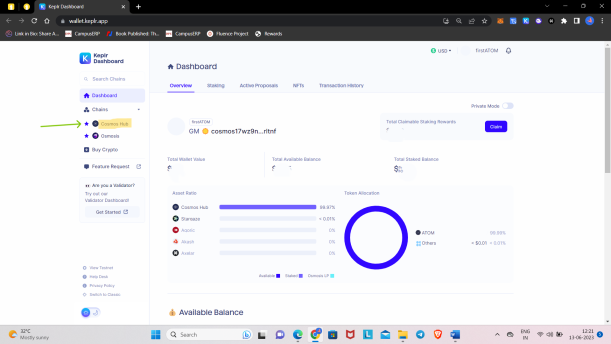
On the Dashboard, you can see all the data related to your wallet including multiple chains. For chain-specific data, you have to select the chain. For us to stake $ATOM tokens we have to click on the ‘Cosmos Hub’ chain, which is highlighted in the above picture. After that you’ll see the following screen –
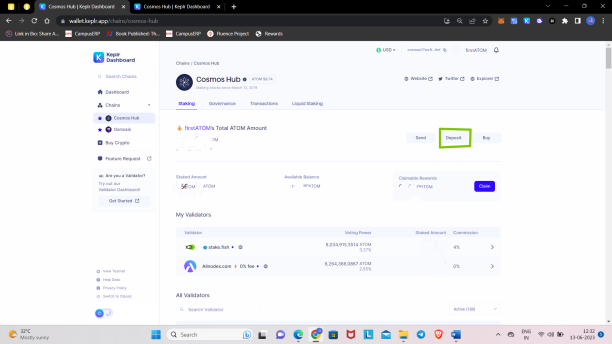
Now click on the ‘Deposit’ button and a pop-up with your address and a QR code will show, there you can deposit $ATOM tokens.
[NOTE – If you’re depositing $ATOM from Binance or another exchange, it’ll ask for MEMO, but there is NO need to enter any MEMO in order to deposit $ATOMs in Keplr, you can keep it blank.]
STEP 4: Selecting Validators to Stake $ATOM
Now considering you have deposited a few $ATOM in your wallet, which hardly takes a minute, it’s time to choose the best validators available to stake with. First, scroll down the page where we were in the last step, there you’ll see the number of validators.
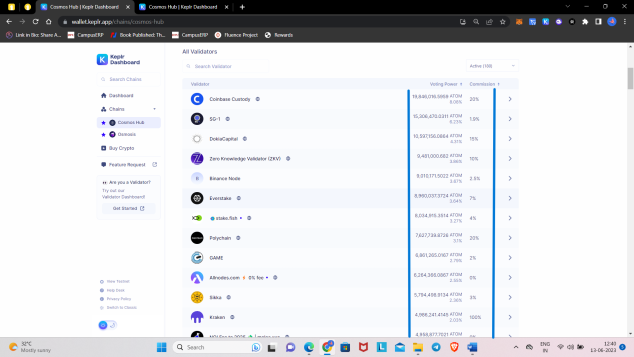
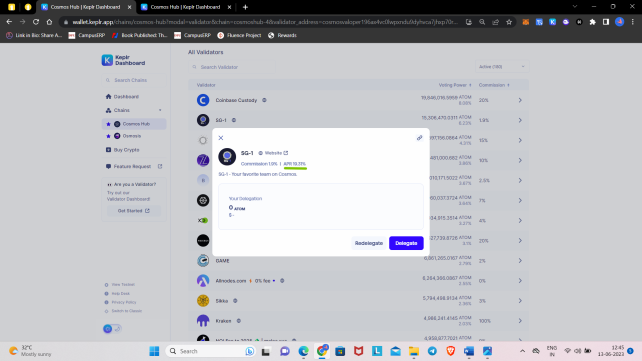
Here you can see the total amount of $ATOMs staked with this validator, their voting power and the commission they charge, and the link to the official website of validators. If you click on any of the validators, a small pop-up will appear showing the estimated APR –
Go through all the validators and choose the best one which suits you. It’s better to select the top validators which are active for a long period of time.
[NOTE: Before Delegating your $ATOM, please note that you’re tokens will be in locked for around 21 days (with any validator), it’s a general process while staking on-chain.]
Step 5: Delegate Your $ATOMs
Once you select your validator, then click on that validator, and in the next pop-up select the ‘Delegate’ button. Next, choose the amount you want to delegate and then click on the ‘Delegate’ button. After that, a pop-up from the Keplr extension will appear for approval. Check the transaction fees, click on it if you want to change, and then approve.
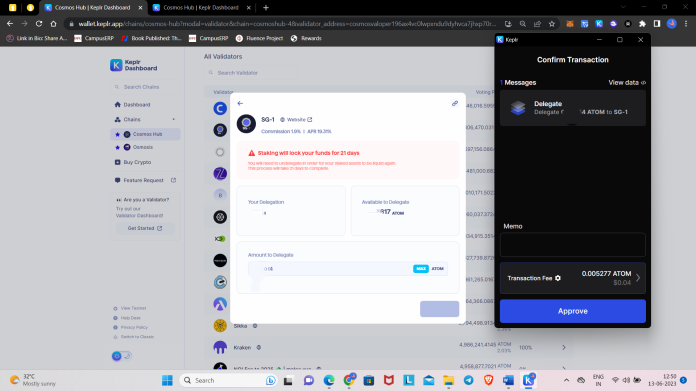
[NOTE: Make sure you keep some $ATOMs (~0.1 or more) in your wallet as you’ll need it in the future for fees while claiming your earned interest.]
Congratulations, you have successfully delegated your $ATOM tokens. The total claimable amount will appear on your dashboard as well as on your Keplr wallet extension.
Hope you guys find this short article informative! If yes, then do follow me and share your views on the current crypto market in the comment section.
Thanks for Your Time!
Hi, I am Ashish, an Author of this article!
I am an individual crypto writer and I write about the latest crypto news, crypto trading data, and guides like this article. If you are interested in getting notified when I publish my next article then do follow me, thanks if you are already a follower! Below are some of my referral links to verified and tested platforms where you can earn a small amount of crypto, so if you are interested then definitely check them out, it'll help me as well.
Freebitco.in - Most Trusted Bitcoin Faucet

Cointiply - All in one & Highest Paying Crypto Faucet

PipeFlare - Best Altcoin Faucet


