
If you are a newbie and have difficulty binding crypto addresses in your account, then you better read this article.
This article will have a comprehensive tutorial on connecting MetaMask to your account to enable withdrawals. So, before diving into the tutorials, we first define MetaMask.
What is MetaMask?
MetaMask is a global community of developers and designers dedicated to improving the world with blockchain technology. Their mission is to democratize access to the decentralized web and, through this mission, to transform the internet and world economy to one that empowers individuals through interactions based on consent, privacy, and free association.
One of Metamask's uses is a crypto wallet; it is used to buy, store, send, and swap tokens equipped with secure login to manage your digital assets safely. It also generates passwords and keys on your device, enabling you to access your accounts and data privately.
The Tutorial
So that we know what MetaMask is, let's now proceed to get your crypto addresses and save them in your account.
Step 1:
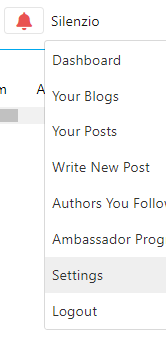
Access your account settings by hovering your mouse over your account name; after, there is a dropdown menu that will show you choices on what you want to do next. In that menu, you should click settings. Or you can click this [Settings]. Refer to the figure below.
 -
- 
Step 2:
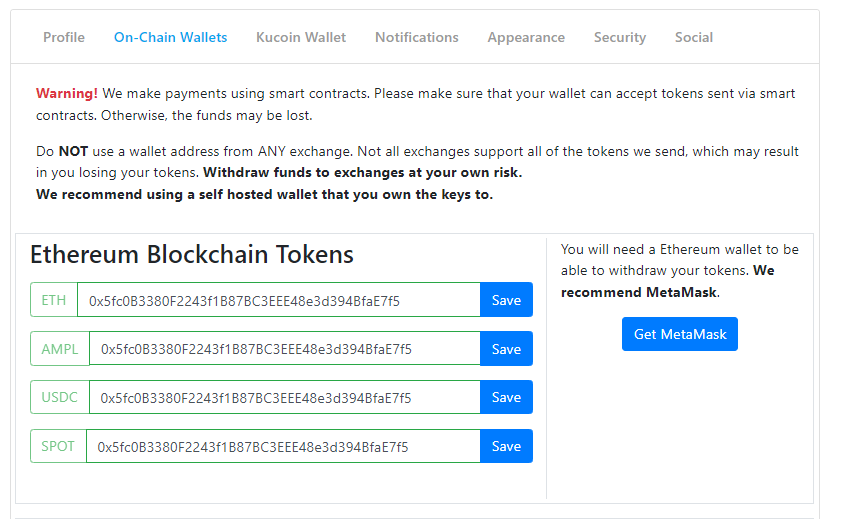
In the settings, there are listed columns of choices, including profile settings. We will click On-Chain Wallets in that list since MetaMask is our wallet choice. Refer to the Figure below.
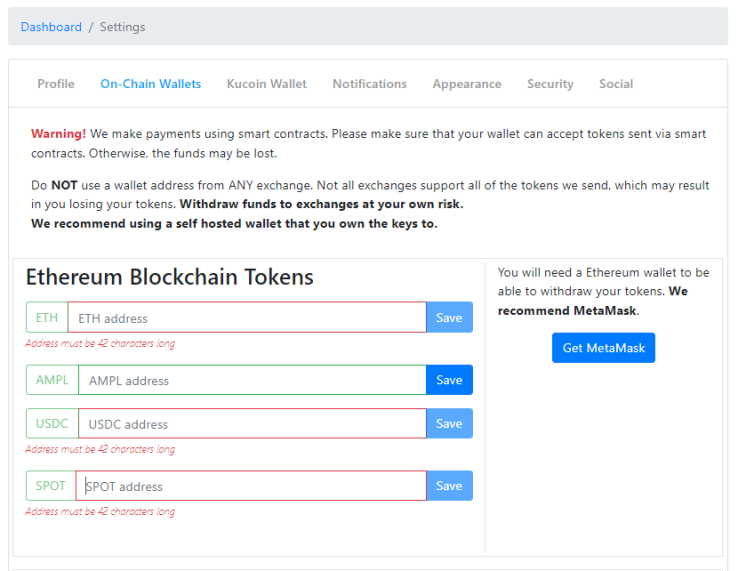
Step 3:
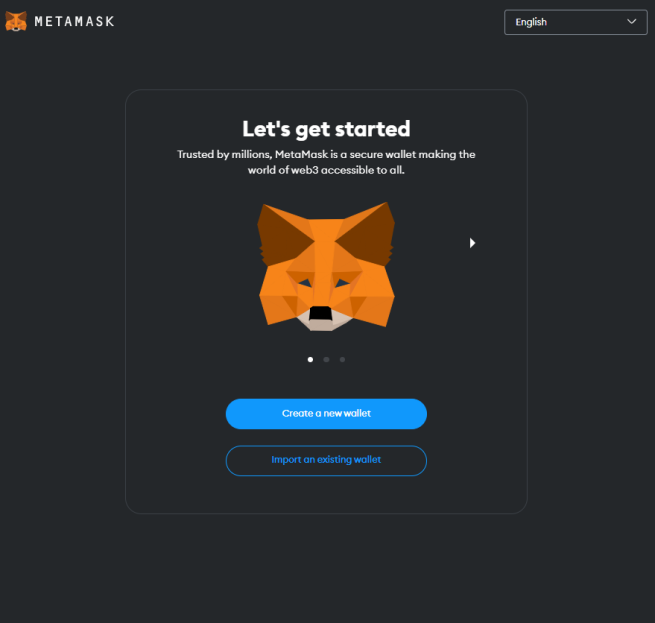
To get your token addresses, click Get MetaMask to download the extension on our browser or mobile. All we need to do for the browser is add the MetaMask extension to our Chromium browser; after installing it, the MetaMask login page will automatically pop up. You will have two choices: Create a new wallet or import an existing one if you already have one. Refer to the figure below.
 -
- 
Step 4:
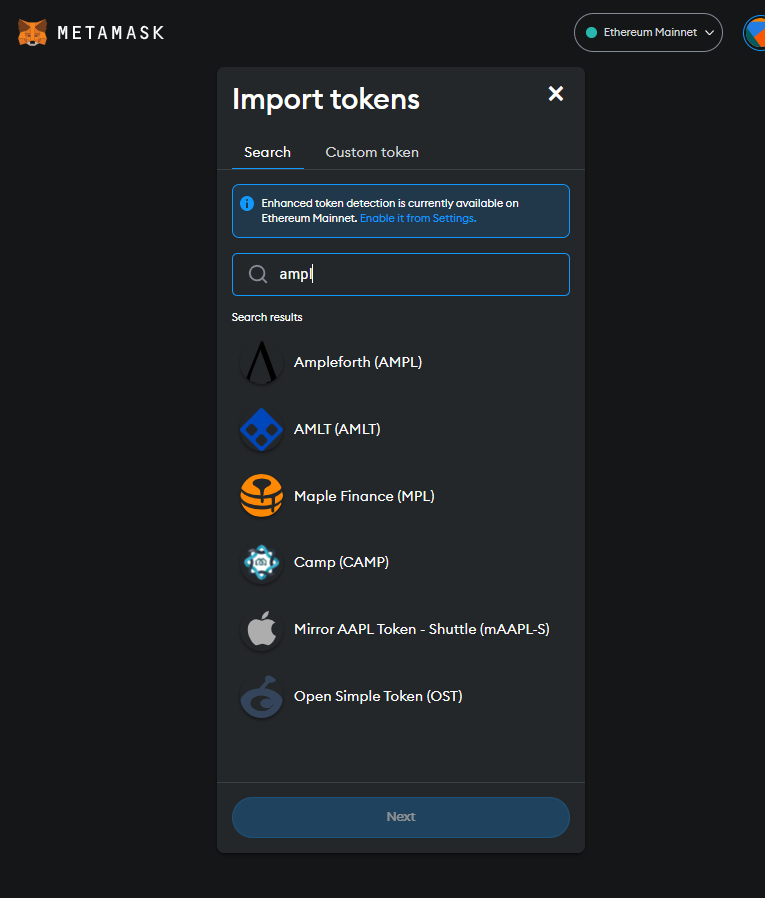
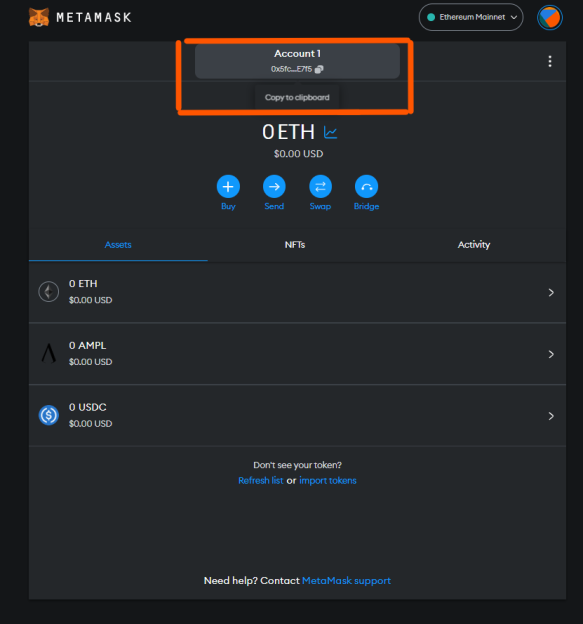
Now, in your account, let's add the two tokens, namely the AMPL and USDC. To add, click on the import tokens below, search for AMPL and USDC, and import them individually.
Step 5:
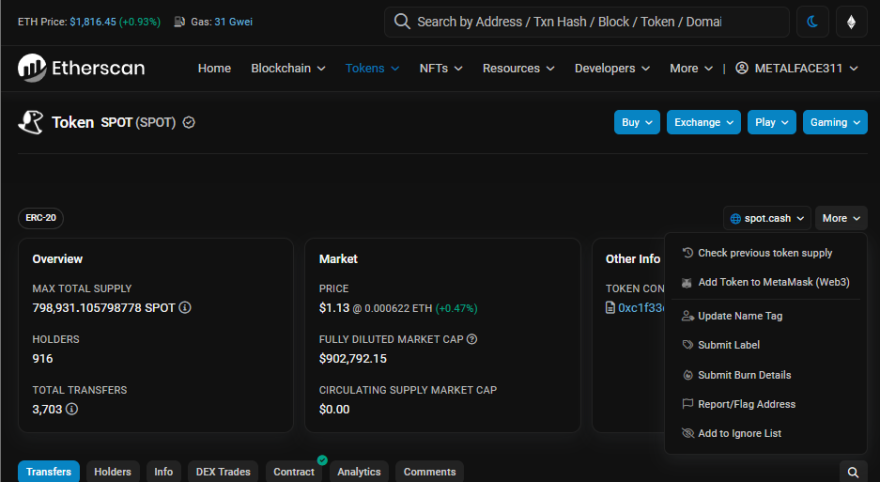
Lastly, for the SPOT token, go to etherscan.io and create your account. Once you are in, please search for the SPOT token and select it. After that, on the right side, there is a More dropdown menu; click that and add a token to MetaMask. Now you have your four tokens in one account. To get your address, you only need to click on the Account name and paste it into the address panel. Refer to the figure below.
Aaaandd, You're done.


