This is a step by step guide to launching a basic token on Ethereum using the following tools:
- Metamask
- Openzeppelin Contract Wizard
- Remix
Launching on the main net will of course require gas, but these steps are equally applicable for an EVM (Ethereum Virtual Machine) test net.
Go to the Openzeppelin contract wizard (https://wizard.openzeppelin.com/)
You will be required to provide 3 things: the token’s name, the token’s symbol, and the initial and total initial supply.
Replace these with your values.

Open the contract in Remix

This will transfer the contract into the Remix IDE where you will actually deploy it.

It will show up on the left-hand side as a solidity contract. You will need to compile it to proceed forward. This happens in the Solidity Compiler, the second tab on the left.
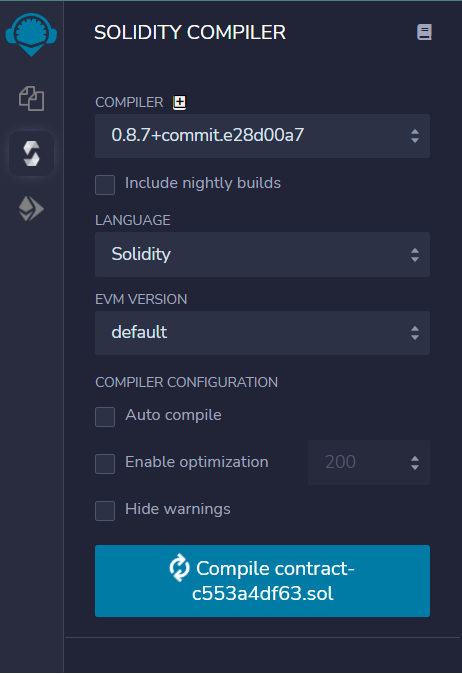
Switch the Compiler version to match the one on the top line of the contract, in this case, 0.8.4. Leave the other values on default.
Let it compile (which might take a while) and proceed to the deploy tab (third tab on the left).
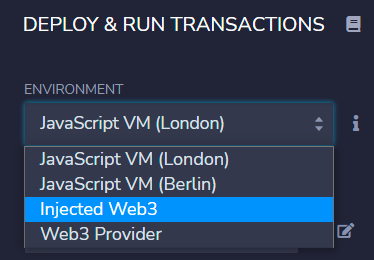
Switch environment to Injected Web3. This will require that you have a browser-based wallet such a Metamask.

Remix will make a request to connect with Metamask which you will have to approve.

Select your token in the contract section since it is not selected by default.
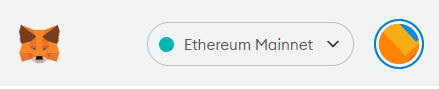
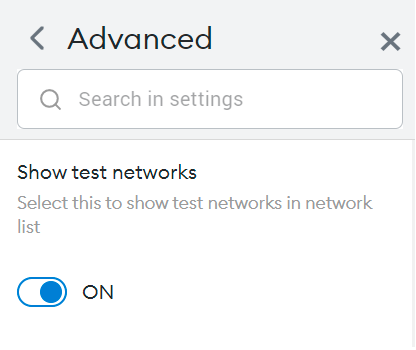
In Metamask check that the network you are deploying to is the correct one, whether it is the Ethereum Main-net or any of the test-nets, such as Ropsten, Kovan, Rinkeby or Goerli. They are not visible by default and can be accessed by going to the setting and toggling on show test networks.
Just as deploying to the mainnet will require gas, so does deploying to the test-nets.
Ether for the test-nets can be acquired from faucets all over the internet.
Deploy

With the correct contract and network selected, click Deploy.

A pop-up asking you to confirm the transaction will appear. Proceed by selecting confirm and the transaction request will appear in your metamask browser wallet.

Here you will be given an estimate of how much ether will be required depending on current conditions. You can reject it, wait until later and try again.

After pressing confirm and waiting for the transaction to go through, you should see something similar to this in the lower console of remix and all the tokens will be deposited in your browser wallet.
More
This guide is barely scratching the surface of tokens (erc-20 or otherwise), Solidity, and smart contracts. But it is a simple a-to-b process and for some people who aren't looking to create anything too complex and don't want to hire a dedicated solidity developer, it is enough, and if anything a launchpad for further research.


