![Onboarding Your Assets From Ethereum to Binance Smart Chain [#BSC Tutorial]](https://www.publish0x.com/img/519173.png?action=resize&ar=1&inv=0&ori=1&st=1&up=1&w=1140&signature=6829001afd991fcea3676761a41948162262813736048149dd04c0d9827470f2)
You will need to set up your MetaMask wallet to be connected to the Binance Smart Chain itself. It is relatively easy, and you can easily switch between the Ethereum network and the Binance Smart Chain network through the wallet. To find out how to set up MetaMask for use in the Binance Smart Chain, take a look at this tutorial.
Once you have MetaMask hooked up to BSC, we need to use the Binance bridge to send our $ETH from the Ethereum chain to the BSC.
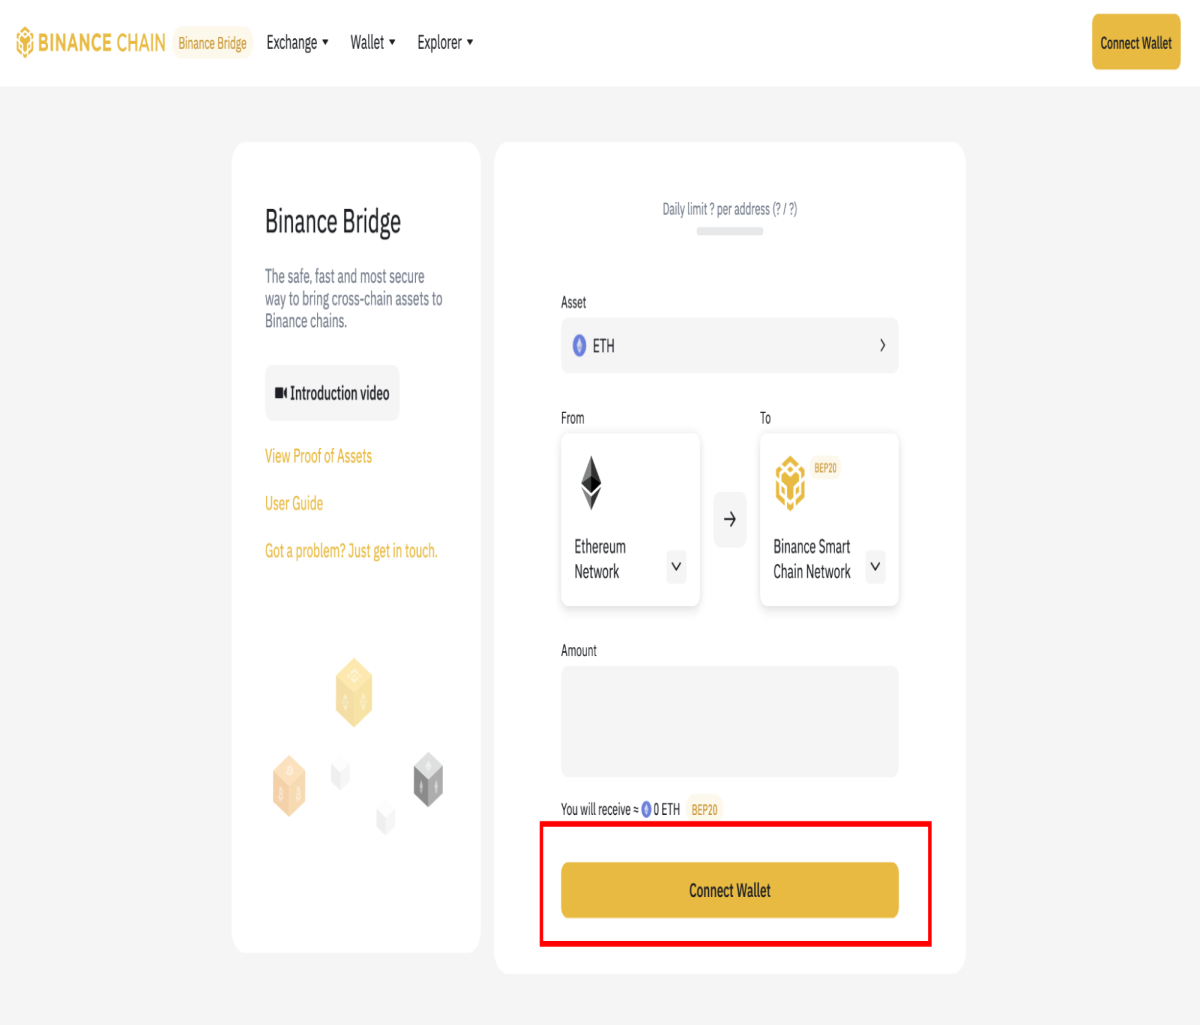
Head over to Binance Bridge and connect your wallet. Remember, we are transferring from the Ethereum network, so make sure you connect to the Binance Bridge with your Ethereum wallet selected. To connect your wallet, simply hit “Connect Wallet”;
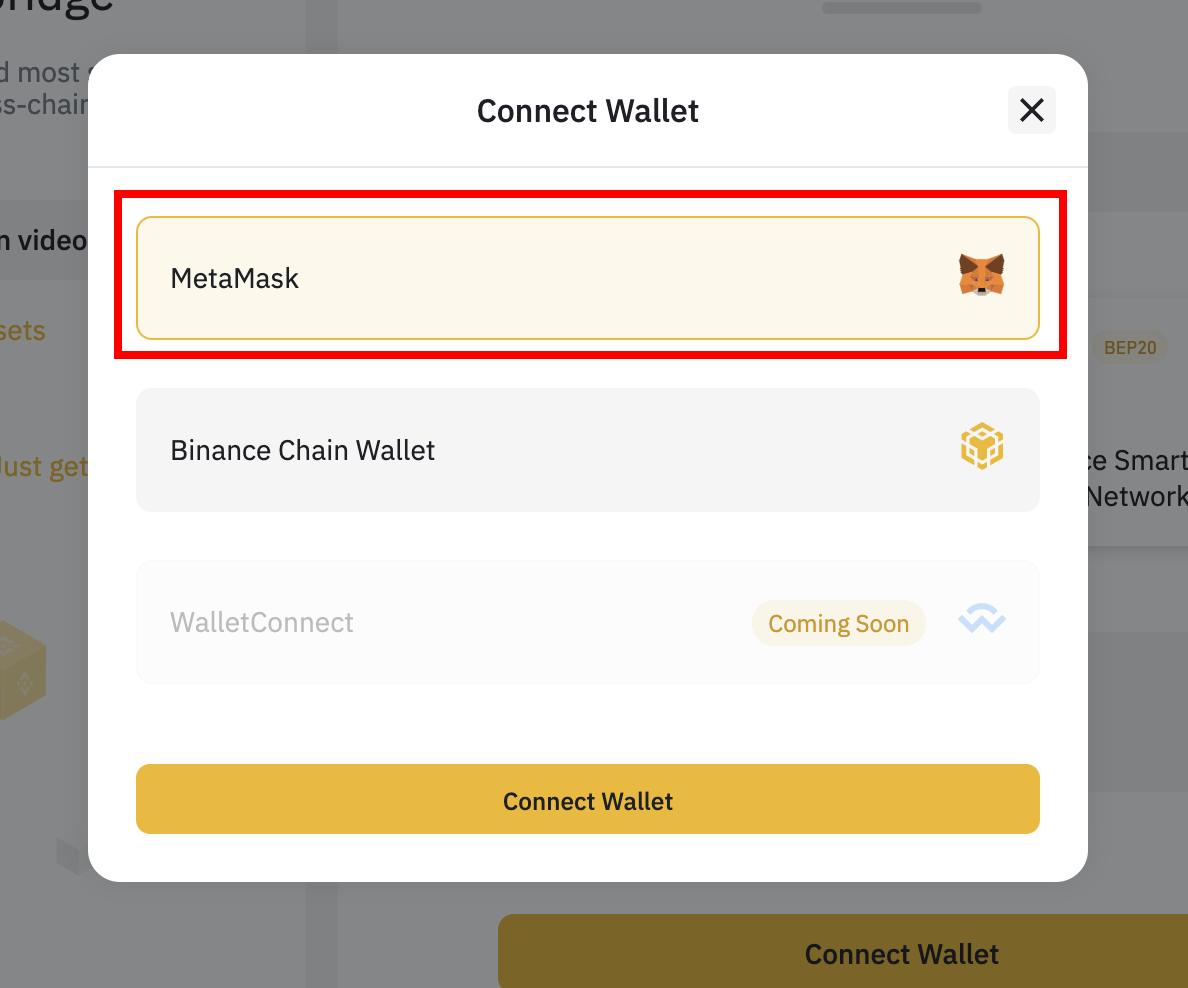
As we are using MetaMask, go ahead and hit the MetaMask option;
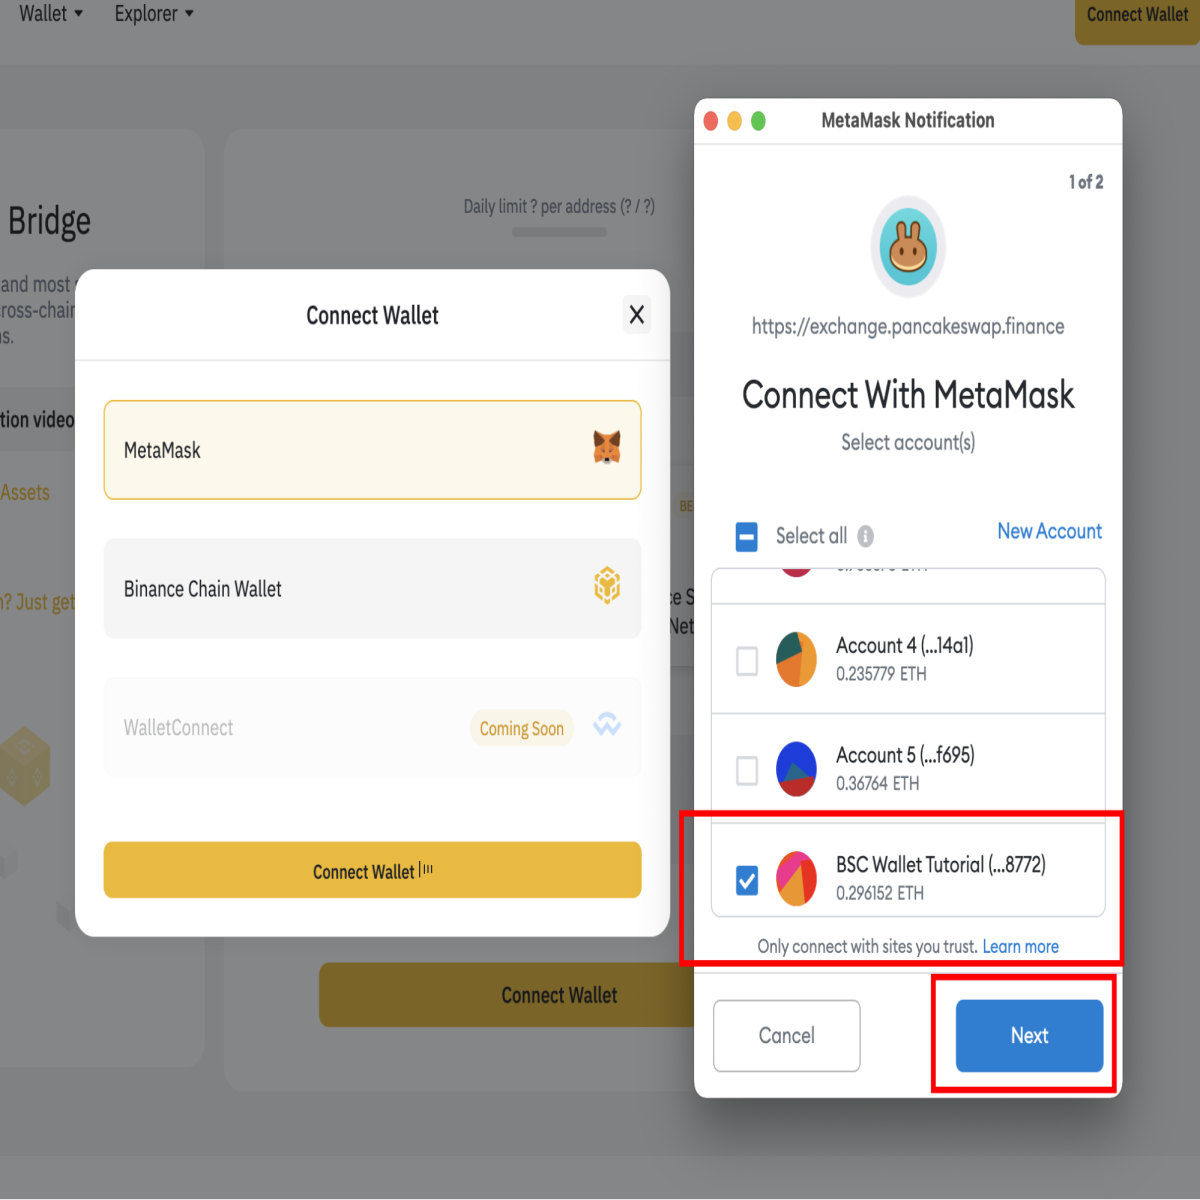
This will bring up a MetaMask window asking which wallet you would like to connect to. Select your desired wallet and hit “Next”;
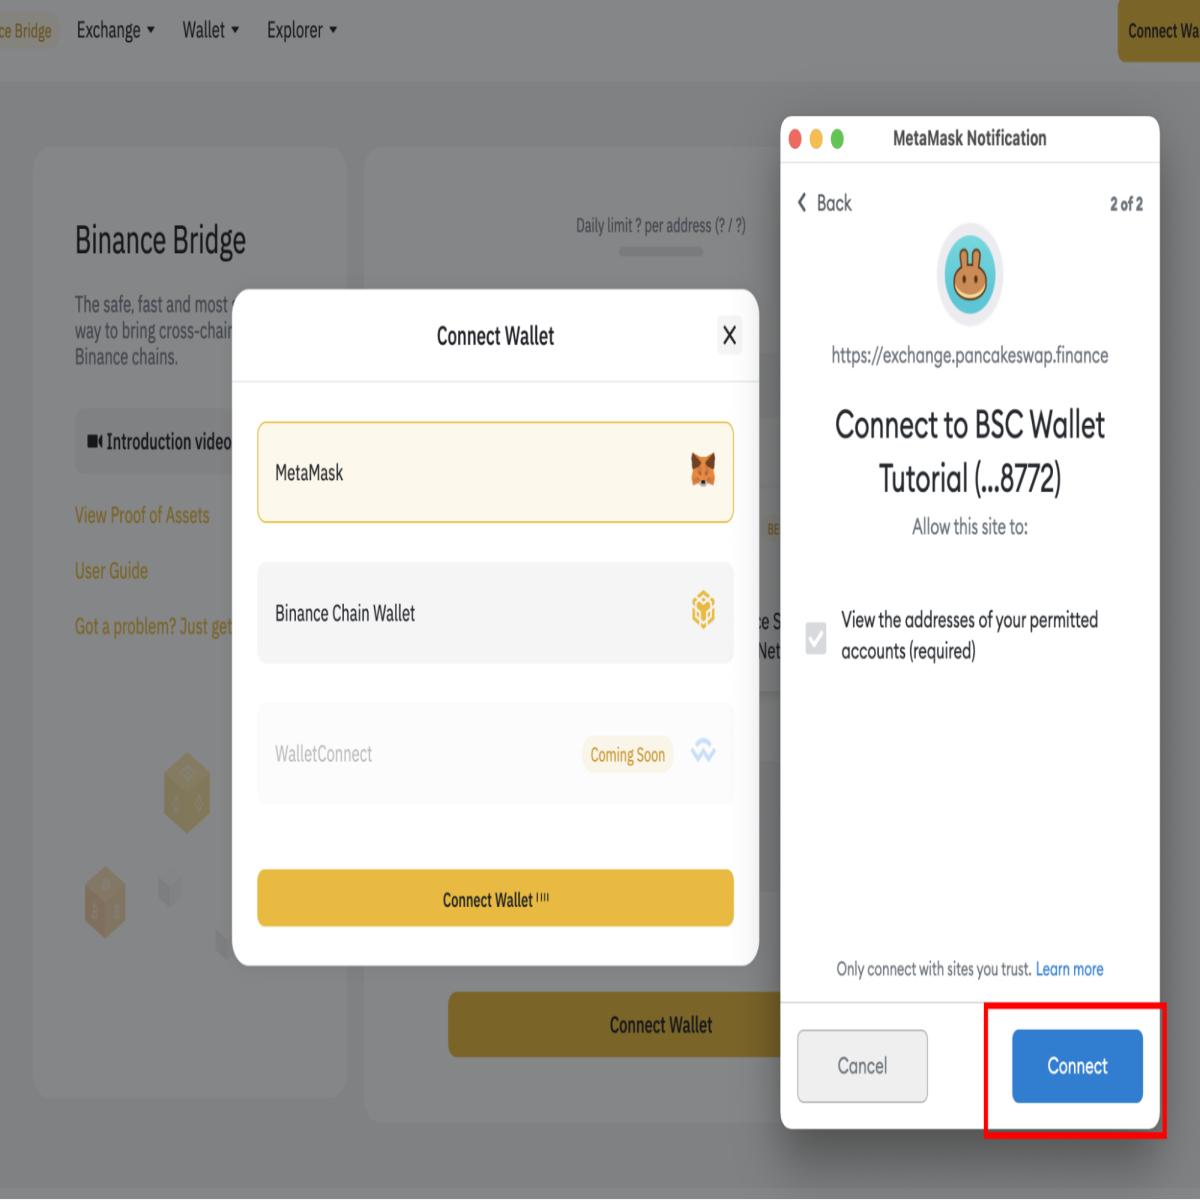
Then go ahead and confirm this by hitting “Connect”;
Once you have connected, you can check you are on the correct network (Ethereum in this part) by looking at the top right-hand corner;
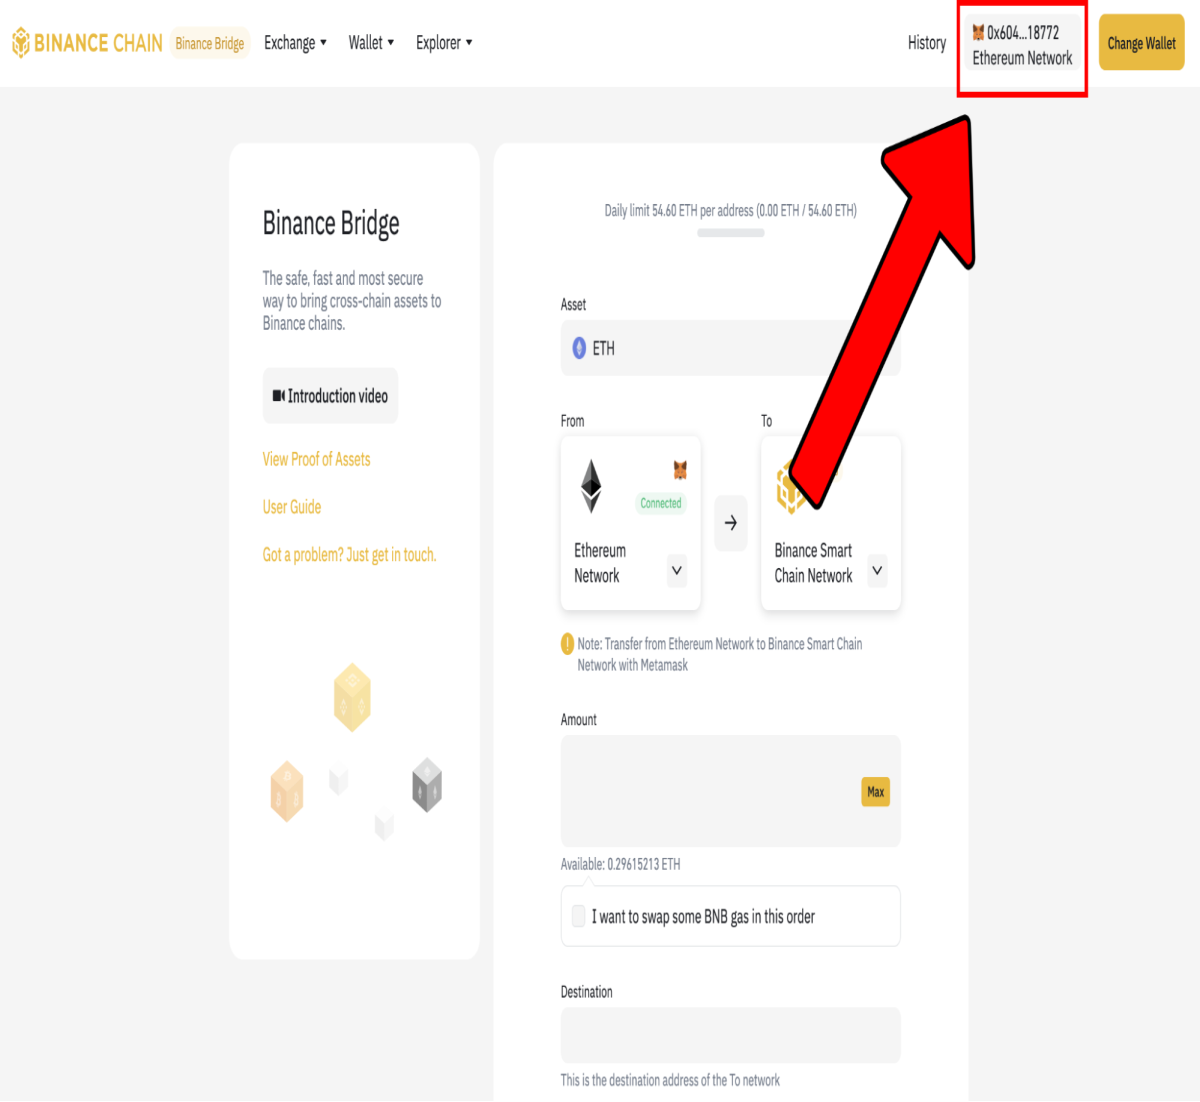
As you can see, it shows that I am connected to my wallet on the Ethereum Network. That's what we want.
The next step is to swap our $ETH from the Ethereum Network to the Binance Smart Chain Network. To do this, simply enter the desired amount to swap in the relevant box.
You can enter the same wallet address you are using to conduct this swap for the destination address. Remember, the wallet address will be the same, but the assets will not be cross-chain compatible. You won’t be able to simply send $ETH from BSC back to the Ethereum chain without coming back to the Binance Bridge.
Here is how it looks for me;
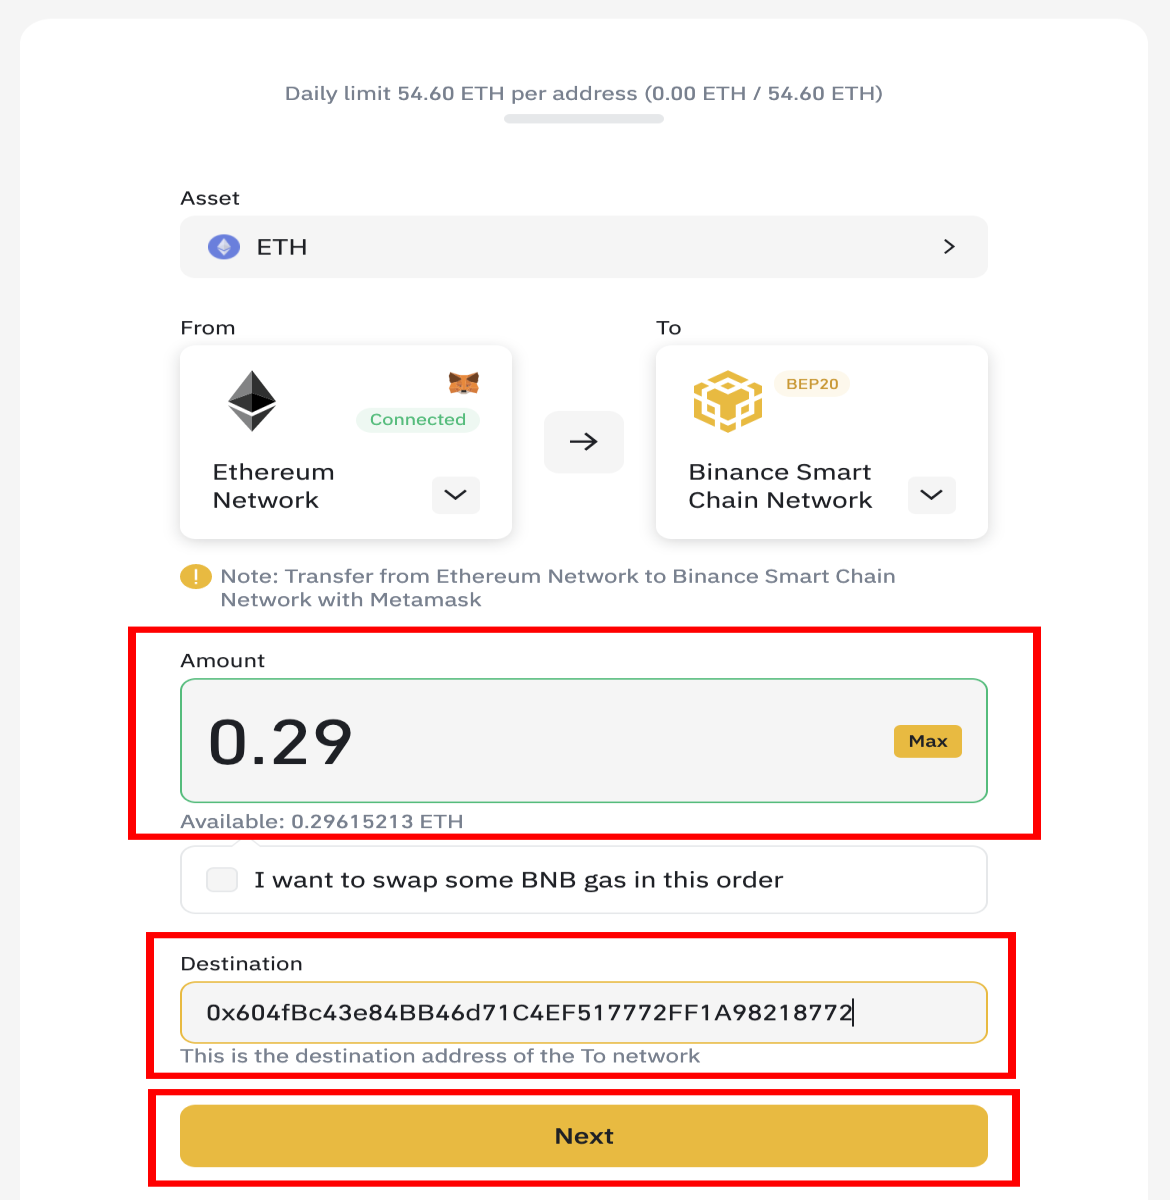
In this example, I will be swapping 0.29 $ETH from the Ethereum Network to the Binance Smart Chain Network. The destination address I inputted is the same address as the Ethereum wallet address I am using. However, I would need to switch to the BSC Network on MetaMask to see the BEP-20 Ethereum in my wallet.
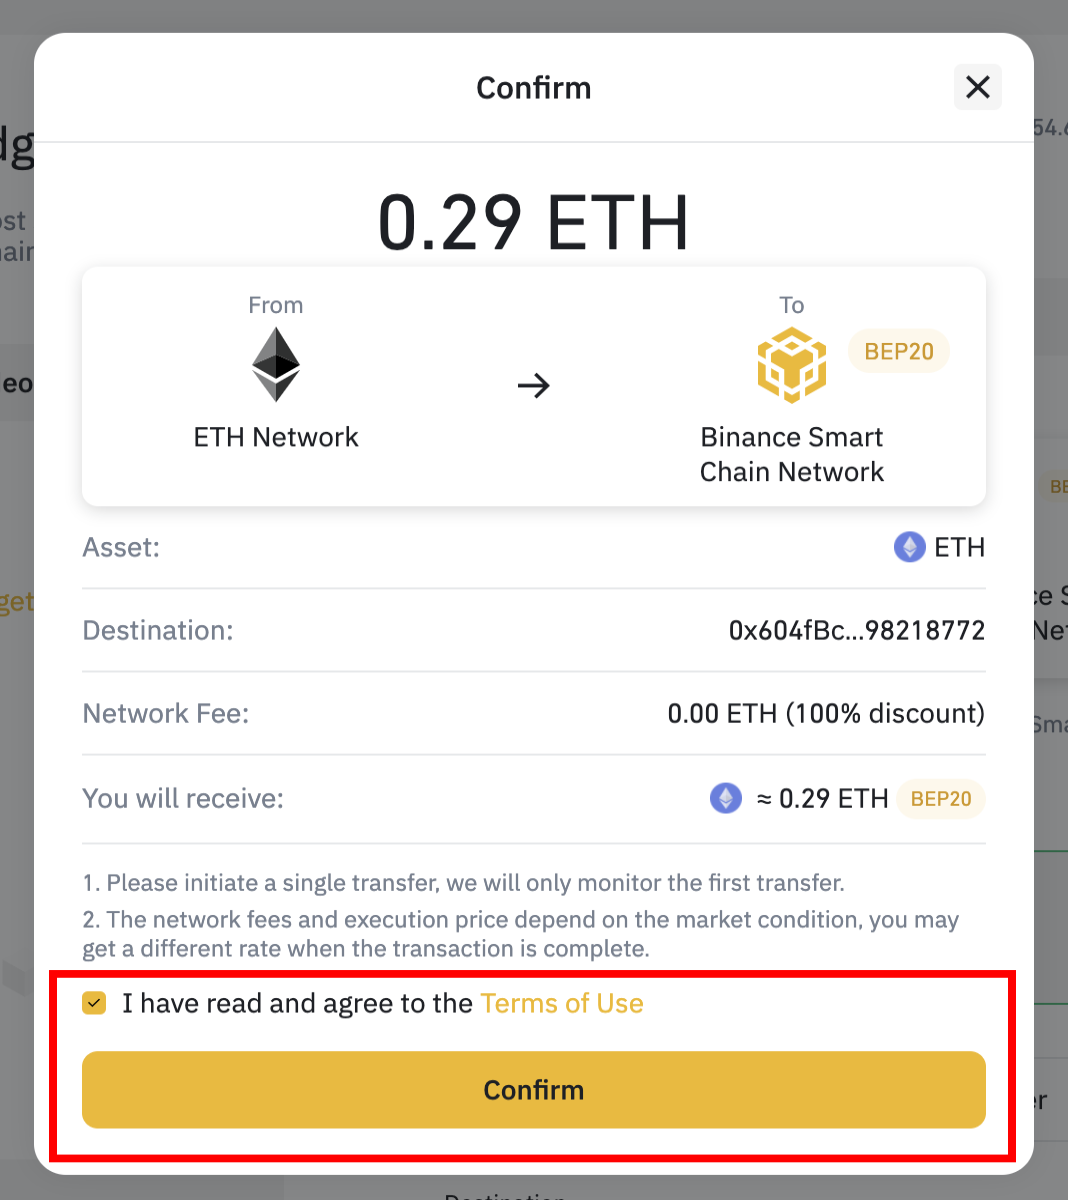
Once you are ready to conduct the swap, go ahead and hit “Next.” You will be asked to confirm the swap. If you are happy to go ahead, click “Confirm”;
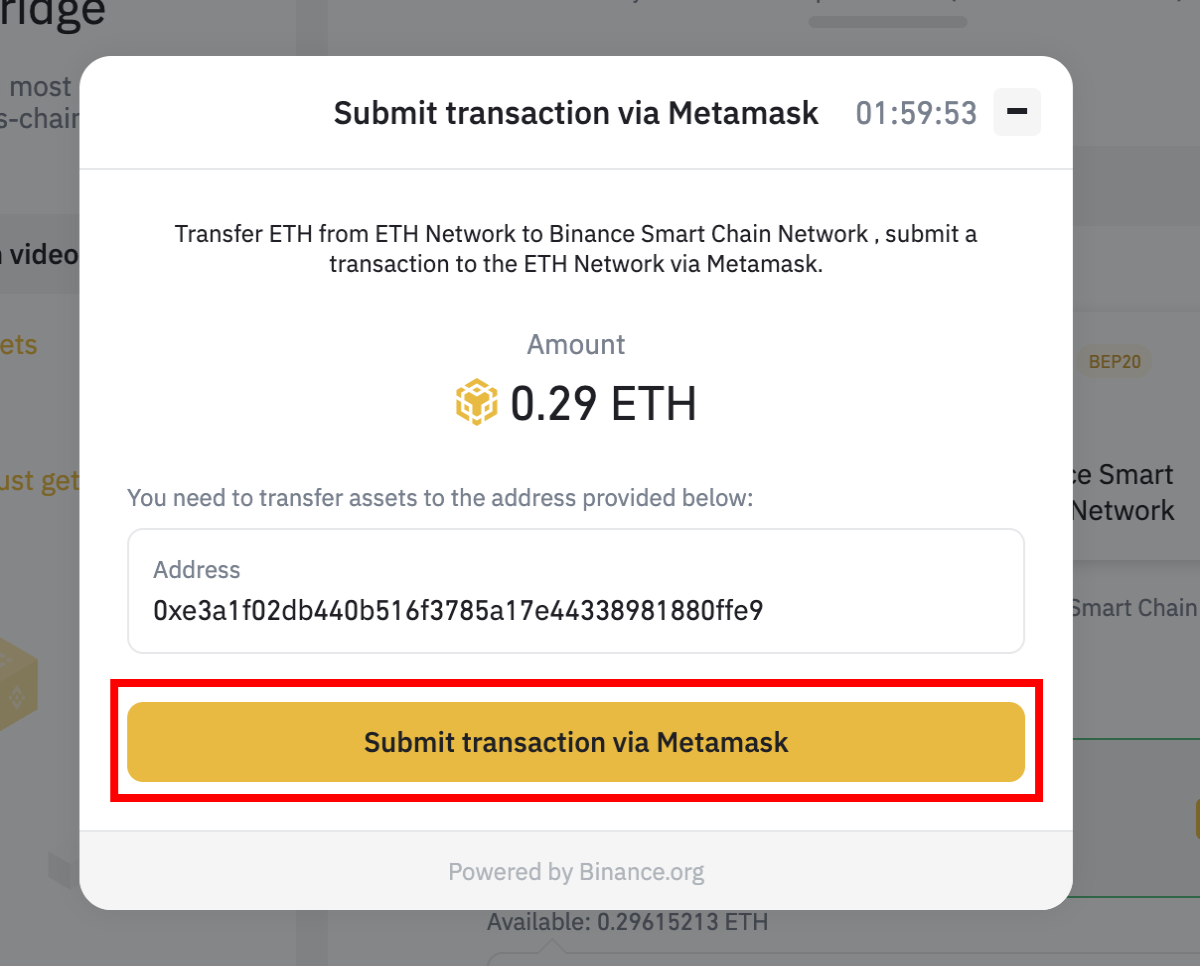
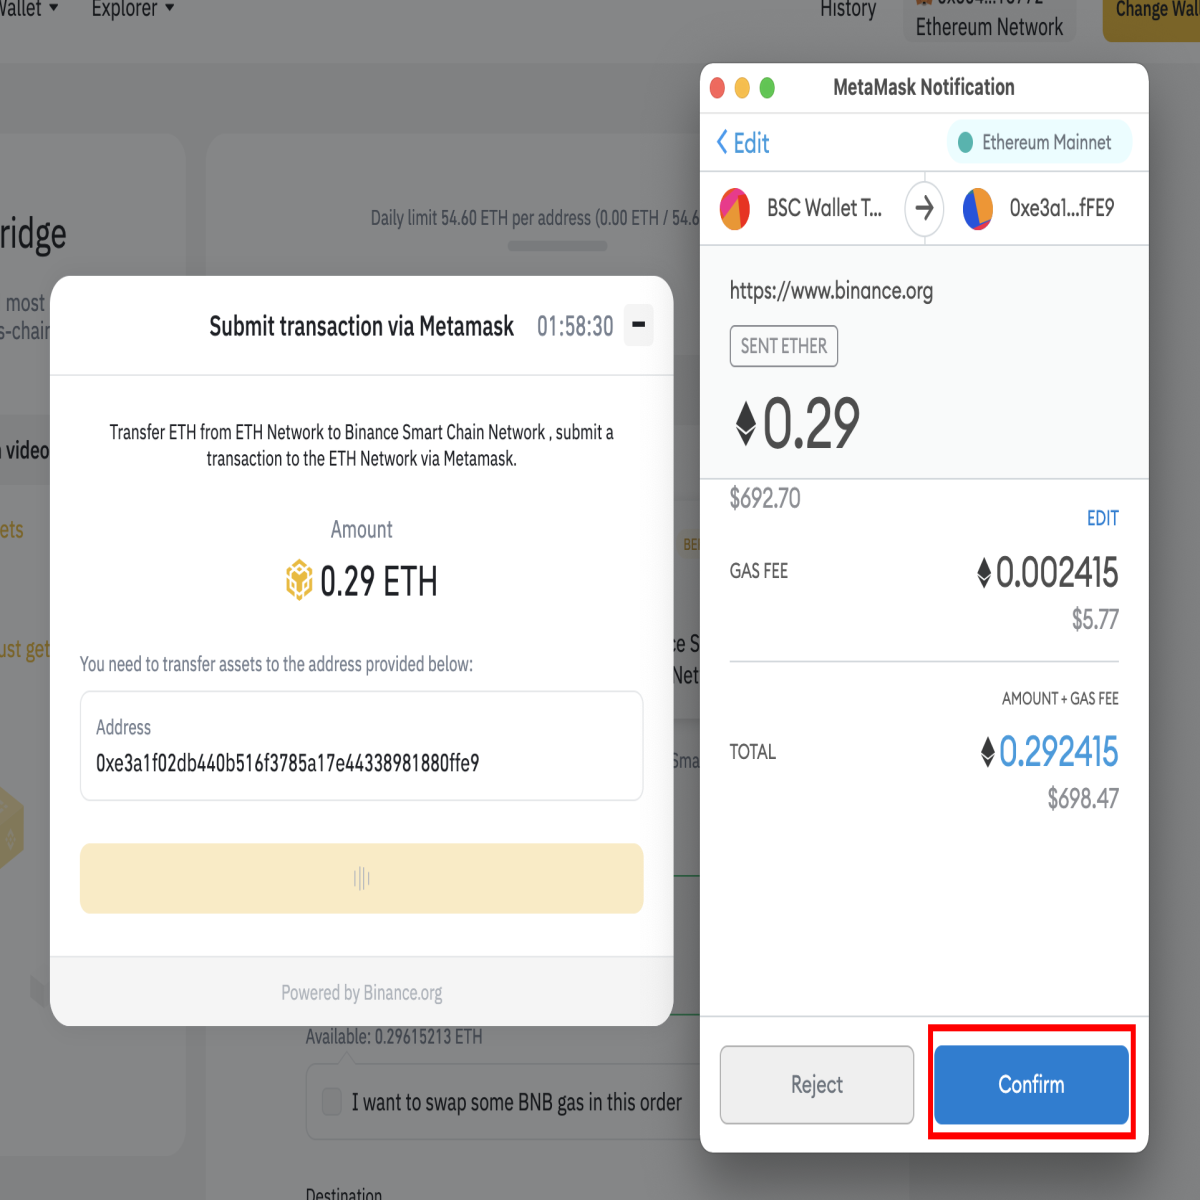
The next window will show you an address to send the $ETH to. You can simply hit “Submit transaction with MetaMask”;
This will bring up a separate MetaMask window, asking you to confirm a transfer. As you can see, the fee is not so high to swap your $ETH from the Ethereum Network to the BSC Network. This swap cost me around $5. If you are happy to confirm the swap, simply hit confirm;
While the transaction is still waiting to be seen on the Ethereum network, you might see this message in the top right-hand corner;
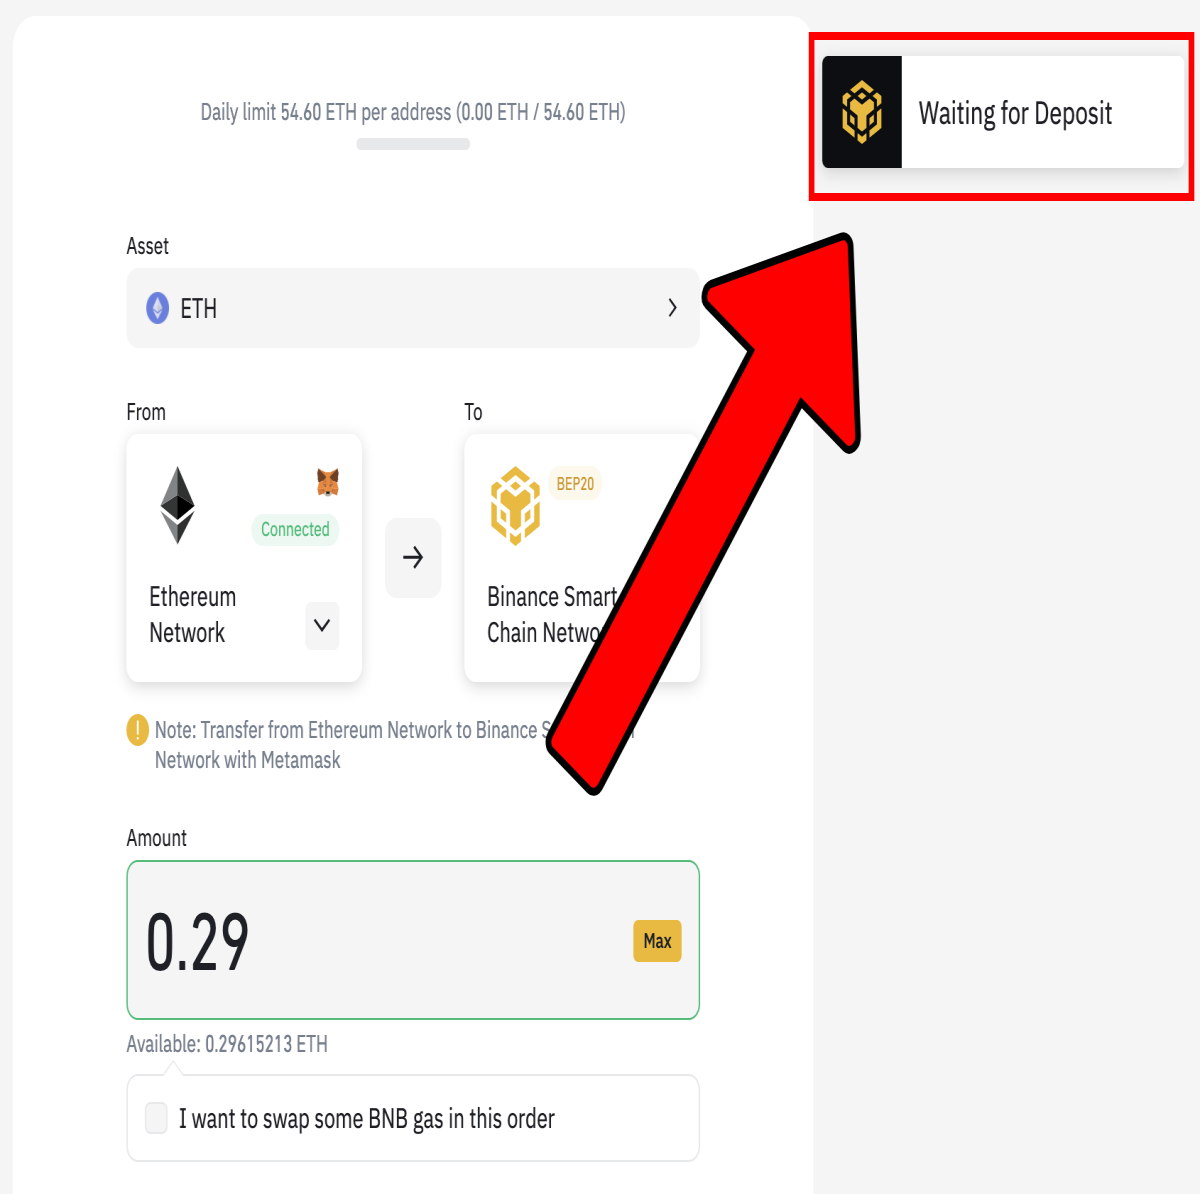
Eventually, the message will switch to the following;

It shows that the network is waiting for confirmations. You can click the message to see how many confirmations are remaining;
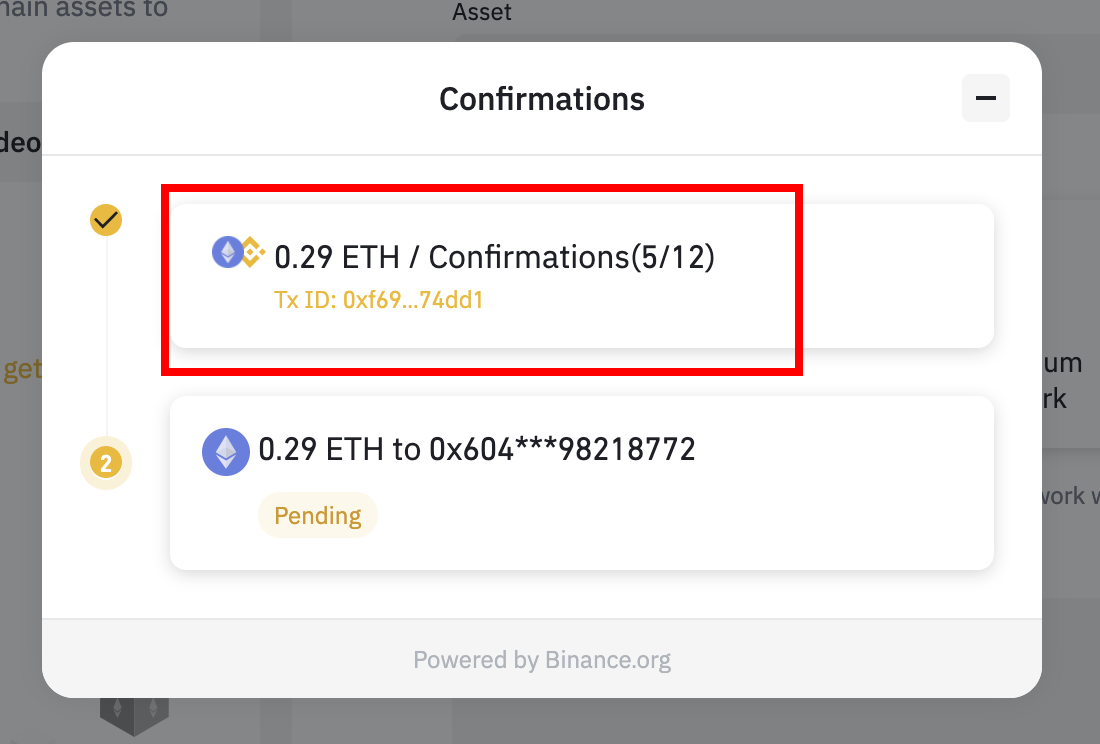
Here, you can see that we still have seven confirmations before the swap is completed.
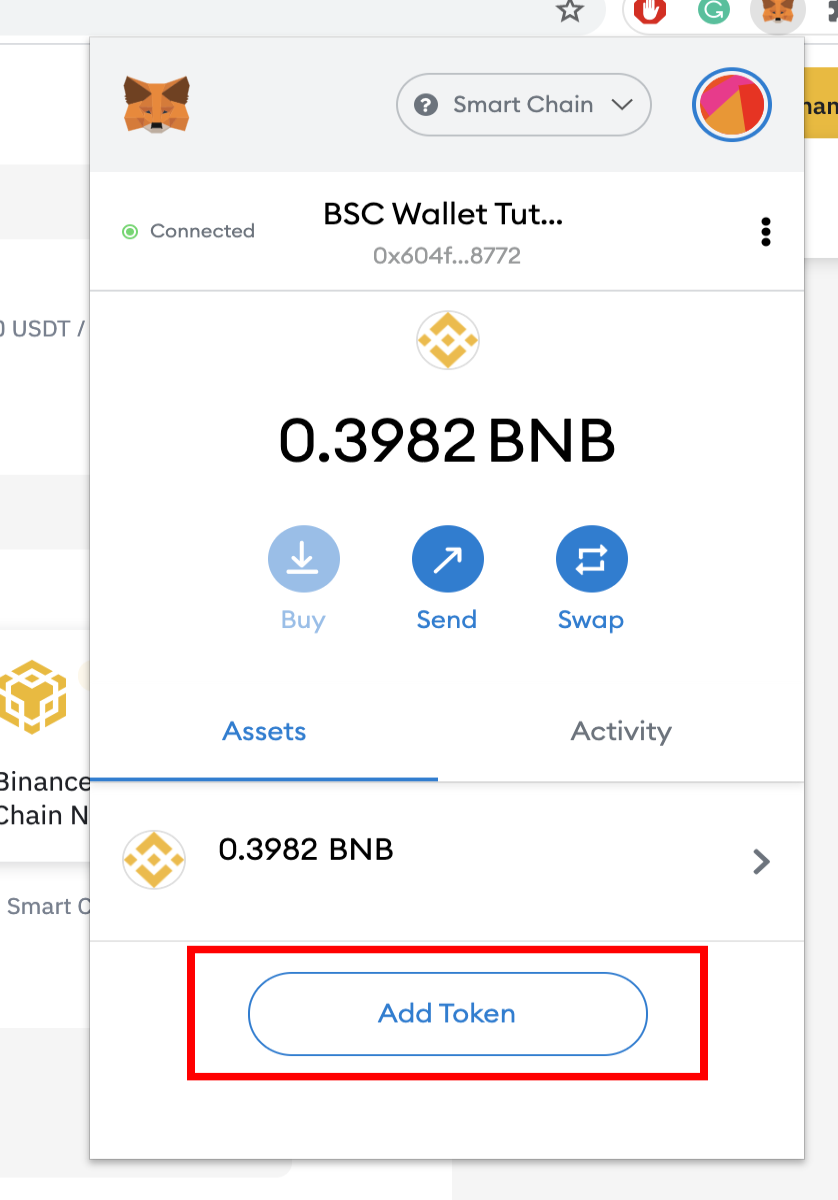
In the meantime, we can switch our MetaMask over to the Binance Smart Chain Network and add the Ethereum token to our wallet so we can see it when the confirmations are complete.
To switch to the Smart Chain, hit the “MetaMask” icon and then hit the “Ethereum Mainnet” tab to select “Smart Chain” in the following menu;

Once we have selected the Binance Smart Chain, we will need to add the “$ETH” token to our wallet. Go ahead and click “Add Token”;
To add $ETH on the BSC, we need to select “Custom Token” and fill in the following details;
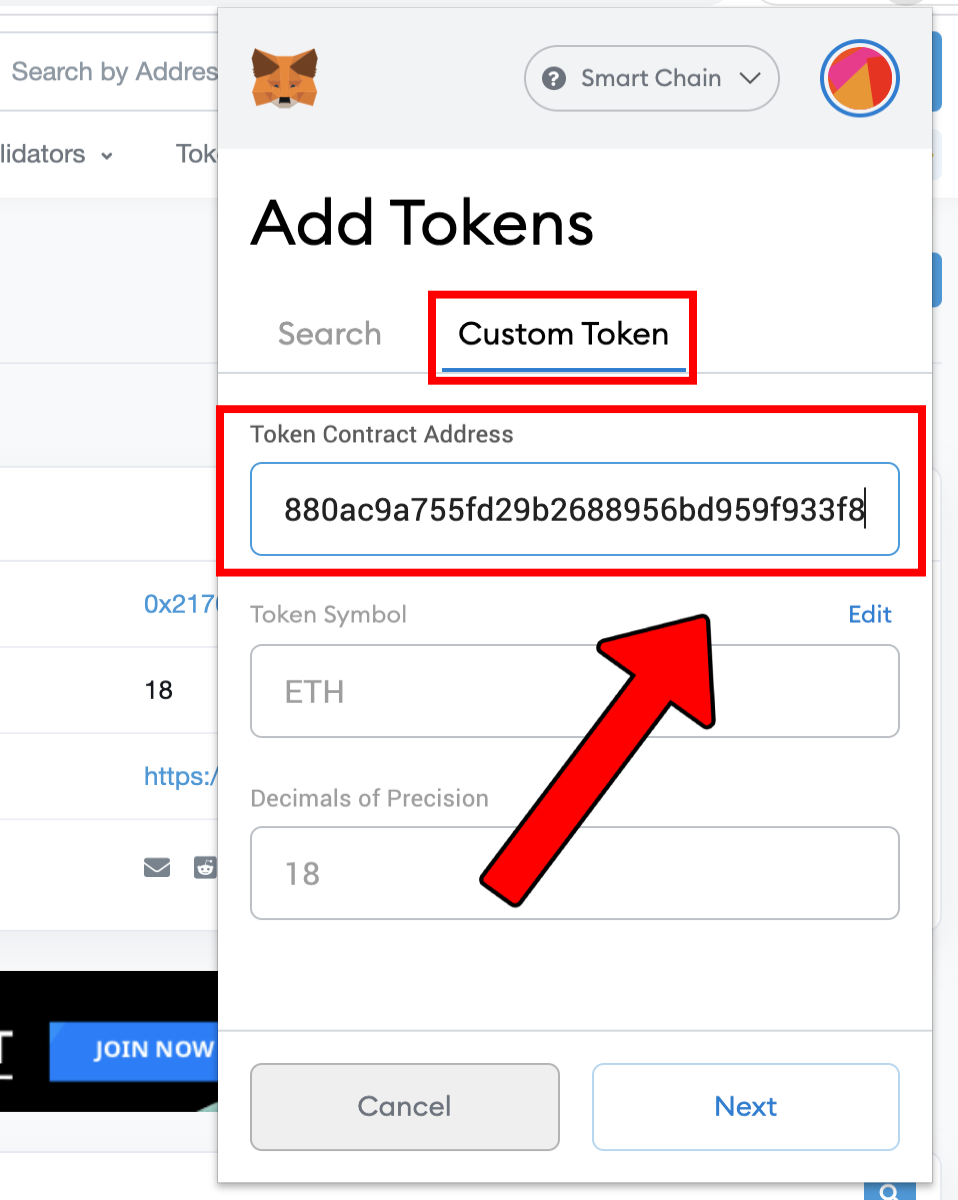
The contract address to import $ETH is;
0x2170ed0880ac9a755fd29b2688956bd959f933f8
You can confirm this by heading over to bscscan.com and searching for ETH in the search box;
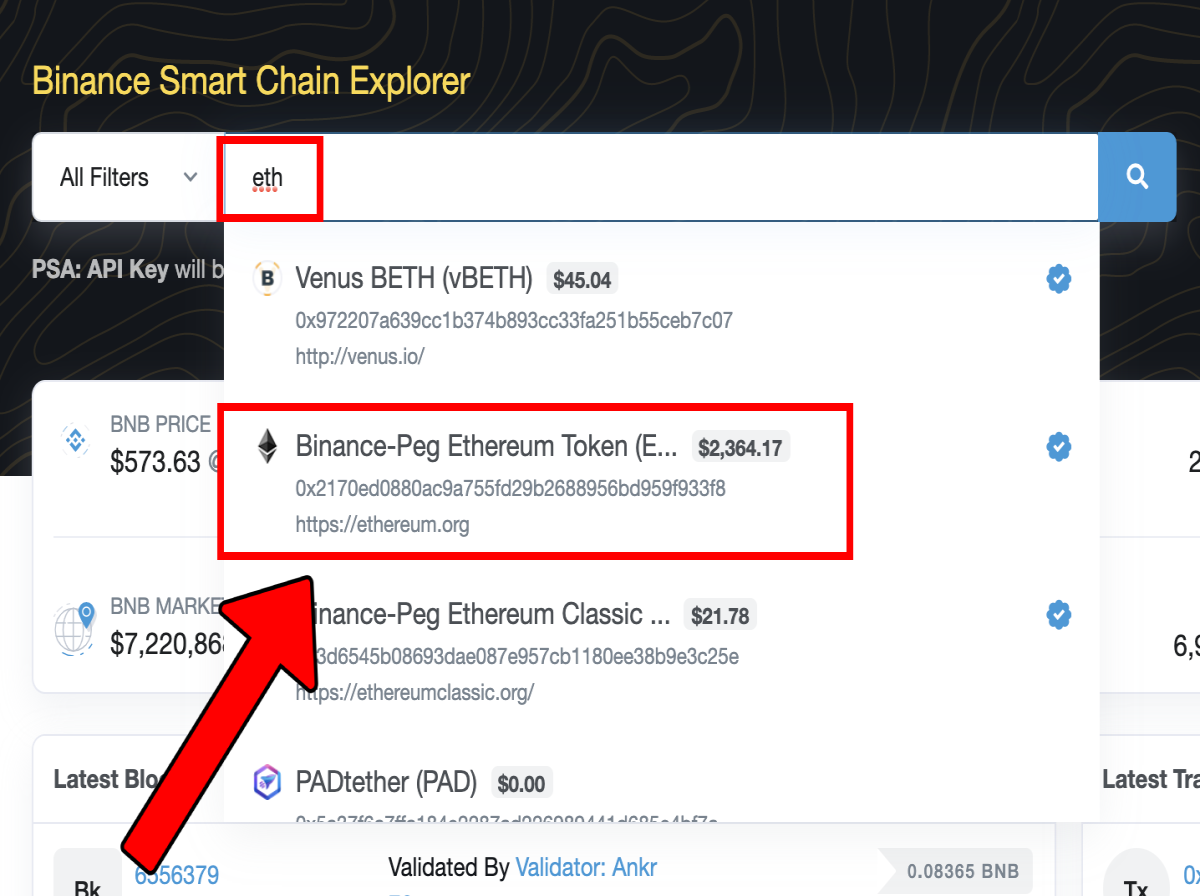
The field we are searching for is the Binance-Peg Ethereum Token. If you click that, the contract address will appear on the following page.
Once you have entered the contract address in click next to bring up the following screen;
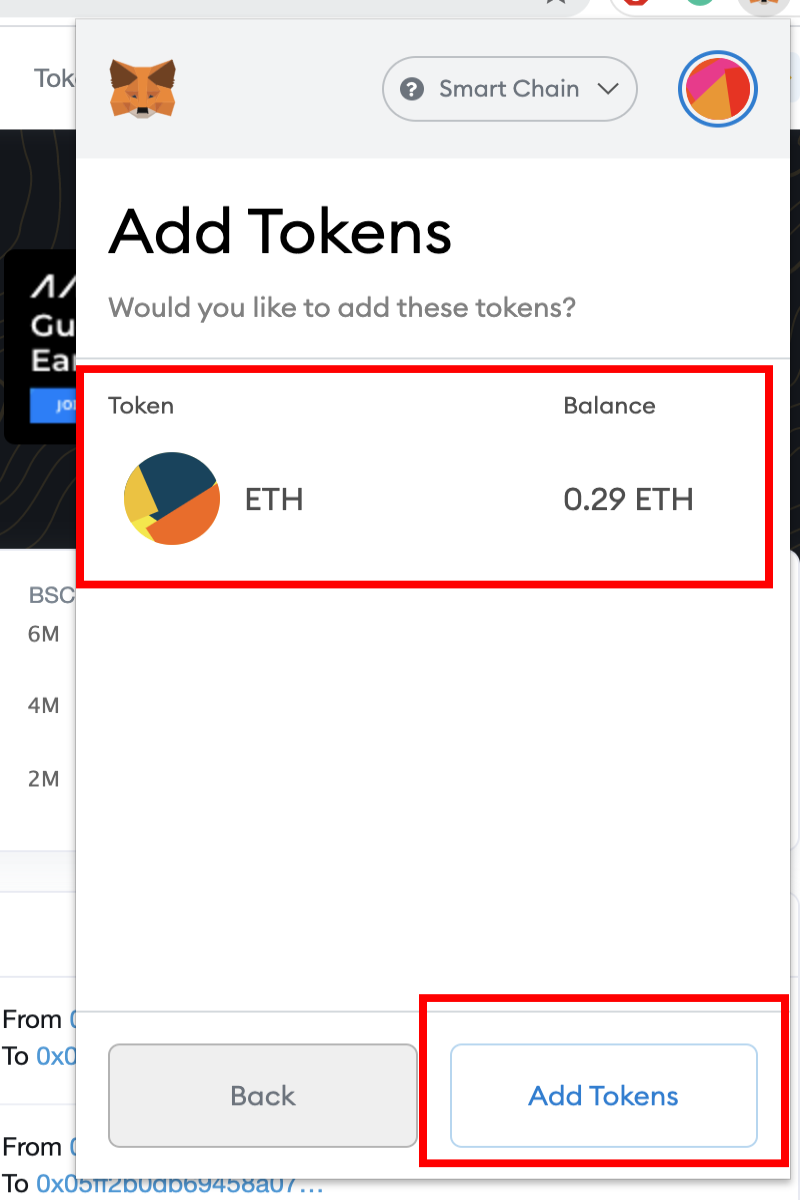
By now, you should have had enough confirmations to see the $ETH in your wallet. As you can see, my 0.29 $ETH I swapped on the Binance Bridge is now showing. Go ahead and click “Add Tokens.”
You should then be able to see your $ETH alongside any other tokens you might have in the BSC wallet. As you can see, I also have some $BNB in there;
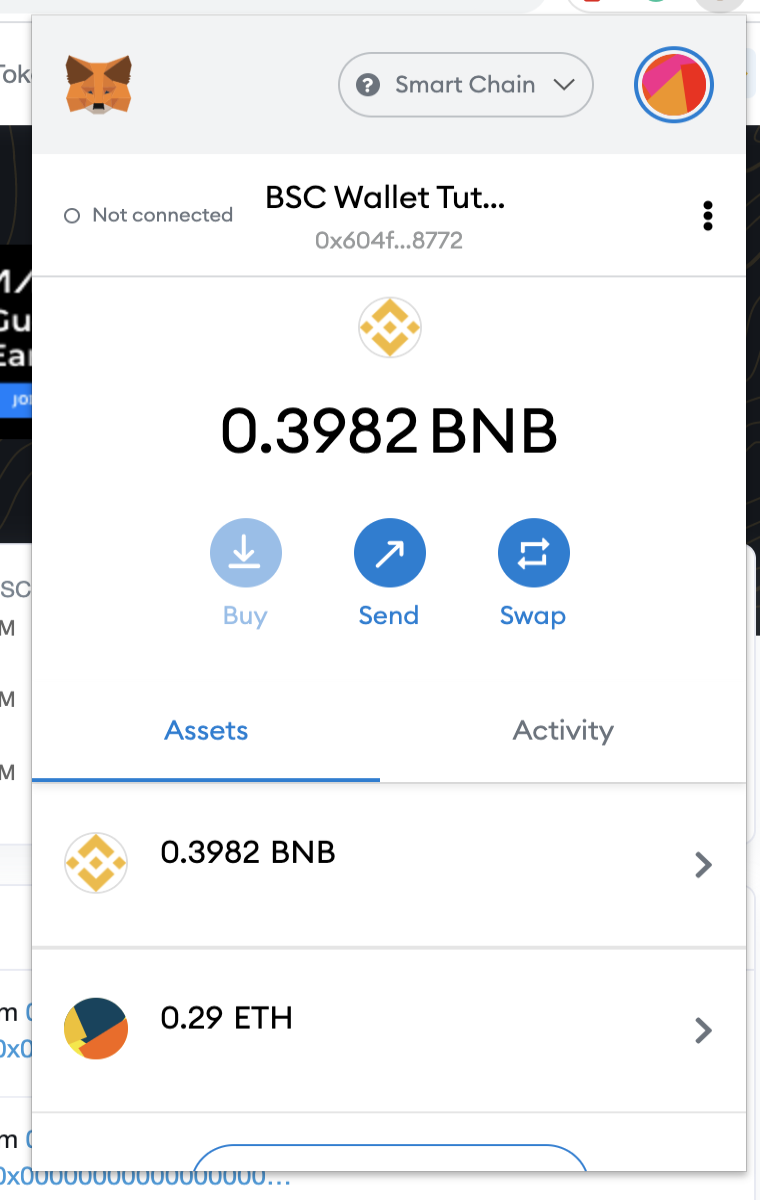
That’s all there is to it. You have now successfully swapped some $ETH over from the Ethereum Network to the Binance Smart Chain. You can now use this BEP-20 $ETH on platforms such as Pancake Swap and trade it for other BEP-20 assets.


