The all-important “C” drive is, for most people, the core of the PC, where their operating system is installed and all the crucial system files are kept. Inevitably, this is also the drive that gets filled up most easily due to endless Windows updates, downloaded files that you forget about, and the fact that by default, everything saves to the “C” drive.
Here we show you how to clean up your drive, recover some space, and subsequently get it running nicely and quickly again.
Delete Temporary Files Manually
Below, we show you some tricks that clean out your various temporary files automatically, but those methods (like Storage Sense and Disk Clean-up) won’t do a complete job of clearing out temporary files, and there’s a good chance that the biggest, most hard-drive-hogging temporary files will remain in your Temp folder for a bit longer. (The automatic methods will wait for files to reach a certain age – one week, usually – before deleting them.)
Note: make sure you’re not running anything when deleting temporary files manually. If you delete temporary files related to an app you’re currently running, it may crash, and you may lose whatever you were working on at that moment.
To find your main temporary files folder, the default directory is “C:\Users\Rob\AppData\Local\Temp” (or you can hit Win + R, then enter %temp%).
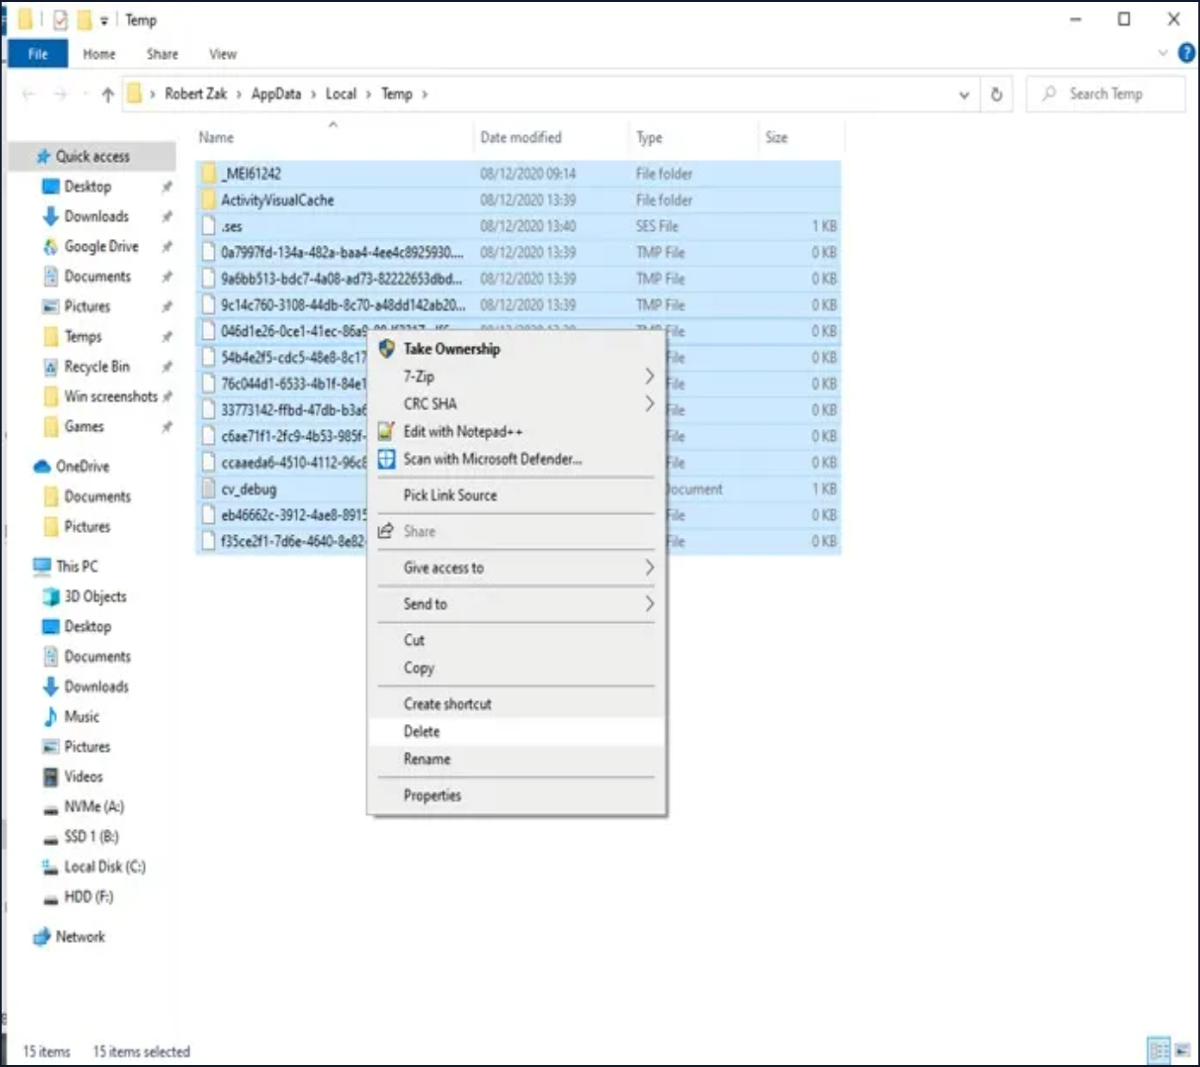
To see how much space the Temp folder is taking up, select everything in it using Ctrl + A, then right-click any file and click Properties. If you’re happy to go ahead with the delete, make sure everything is selected using Ctrl + A, right-click, then click Delete.
Use Storage Sense
Windows 10 has a handy feature called Storage Sense, which monitors the storage space on your PC, then jumps in and cleans things up if you’re running low. It does basic things like clean your Recycle Bin, remove old files in your Downloads folder, and delete temporary files on your PC.
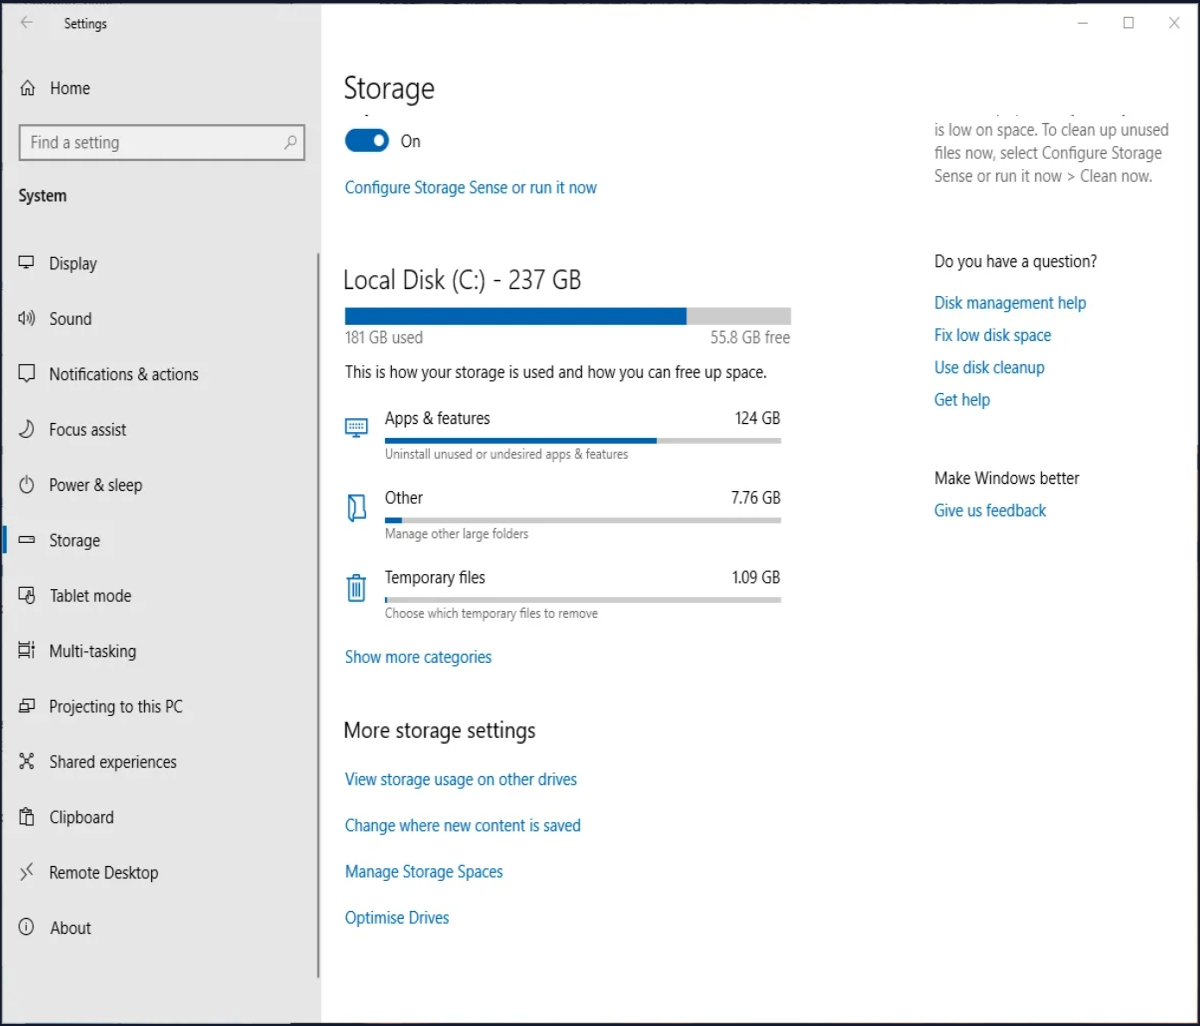
To turn this feature on, go to “Settings -> System,” then click “Storage” in the pane on the left.
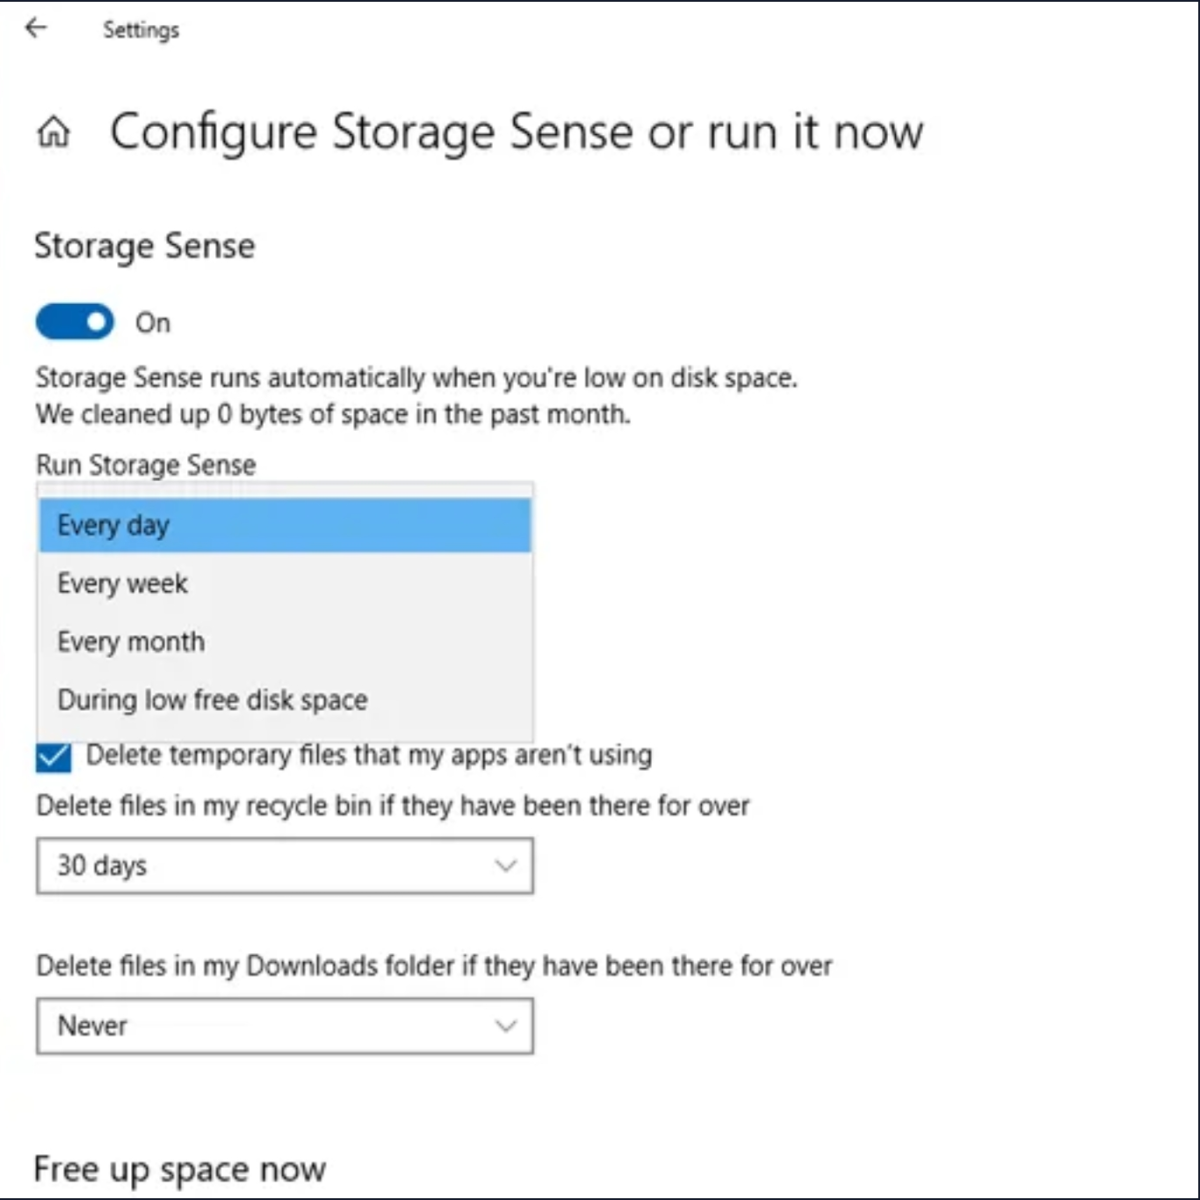
Click “Configure Storage Sense or run it now,” then in the new window click the slider under Storage Sense so that it’s “On.” You can then use the drop-down menu below to choose whether you want it to run when you’re low on space, daily, weekly or monthly.
In Storage Sense, you’ll also see that you can get it to automatically delete files in your Recycle Bin that have been there for a certain amount of time, and even files in your Downloads folder (which, from my experience, is definitely a place where unused files tend to outstay their welcome).
Scan for Large Files on Your Hard Drive
Using Windows Explorer, you can scan your entire hard drive for files based on their size. The amount of times I’ve found hefty redundant files sitting around for years is unbelievable.
To do this search, open a Windows Explorer window, select your “C” drive, then click the “Search (C:)” search box at the top-right of the window.
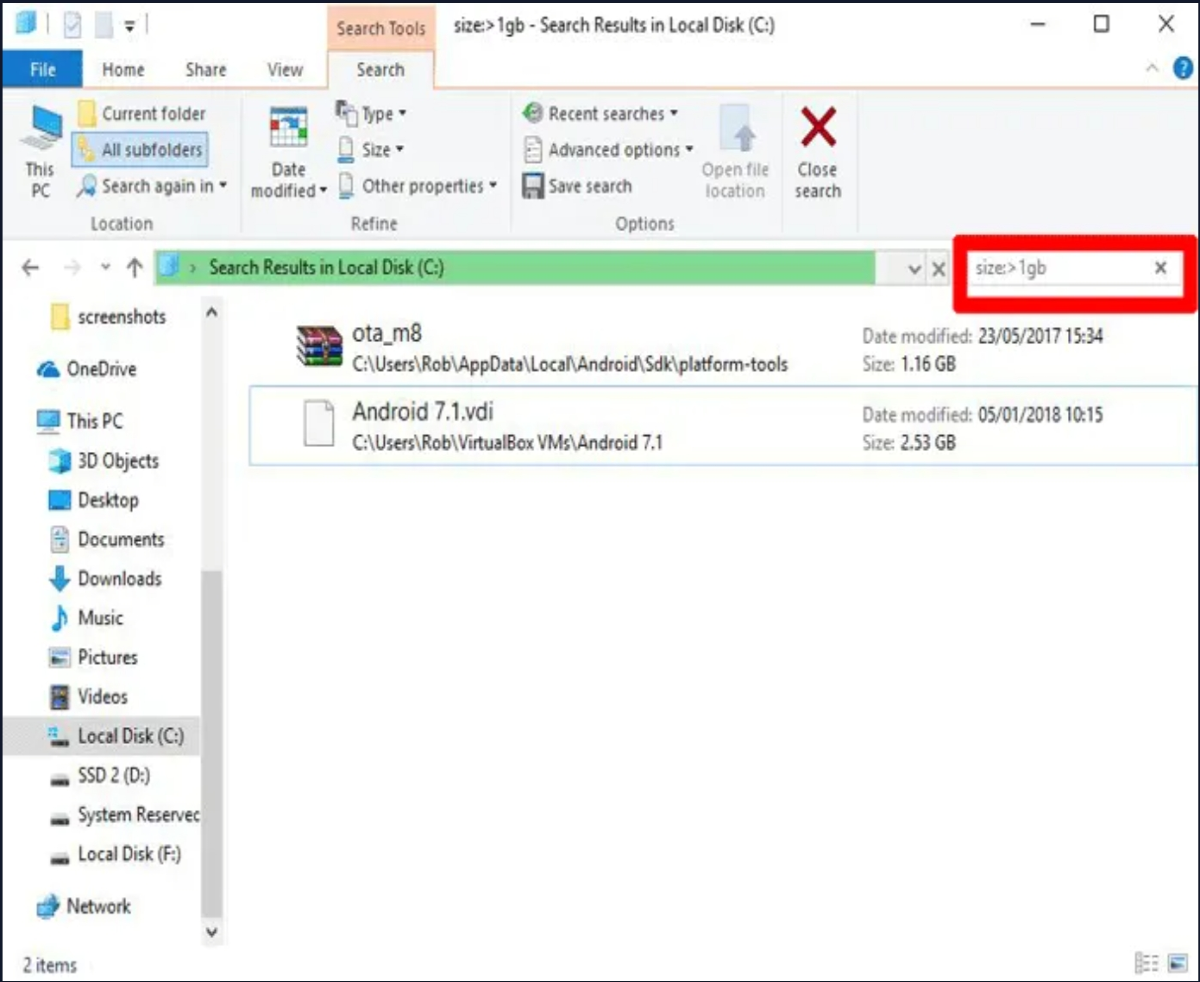
Type “size:” and you’ll get a bunch of autofill options showing varying sizes of files to filter for. You can use one of these presets, or if you want to get more specific about the size of file you’re looking for, you can type “size:>1gb” to look for files over 1GB in size and so on.
You can delete files directly from the results or right-click, then select “Sort by -> Size” to order them by size and quickly see which ones need deleting. Just by testing this, I’ve discovered an old Android 7.1 VM that I really don’t need any more. Just don’t delete anything that looks important. (For example, stuff from the “C:Windows folder” or game files that tend to be quite large.)
Uninstall Windows Shovelware and Space-Hungry Apps
In the “Apps & Features” window (you’ll find it by right-clicking the Start button), you can sort the list by “Size” to see which applications are the most HDD-hungry. You may be surprised by the results and may wish to remove apps as appropriate. Think about whether you really need all those space-hungry apps and delete as appropriate.
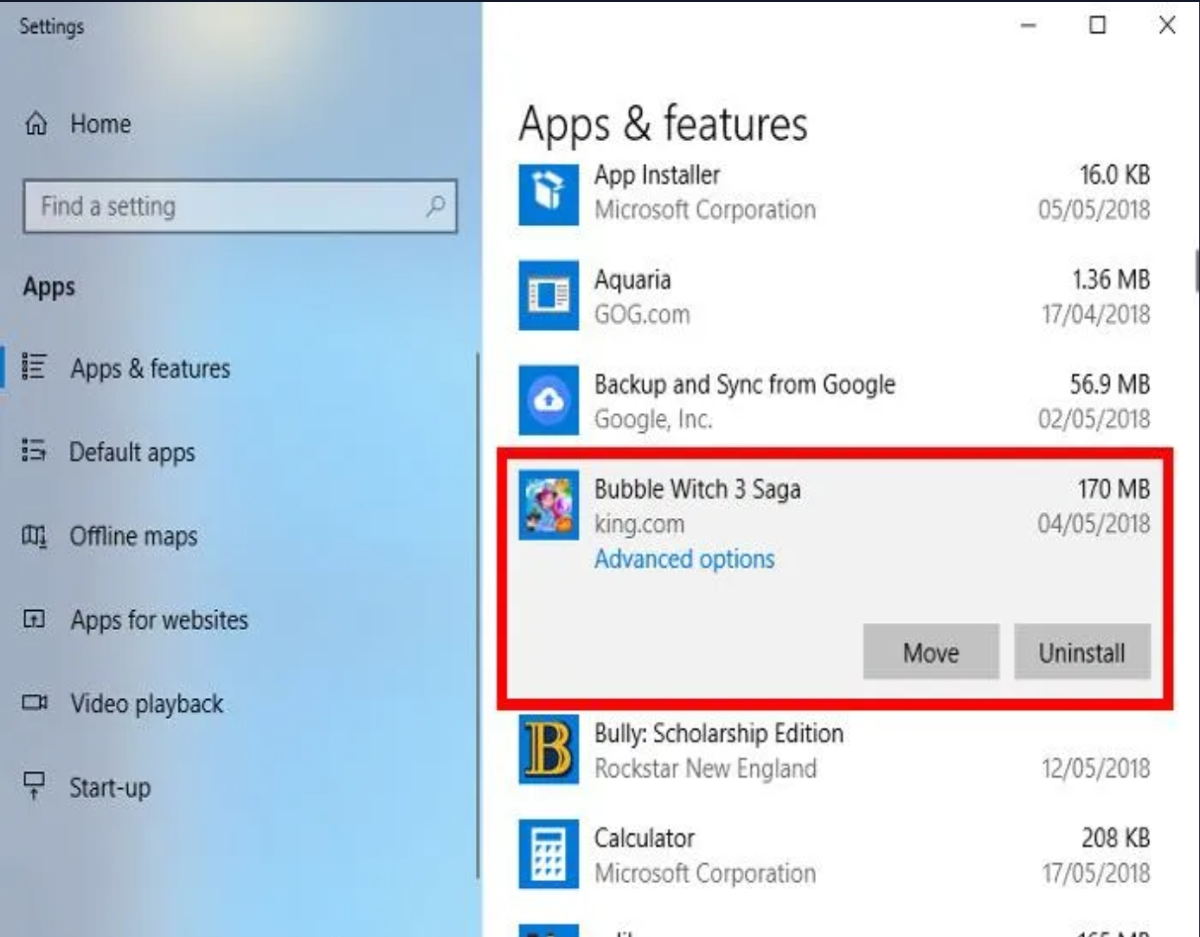
Another thing that may surprise you is that you’re the proud owner of games like Bubble Witch 3 Saga and Minecraft, which you never wanted in the first place! Simply uninstalling them from the “Apps & Features” list won’t suffice, however, and you will need to remove them using the Powershell.
Use Disk Clean-Up Utility
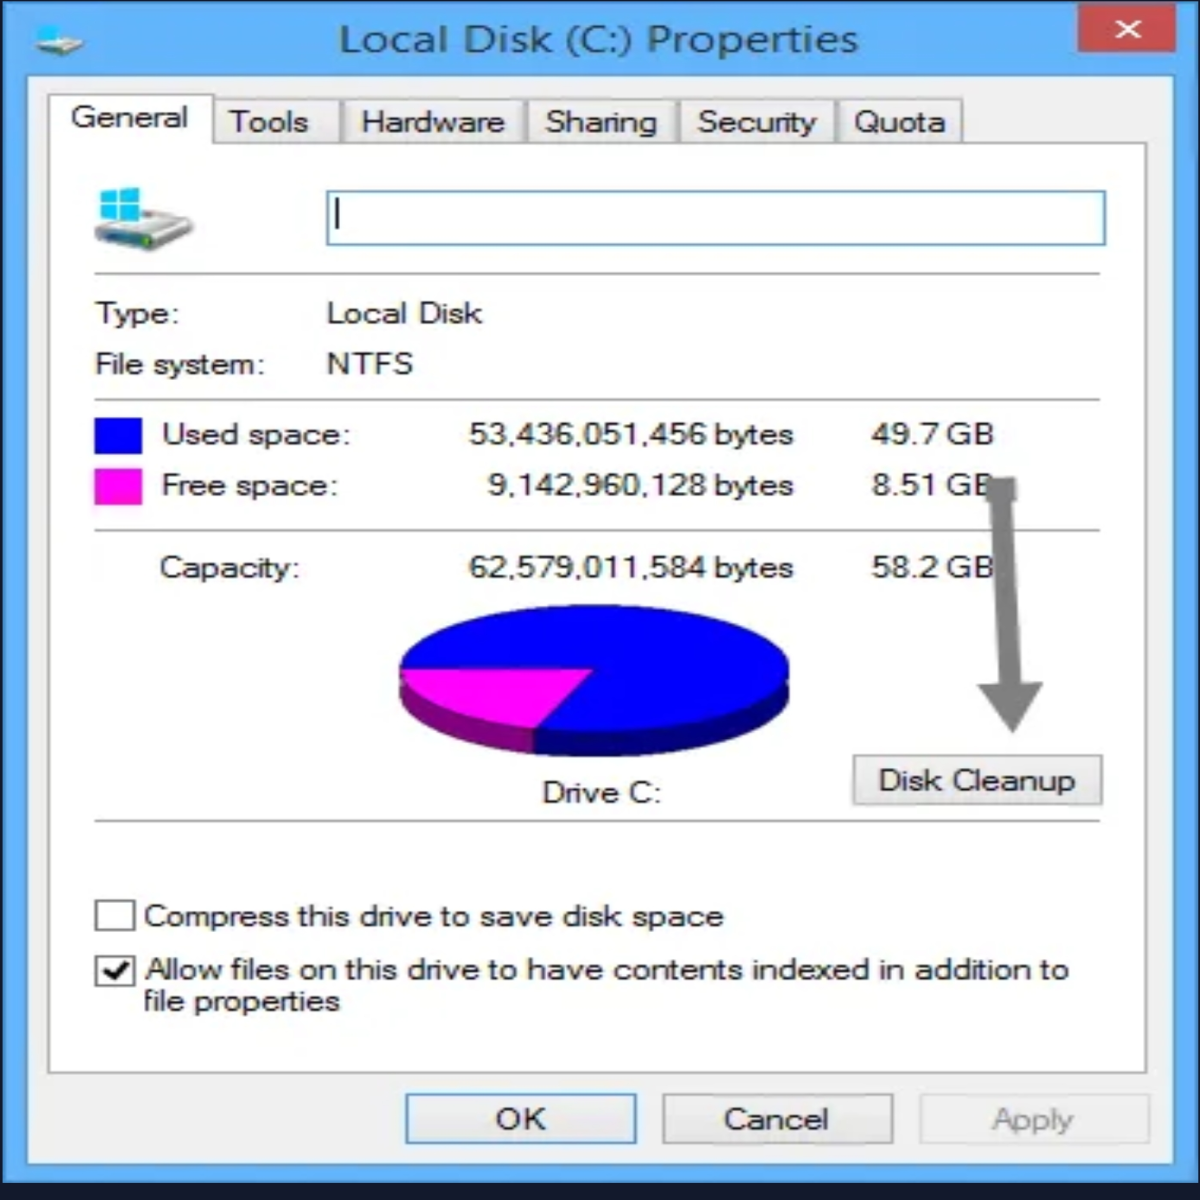
You’re probably aware of Windows’s built-in Disk Clean-Up utility but have not been using it. This is the first place to look to free up some space. To start using it, launch Windows Explorer, right-click on the C drive and select “Properties” from the list.
Once the Properties window is open, click “Disk Cleanup” to open the utility. Here, in the “files to delete” box, select all the checkboxes like System memory error dump files, Recycle Bin, set up log files, etc.