
Storing cryptocurrency safely is essential for any investor, and the XDC Network (XDC) offers enterprise-grade blockchain solutions that have gained considerable popularity. For those looking to store XDC securely, a hardware wallet like the D’CENT Biometric Wallet is a highly recommended choice. The D’CENT Wallet, with its biometric features, offers enhanced security by requiring fingerprint verification for access, making it both safe and user-friendly.
In this guide, we’ll walk you through setting up the D’CENT Wallet and securely storing your $XDC.
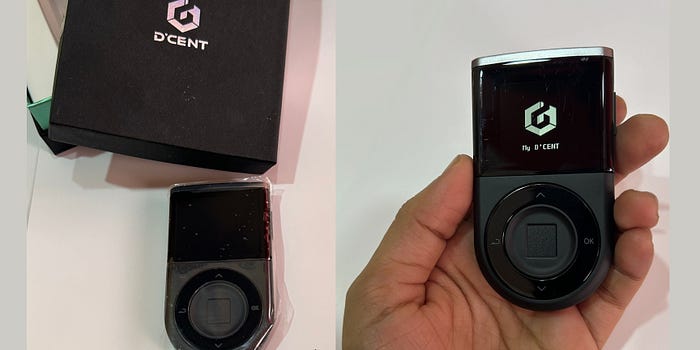
How to Purchase the D’CENT Biometric Wallet
To enjoy maximum security for your crypto holdings, you can order the D’CENT Biometric Wallet directly from the official D’CENT store. This link will take you to the dedicated product page where you can review all the wallet’s specifications and proceed with your purchase.
Step 1: Unboxing and Initial Setup
- Unbox your D’CENT Biometric Wallet: Inside, you’ll find the wallet, a USB cable, and a quick start guide.
- Turn on the Device: Hold the power button on the D’CENT Wallet to turn it on. Once on, follow the on-screen instructions.
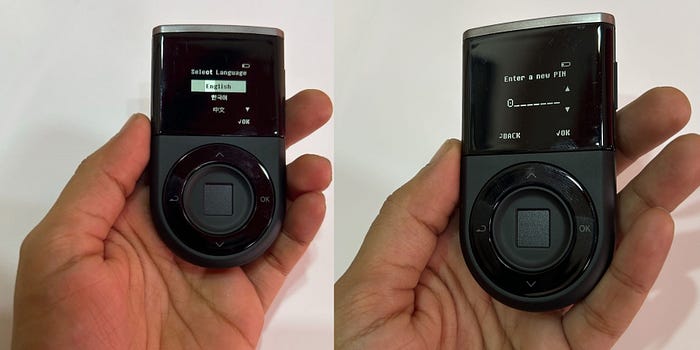
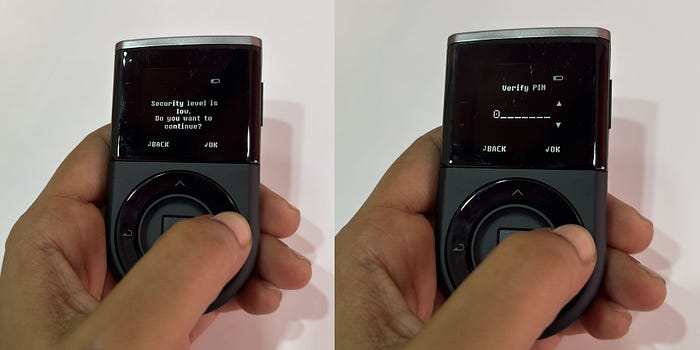
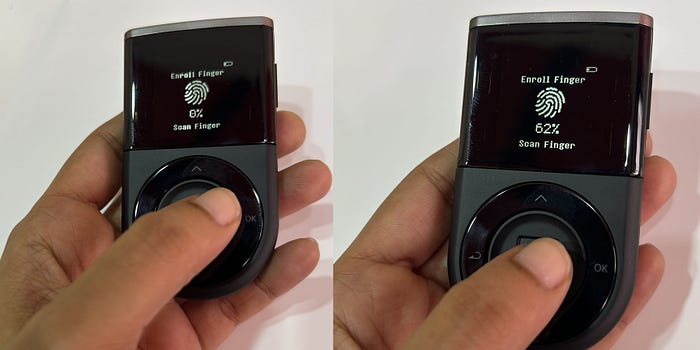
Step 2: Setting Up the Biometric Security
- Select a Language: After powering on, select your preferred language from the options provided.
- Set Up a PIN: You’ll be prompted to create a secure PIN. Ensure it’s a combination that’s hard to guess but easy for you to remember.
- Register Your Fingerprint: Follow the prompts on the wallet’s screen to register your fingerprint. This biometric security measure will be used to unlock the device and approve transactions.
Step 3: Connecting the Wallet to the D’CENT Mobile App
To fully use the D’CENT Wallet, you’ll need to pair it with the D’CENT mobile app. Here’s how to do it:
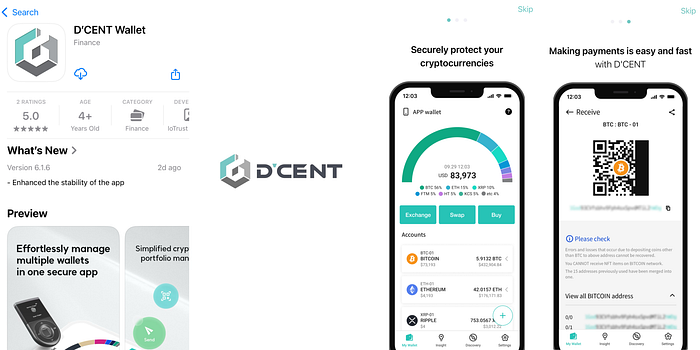
- Download the D’CENT Mobile App: Available on iOS and Android, download and install the app from the official app store.
2. Bluetooth Pairing:
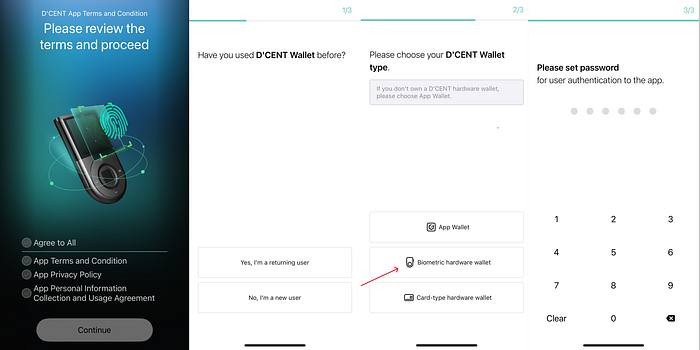
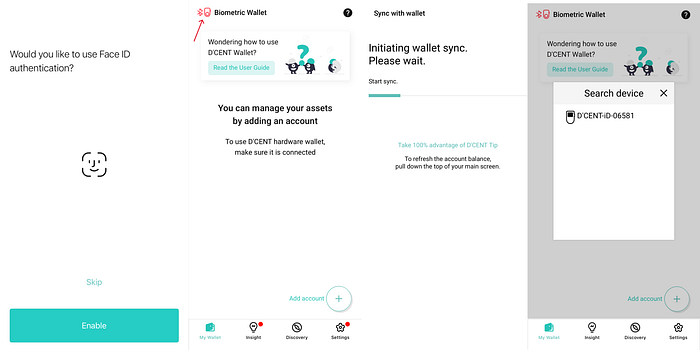
- iPhone Users: Turn on Bluetooth from your iPhone settings. Open the D’CENT app, tap on “Connect Hardware Wallet,” and select the D’CENT Biometric Wallet from the list of available devices.
- Android Users: Similar to iPhone, turn on Bluetooth, open the D’CENT app, and follow the prompts to pair with your D’CENT Biometric Wallet.
3. Verify the Connection: Once the pairing is complete, the wallet screen will show a confirmation message.
Step 4: Creating a Wallet
Create a New Wallet:
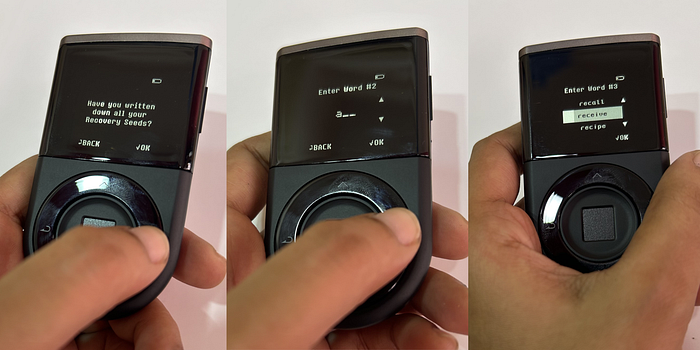
- Select “Create Wallet” if you’re setting up for the first time. The device will generate a new wallet and provide a 24-word recovery seed phrase.
- Important: Write down this recovery phrase on paper and store it in a secure location. This phrase is the only way to recover your wallet if the device is lost or reset.

Step 5: Adding XDC to the D’CENT Wallet
With the wallet set up and paired, you can now add XDC to your D’CENT Wallet:
- Navigate to the “Manage Wallet” Section: On the D’CENT mobile app, tap on “Manage Wallet.”
- Select XDC from the Token List: Scroll or search for XDC in the token list. Once found, tap to add it to your list of supported tokens.
- Confirm on Your D’CENT Biometric Wallet: The D’CENT device will prompt you to confirm the addition of XDC to your wallet. Verify and approve on the wallet screen.

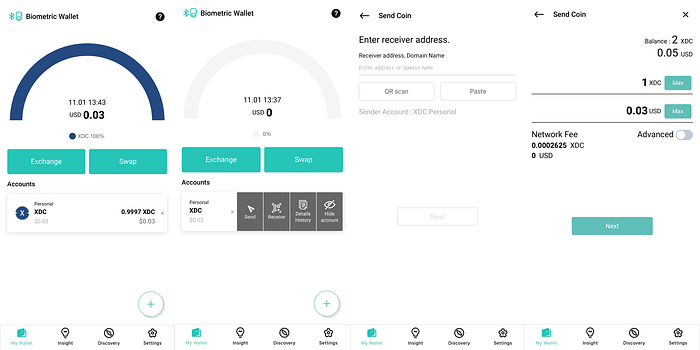
Step 6: Receiving XDC
To receive XDC, follow these steps:
- Get Your XDC Wallet Address:
- Open the D’CENT mobile app and navigate to your XDC account.
- Select “Receive” to generate your wallet address QR code and copy the address.
2. Share Your Wallet Address: You can use this address to receive XDC from exchanges, other wallets, or peers.
3. Verify the Address on Your Hardware Wallet: For added security, double-check the wallet address displayed on the D’CENT Biometric Wallet screen before sharing it.
Step 7: Sending XDC from the D’CENT Wallet
Sending XDC from your wallet is just as secure and straightforward:
- Initiate a Transaction:
- Go to your XDC account on the D’CENT mobile app and select “Send.”
- Enter the recipient’s XDC address and the amount of XDC you wish to send.
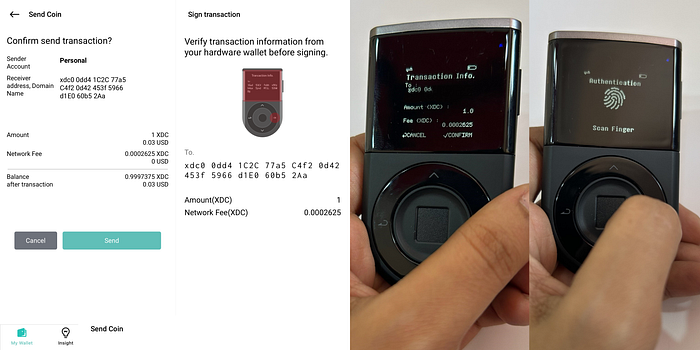
2. Confirm on Your D’CENT Biometric Wallet:
- The wallet will prompt you to review transaction details. Double-check the recipient address and amount displayed on the device screen.
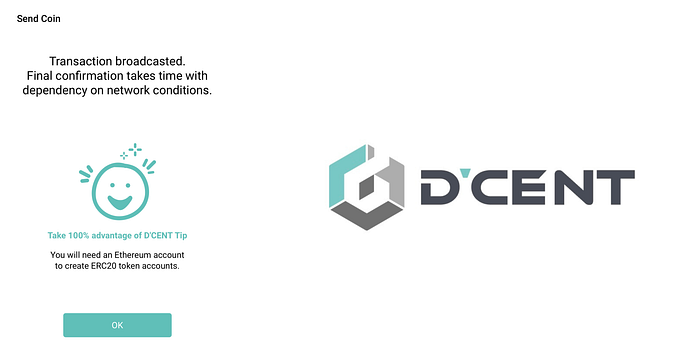
- Approve the transaction using your fingerprint.
Step 8: Ensuring Long-Term Security
- Regularly Update Firmware: D’CENT releases firmware updates to improve security. Connect the wallet to your computer via USB and follow the instructions on the D’CENT website to update the firmware as new versions are released.
- Backup Your Recovery Phrase: The 24-word recovery phrase is crucial for wallet recovery. Store it securely offline and avoid sharing it or storing it digitally.
- Enable Additional Security Options (if available): Some D’CENT Wallet models may support additional security layers. Review available settings in the mobile app for additional protection options.
Wrapping Up
The D’CENT Biometric Wallet offers a user-friendly and highly secure way to store your XDC holdings. By following these steps, you can confidently protect your assets and benefit from the added security features of a biometric wallet. Storing XDC on a hardware wallet like D’CENT ensures that your holdings are offline and safeguarded from potential online threats, giving you peace of mind for the long term.
To purchase the D’CENT Biometric Wallet and secure your XDC assets with advanced fingerprint technology, simply visit the official D’CENT store and place your order. This wallet offers top-tier security and convenience, making it an ideal choice for safeguarding your crypto holdings.
For more information, refer to the official D’CENT User Guide.


