
If Bitcoin was the great catalyst for the emergence of modern cryptocurrencies as we know it, Ethereum was the great catalyst for the emergence of thousands of other cryptocurrencies, NFTs and Web 3.0 itself, which is increasingly being talked about. Vitalik Buterin, creator of the Ethereum network and his team, saw in blockchain technology not only the possibility of creating virtual money, that is, decentralized and secure, but also the opportunity to allow the creation of “smart contracts”. Thus, any programmer around the world could publish their codes to be executed on the Ethereum network and thus begin the emergence of an entire ecosystem even larger and more vibrant (although still smaller in capitalization) than the original Bitcoin.
In 2014, it was Gavin Wood, one of the founders of Ethereum, who had the idea of creating the Solidity language, specifically for coding Smart Contracts on the Ethereum network and other compatible networks (forks, such as the BNB Smart Chain that emerged years later ). Smart contracts written in Solidity are published on the network and every time they are activated by clients, they run in an interpreter called EVM, the Ethereum Virtual Machine, similar to what happens with the Java VM, if you know it.
The Solidity language is today the main technology related to smart contracts that you should study if you want to learn how to create applications that run on the blockchain, mainly Dex, Defi, DAOs and of course, Web3 dapps. A young language, similar to the ECMA standard for those used to JS programming, but with static typing. In fact, the contracts themselves are very reminiscent of classes existing in other Object-Oriented languages.
My idea with this tutorial is to give you an introduction to this language and technology, awakening your interest (and ability) to learn more about this universe that never stops growing. So let's go!
#1 – Environment
First, it is important to understand that there is no single way to create your smart contracts with Solidity. We will do this in an amateur but didactic way in this tutorial using an online tool called Remix. If you're looking for a more professional approach, I recommend Truffle with Node.js, which I hope to cover here on the blog in another tutorial.
Remix is a free online IDE for Solidity programming. With it, we won't need to configure absolutely anything on our machine and the compilation and deployment processes become extremely abstracted. To use Remix, simply access the tool's website at this link and you will automatically have a new project created for you.
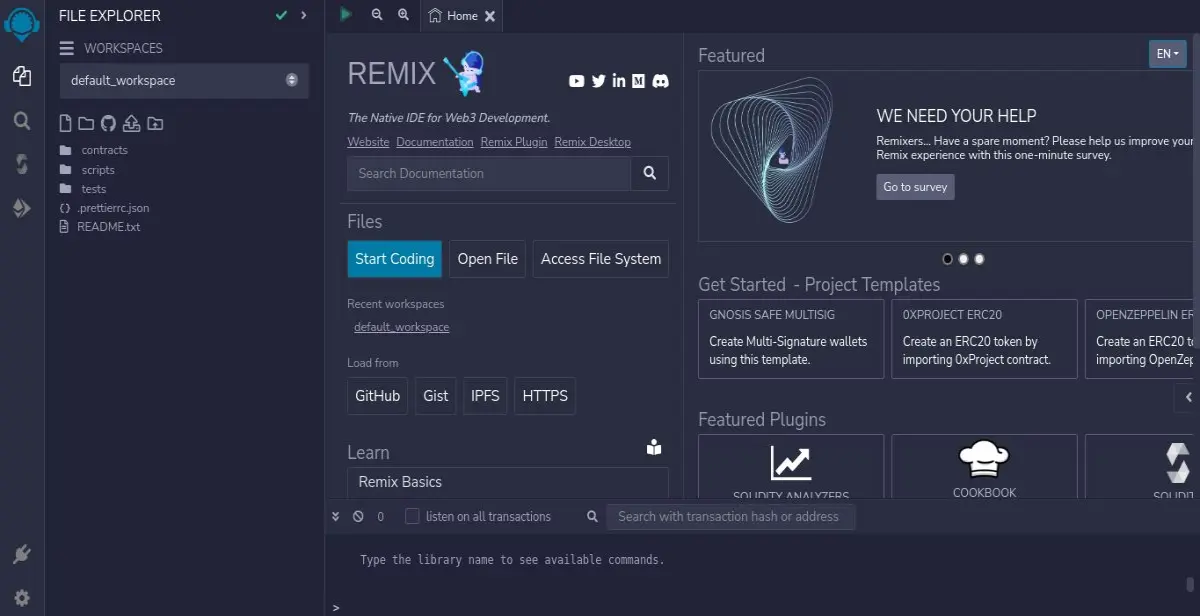
In the contracts folder you will find some example contracts and that is where we will work. Your project folders are accessed through the File Explorer tab in the left side menu. Contracts are files with the “.sol” extension (from Solidity) and if you want, you can delete the contracts that Remix created for you, as we will not use them.
Remix is an excellent option to start with Solidity although later you will want to work with something more professional. In it, you will write the contracts, deploy them to a test network and even test your contract, all without leaving your browser and I will show you all of this in this tutorial.
#2 – Creating Hello World
Now, in the contracts folder, we will create our HelloWorld.sol file, which will be our contract file.
Once you have created this blank file, there are two initial instructions that we must place. One of them is the license of your source code and the second statement is the version of the Solidity compiler that will be used to compile this agreement. This is because just as it works with Java, C# and other languages, we write the program (contract in this case) in a language and it needs to be compiled into a machine language that will be interpreted by the EVM (Ethereum Virtual Machine) later. Over time, new versions of the language are released with new features and therefore it is important to specify which version you need for your project.
Your file should look like this (my version is 0.9.0). Note that I opted for the MIT license, which you can change at will depending on what makes the most sense for you.
// SPDX-License-Identifier: MIT
pragma solidity ^0.9.0;
Optionally, you can document your smart contract using comments and annotations as below, just below the previous instructions.
/// @title Title of your contract
/// @author Author name
/// @notice Explain what the contract is
/// @dev Additional details for developers
Below all this information we will start coding our first contract. If you already know an object-oriented language before, you'll feel right at home because writing a contract is very similar to writing classes. To begin, you define your contract using the reserved word contract and defining its scope in curly bracket.
contract HelloWorld {

}
Inside the contract you can place your properties and functions, just like you would with classes and we will start by declaring a property called message, just to store the content of a message.
contract HelloWorld {
    string public message = "Hello World!";
}
We define the type of the variable as string (text), the access modifier we set as public (which indicates that it can be accessed from outside the contract), the name of the variable we put message and we assign the value in quotes Hello World for it, in the same way we would do in JavaScript and many other programming languages.
Other valid types for variables, among many:
- bool: true or false;
- int: integers (with bit variations such as int8, int256, etc.);
- uint: positive integers (unsigned, unsigned, with bit variations such as uint8, uint256, etc.);
- address: addresses on the network;
Likewise, the process of creating a function is also very simple and below is an example of a helloWorld function.
contract HelloWorld {
    string public message = "Hello World!";

    function helloWorld() public view returns (string memory) {
        return message;
    }
}
In this example we use the reserved word function to say that we are going to write a function, we give it a name (camel-case) and we open parentheses to define the parameters, which I chose here to have none. Next, we define the access modifier (public, indicating that it can be called outside this contract), the type of function (I used view as we only need to view information from the contract) and the reserved word returns to inform what this information returns , in this case a single string memory variable.
Perhaps the most different point here is the reserved word view, which indicates that this function can read the “state” of the contract, that is, its internal properties/variables. Another option would be the reserved word pure, which indicates that this is a pure function, that is, stateless, without using external variables. It is important to highlight right away that the use of class or function variables directly impacts the cost of calls to this contract, which we will explore in the future here on the blog. And finally we also have the payable functions , which allow someone to send funds (pay) when the function is called.
Furthermore, another point that is worth reinforcing is regarding the access modifier, public , which if not informed will be private by default, that is, without external access. Other options include external and internal, which we will explore another opportunity.
The content of the function itself needs no explanation and now that we have our HelloWorld coded, it's time to test it.
#3 – Testing Hello World
Testing is a crucial part of any software development but Solidity takes it to another level. This is because as your code will be visible on the blockchain and most of the time it will involve money, it is crucial that it is fully functioning and secure. Not only that, transactions on the blockchain are immutable so we don't have room to correct small things later, as is common in the web world.
That said, go to the Compiler tab (it's the one with the Solidity symbol) and click on the “Compile” button which, if everything is ok, will contain your HelloWorld.sol file (or the file you selected in the previous tab) , it will be compiled successfully. If you have any problems, Remix will let you know.
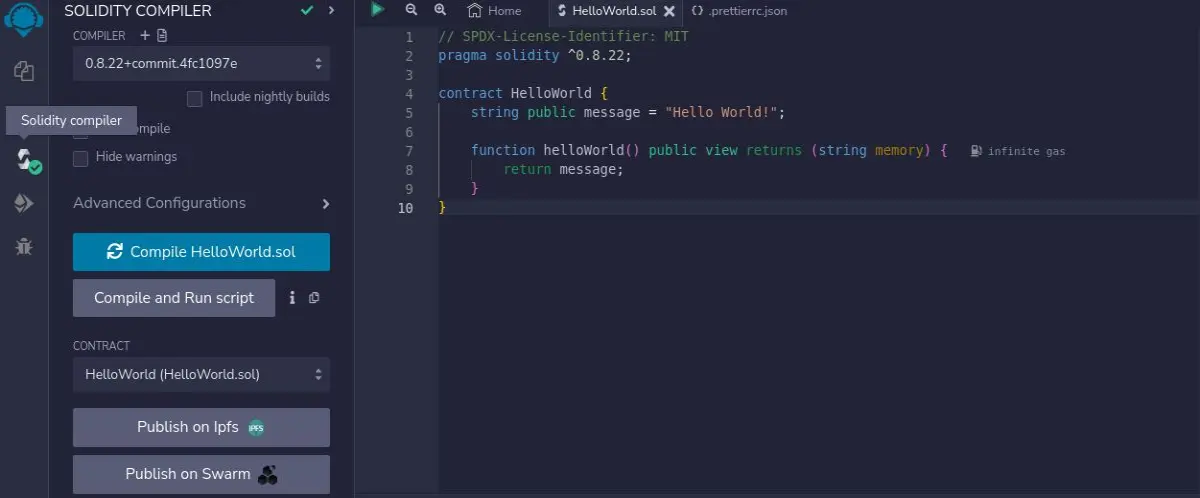
With the contract compiled, you will have access to two very cool pieces of information that we can take a look at. In this same compiler tab, towards the end of it, you will find two small buttons, one “ABI”. another “Bytecode”. Bytecodes are the compiled contract, that is, in machine language. If you open this file you will see a JSON with a lot of hexadecimal in a given part of the file and this is what will be distributed to the network during deployment and when interpreted by the EVM it will execute your contract when requested.
The other button, ABI, is the Application Binary Interface. An interface is like a specification of how to use software, your contract in this case. In the ABI you will have information about the public variables and functions of your contract that can be called by other programs and this information is mandatory for any dev who uses your contract.
But leaving this information aside for now, let's deploy it to test our contract. To do this, go to the last Remix tab (the one at the bottom of the left side menu), Deploy, choose the Remix VM option, select your contract and click on “Deploy”. This will deploy to a Remix test VM instead of the real network, since we don't want to incur costs in the development phase.
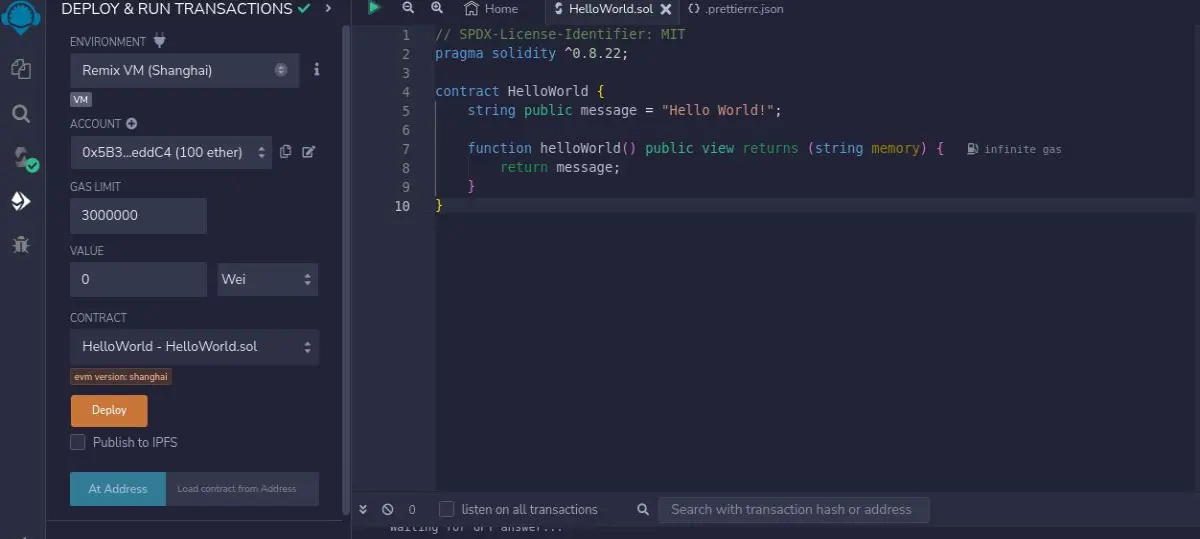
If everything goes well with the deployment, below the deploy button you will have an area where you can test the public properties and functions of your contract. Just click on the buttons and you will see the result below them, which is exactly the result that some software or dapp would have when invoking the respective commands. Note that in the console on the right you also have information about what happens with each call.

And with that we finish our first Solidity with Remix tutorial. If you want to learn how to deploy this contract on the blockchain, how to make a frontend for your smart contract or if you're ready for something even more advanced, like Truffle or HardHat, don't forget to like and follow for more such tutorials!






