Contents:
-
How to create your Atomic Wallet
-
How to fund your Atomic Wallet
-
Atomic Wallet interface guide
-
How to use the exchange feature in the Atomic Wallet
-
How to withdraw from your Atomic Wallet
How to create your wallet
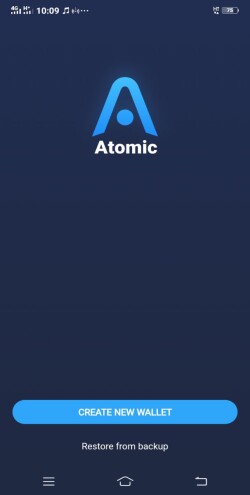
Before create wallet, you need an Atomic Wallet App. If you don’t have one, you can go to https://atomicwallet.io/downloads and install it. Atomic Wallet supports all operating systems (Windows, MacOS, Ubuntu, Debian and Fedora) and also supports mobile phones. This tutorial will explain using Atomic Wallet on an Android mobile.
Step 1. Open Atomic Wallet App and click on Create New Wallet. You can use the Restore From Backup button if you have previously had an Atomic Wallet.
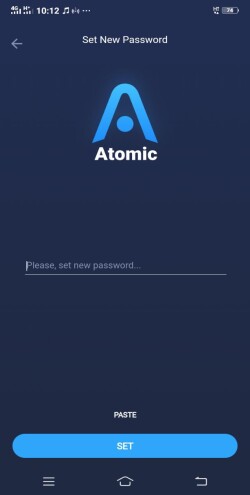
Step 2. Create a safe password. When you are ready, click on Set.
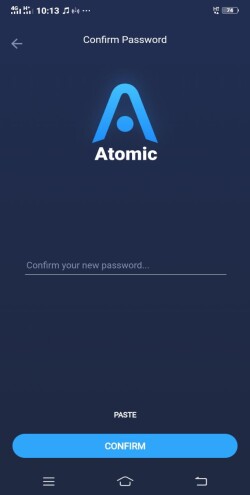
Step 3. Confirm your new password, click on Confirm to continue.
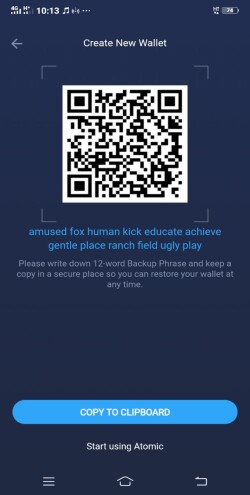
Step 4. Please save 12-word Backup Phrase or take a screenshot. It's useful if you want to restore your wallet at any time. Click on Start using Atomic to enter your Atomic Wallet. And that’s it. Your Atomic Wallet is ready!
How to fund your wallet
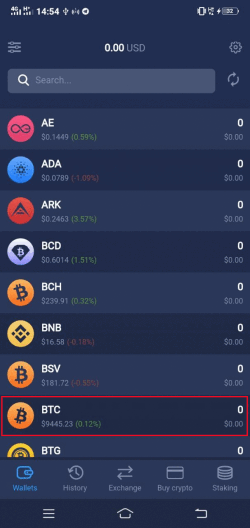
Step 1. Open Atomic Wallet App and select which cryptocurrency you wish to fund. Atomic Wallet support over 500 cryptocurrencies, and you can deposit any one of these. In this example, we will be depositing Bitcoin (BTC). Click on BTC to continue to the next stage.
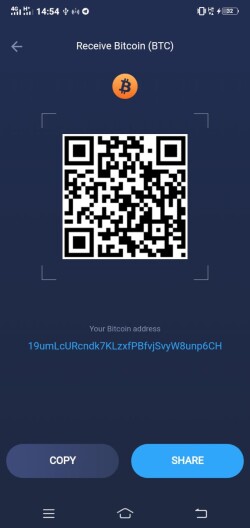
Step 2. Click on Receive to display your BTC deposit address.
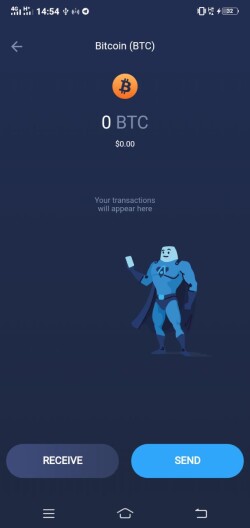
Step 3. Now that you have your deposit details. Once you sent the transaction and your Bitcoin (BTC) wallet will be credited shortly after.
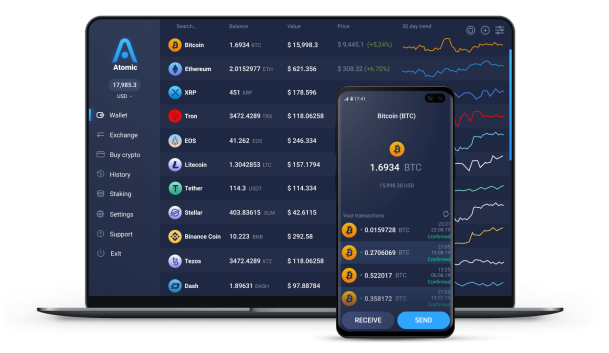
Atomic Wallet interface guide
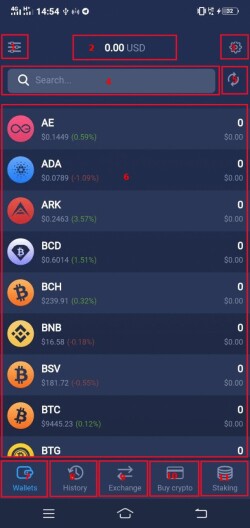
1. This is where you can filter your cryptocurrency wallet. Atomic Wallet currently supports more than 500 tokens, this feature allows you to filter out which wallet you want to display.
2. This is where you can monitor the balance of all available assets.
3. This is where you can access the tool menu (Add token, Wallet Connect, Airdrop, Change Password, Fingerprint/Face ID, Private keys, Local currency Support, About and Log out).
4. This is a search board to make it easy for you to find the crypto wallet you want to see.
5. This is a refresh button, useful for refreshing your asset balance.
6. This is where you can switch between the assets to check the current balance and make deposits and withdrawals.
7. This is where you can see the main page of the Atomic Wallet that you are currently viewing.
8. This is where you can get a full transaction history.
9. This is where you can access the exchange feature. You can make instant exchanges anonymously.
10. This is where you can buy more crypto with credit card. Atomic Wallet accept USD, EUR, and local currency worldwide.
11. This is where you can access the staking feature. You can stake AWC, ATOM, and other coins with zero fees.
How to use the exchange feature in the Atomic Wallet
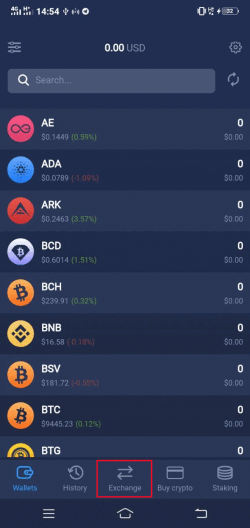
Step 1. Open Atomic Wallet App and click on Exchange at the bottom right.
Step 2. At this step you need to set here 2 things: You send (This is the coin that you currently have) and You get (This is the coin that you want to get). Then click on the arrow pointing to the right of each item and then search for the coin.
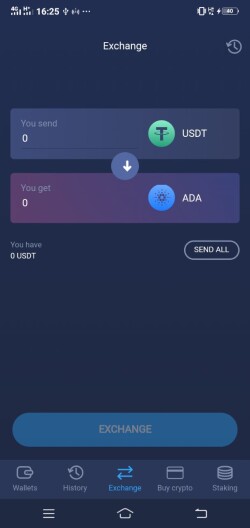
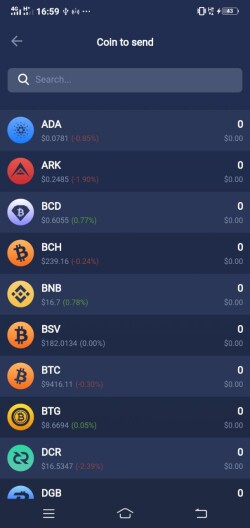
Step 3. Search the coin you have now that you want to send.
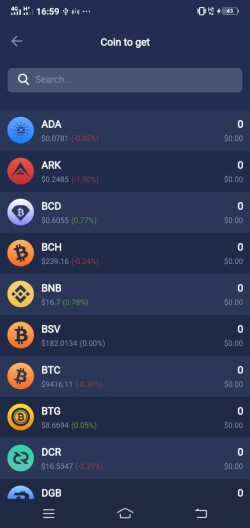
Step 4. Search and find the coins you want to get. You can type the name of the coin to facilitate the search.
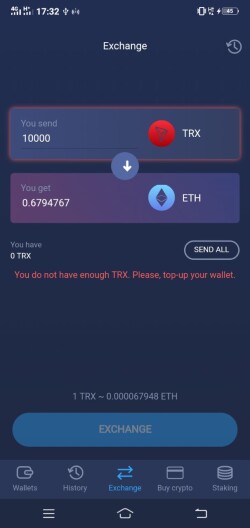
Step 5. Enter the amount of the coin you want to send/get. The application will automatically calculate the conversion rate and cost. Click on Exchange if you are ready and confirm your transaction by entering the password. Transactions will be processed automatically and the coins that you want to get will be credited immediately to your wallet.
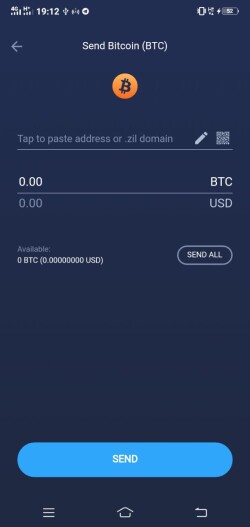
How to withdraw from your Atomic Wallet
Step 1. Open Atomic Wallet App and select which cryptocurrency you wish to withdraw. Click on Send to continue.
Step 3. Enter the withdrawal address and set amount you wish to withdraw. Click on Send to continue and confirm your transaction by entering the password. Your transaction will be processed automatically.