
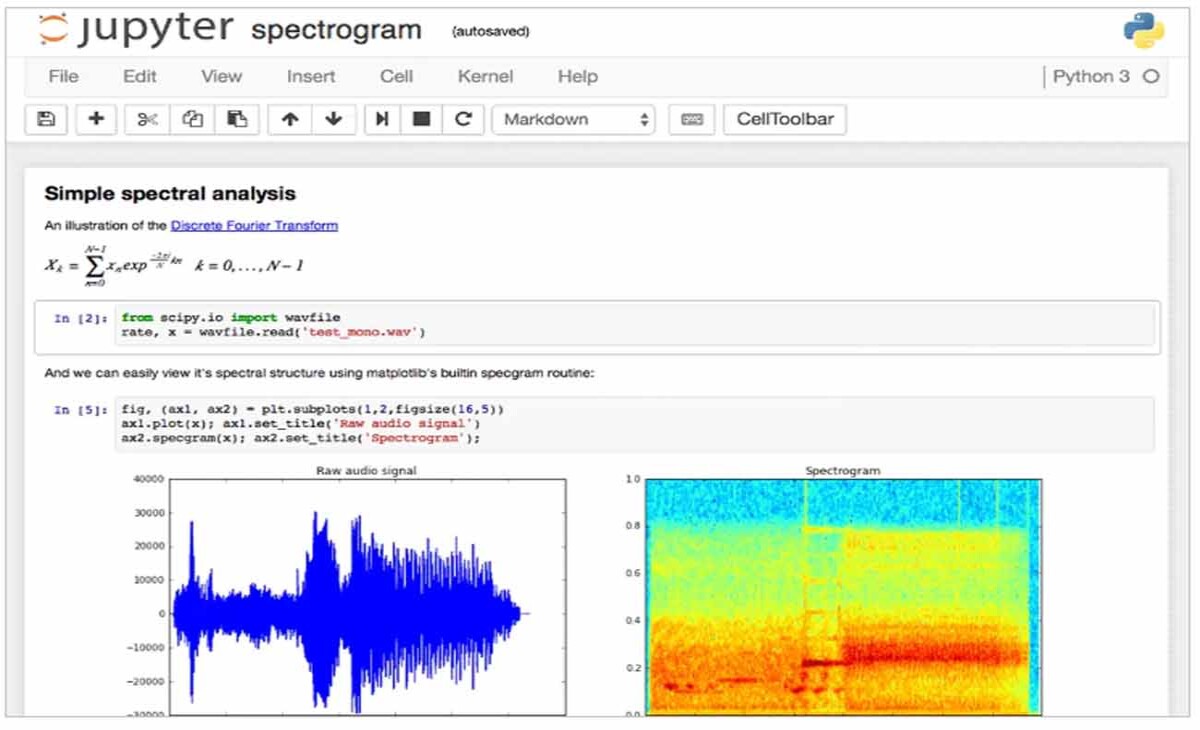
Jupyter notebook is an open source web application. It is used in Data Science for data visualization. We explain how it works and analyze examples of projects.
In the world of Data Science, Jupyter Notebook has been considered one of the most popular tools for data analysis and rapid prototyping for several years.
Jupyter Notebook has two main parts: a web application and notebooks-files that work with the program's source code, run it, and output data in different formats. Two formats are used for exporting notebooks: PDF and HTML.
What you can do in the web app:
- Run and edit code in the browser.
- Show calculation results using charts and graphs.
- Use the Markdown and LaTeX markup languages.
1. How to Install Jupyter Notebook Dependencies
Jupyter Notebook uses Python as its main language because it is used to connect with third-party applications such as AWS, Digital Ocean and others. Python is also used to connect Jupyter with web browsers such as Google Chrome.
On FreeBSD all Jupyter dependencies are available in the PKG or ports repository. You choose one to install the dependencies. In this article we will use PKG to install Jupyter dependencies, because in addition to being fast, PKG is very easy to use. Here is an example of installing Jupyter dependencies on FreeBSD.
root@ns3:~ # pkg install py39-setuptools desktop-file-utils py39-ipykernel py39-referencing py39-jsonschema-specifications py39-graphviz
root@ns3:~ # pkg install py39-jsonschema py39-nbformat py39-nbclient py39-nbconvert py39-maturin py39-pyzmq libzmq4 py39-twisted
2. How to Install Jupyter Notebook
After installing the dependencies, the next step is to install Jupyter Notebook. Just like the dependencies above, the Jupyter Notebook repository is also available in the PKG package. Here's how to install Jupyter Notebook with PKG.
root@ns3:~ # pkg install py39-notebook
In the example script above, py39 means we install Jupyter Notebook with Python39, because on FreeBSD 13.3 the Jupyter application can only be installed with Python39.
We will create a Jupyter configuration file, in this way Generate initial configuration. This configuration file has a *.py extension and is used to manage all Jupyter Notebook functions and features. Run the command below to generate a *.py configuration file.
root@ns3:~ # jupyter notebook --generate-config
If you want to customize the configuration to your FreeBSD server specifications, open the "jupyter_notebook_config.py" file. Change only a few scripts as in the example below.
root@ns3:~ # cd /root/.jupyter
root@ns3:~/.jupyter # ee jupyter_notebook_config.py
c.NotebookApp.ip = '192.168.5.2'
c.NotebookApp.notebook_dir = '/tmp'
c.NotebookApp.open_browser = False
c.NotebookApp.port = 8888
192.168.5.2 is the private IP of the FreeBSD server (according to your FreeBSD IP) and port 8888 is the port used to open Jupyter Notebook in a web browser. The next step, run Jupyter Notebook.
root@ns3:~/.jupyter # jupyter notebook --allow-root
[I 09:50:39.420 NotebookApp] Writing notebook server cookie secret to /root/.local/share/jupyter/runtime/notebook_cookie_secret
[I 09:50:45.584 NotebookApp] Serving notebooks from local directory: /tmp
[I 09:50:45.584 NotebookApp] Jupyter Notebook 6.4.13 is running at:
[I 09:50:45.584 NotebookApp] http://192.168.5.2:8888/?token=e352ecf595618fb5ac6eaaeb849b0a1b60fa50b589f6986b
[I 09:50:45.584 NotebookApp]  or http://127.0.0.1:8888/?token=e352ecf595618fb5ac6eaaeb849b0a1b60fa50b589f6986b
[I 09:50:45.585 NotebookApp] Use Control-C to stop this server and shut down all kernels (twice to skip confirmation).
[C 09:50:45.618 NotebookApp]

    To access the notebook, open this file in a browser:
        file:///root/.local/share/jupyter/runtime/nbserver-2370-open.html
    Or copy and paste one of these URLs:
        http://192.168.5.2:8888/?token=e352ecf595618fb5ac6eaaeb849b0a1b60fa50b589f6986b
     or http://127.0.0.1:8888/?token=e352ecf595618fb5ac6eaaeb849b0a1b60fa50b589f6986b
3. How to Test Jupyter Notebook
The last step of this article is to do etching. If there is no wrong configuration, your monitor screen will display the Login menu. Open Google Chrome, type "http://192.168.5.2:8888/", if successful it will appear as in the image below.
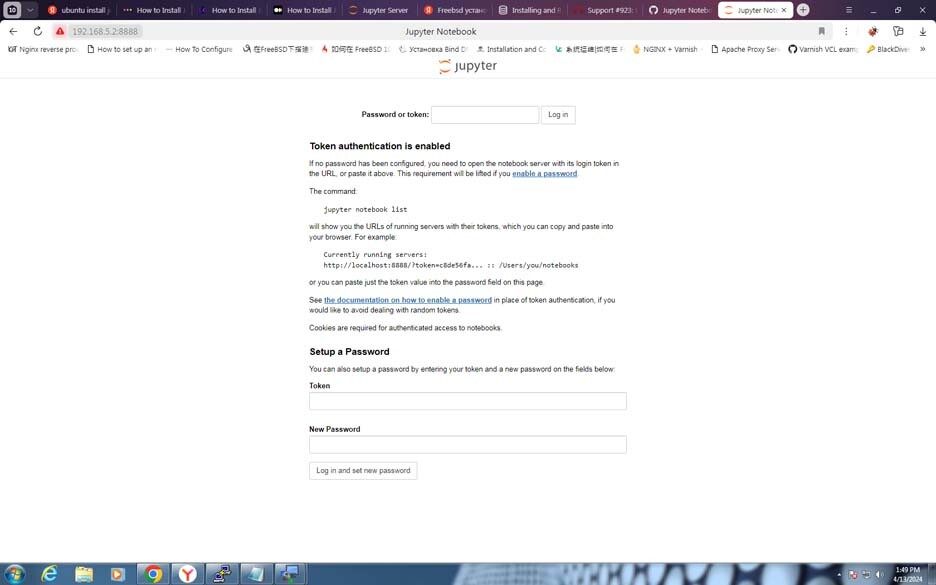
In the image above there is a Password or token menu. To fill in the Password column, you can take it from the blue script above, when you run the command "jupyter notebook --allow-root". If the password you type is correct, it will appear as in the image below.
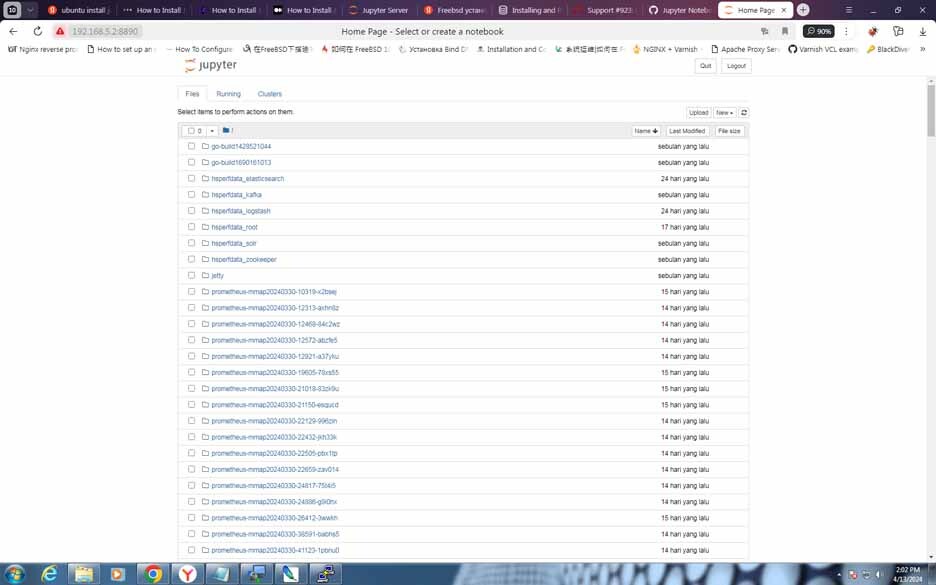
If it appears like the image above, you have successfully installed Jupyter Notebook on FreeBSD. Use Jupyter Notebook to increase productivity and gain deeper insights from data. Due to its interactive nature, language independence, powerful visualization capabilities, support for documentation, and increased reproducibility, Jupyter Notebook is currently the top choice for data developers.


