
Traffic shaping or network Quality of Service (QoS), is a means of prioritizing network traffic. Without any network traffic shaping, packets are processed on a first-in/first-out basis by the firewall. QoS offers a way to prioritize different types of network traffic, ensuring that high-priority services receive the bandwidth they need before lower-priority services. Basically, Traffic shaping regulates the network by slowing down the transmission of packets that are classified as less important so that priority applications are delivered without delay. Traffic shaping, used to optimize or guarantee network traffic performance, increase latency and increase the bandwidth that can be used for some types of packets by delaying other types of packets. So the meaning of traffic shaping is an effort to control network traffic so that bandwidth is more optimal and network performance is more guaranteed.
Why Traffic Shaping Is Important
Limited network resources make bandwidth prioritization a necessity. Traffic shaping is one of the most important techniques for ensuring high quality of service for business applications and data. This is an important requirement for a network firewall. Traffic shaping switches, rules, and policies, also known as packet shaping, prioritize traffic and bandwidth to provide a superior quality of service, or QoS, for network traffic related to business.
There are many advantages to using a network traffic management device or program in PFSense, including:
-
Improve and manage network traffic.
-
Prevent network congestion by identifying abnormal bandwidth usage.
-
Block attacker IP addresses.
-
Make applications run better.
-
Ensure good transmission quality for applications that require it.
-
Ensure end customers will receive tiered services.
-
Optimize bandwidth allocation and consumption of higher priority resources/applications by limiting unnecessary traffic.
Setup PFSENSE Traffic Shaping
Now we get to the core of the discussion, namely installing Traffic shaping on the Pfsense firewall router. But before applying Traffic Shaping, you must first know how much internet bandwidth is provided by the ISP, for example the bandwidth check results https://www.speedtest.net/.
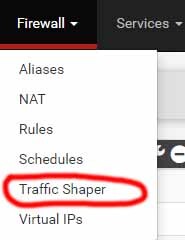
In the Pfsense WEB GUI, please log in first, then go to the Firewall - Traffic Shaper menu, select Wizards, the Traffic Shaper Wizards menu will appear.

If you use 2 WANs or 3 WANs and 1 LAN or 2 LANs or even up to 8 LANs, then select Multiple LAN/WAN, but if your Pfsense router only has 1 WAN, click Dedicated Links. In this article, we will practice 1 WAN (dedicated links). After we click traffic_shaper_wizard_dedicated.xml. Fill in the number 1 in Enter number of WAN type connections, because we only have 1 WAN, then click Next. Next we will go to step 1 of 8. Fill in the values according to the image above. These figures are obtained from the results of checking bandwidth with speedtest, once everything is filled in, click Next. Next we will go to step 2 of 8. 
 Step 2 of 8 is the Voice over IP (VOIP) menu. If your home internet does not have a VoIP server, you can skip this step, and if your office/home internet has a VOIP server, then these parameters must be filled in. OK, let's say there is no VOIP server in your office/home, so let's just skip this step, or don't activate it. Then click Next, we will go to step 3 of 8.
  Step 3 of 8 is often referred to as bandwidth "hogs", meaning that there is one user on your computer network who uses up a lot of internet bandwidth. You can enter it here. For example, the "hogs" IP bandwidth is 192.168.9.100, we will only give that person 2% bandwidth. In terms of bandwidth “hogs” pfSense accepts a range of 2% to 15%.
  What if there are a lot of bandwidth "hogs". In this case, we can create lots of IP bandwidth "hogs" by clicking the Firewall - Aliases - IP menu. After setting step 3 of 8, then click Next, we will go to step 4 of 8. This step contains Peer to Peer networking parameters or those related to torrent files. Let's just skip step 4 of 8.
  Next we will go to step 5 of 8 which contains Network Games parameters.
 You can fill it in as needed. We proceed to step 6 of 8, which contains the parameters Raise or lower other Applications, step 6 of 8 is very important because it is widely used on computer network servers. You can also fill it in as needed. In this article, I will only fill in a few parameters. Enable = checklist HTTP = Higher priority SMTP = Lower priority POP3 = Lower priority IMAP = Lower priority DNS = Higher priority
  After that, click Next. We will go to step 7 of 8, namely Reload profile or Finish.
  Efficient, dependable networks are the lifeblood of enterprises today, and the network administrator plays a key role. Their job includes making optimum use of available network resources so essential applications run well and with minimal service disruption. To achieve these goals, net admins need to fully understand concepts such as fault tolerance, quality of service (QoS), and traffic shaping.

The FreeBSD Handbook - System Administrator
## Table Of Content ##
1. FreeBSD Getting Started Guide
2. PKG and Ports For Managing Software
3. Working with Files and Directories
4. Managing Users And Groups
5. Updating and Building the Kernel
6. Monitor Server Performance
Read Ebook
Author:
Linux BSD Blockchain - publish0x


