
Hi!
This time we will go with a more twisted topic, especially for people who have not done this yet. At least I hope that others do it too and not just me doing such messed up things xD
What will we be doing today? Silly question, the title gave it away - we will be setting up an nginx server on a Linux subsystem, which will be visible on Windows through a browser as localhost and additionally will use a Windows directory to store files/pages. In the end, we will have a fully Linux server accessible on Windows.
If the article alone is not enough, you can watch a video that shows the installation step by step.
Let's get started!
0. WSL…
Let’s get started then! I assume you already have WSL installed if you have come to this thread, but if you haven’t, I won’t make it difficult for you and here’s a handy link to MS Store:
https://apps.microsoft.com/store/detail/windows-subsystem-for-linux/9P9TQF7MRM4R
1. Installing Ubuntu using PowerShell.
1.1 We run PowerShell as an admin
1.2 We enter a simple command
wsl --install Ubuntu
1.3 Depending on the internet connection, it may take some time.
1.4 We choose a username.
1.5 Next, we enter a password (the characters typed are not visible, don’t panic, everything is working).
… password again
The system is installed and ready, you can now see your Linux.
2. Installing the nginx server.
2.1 We will be operating as an administrator for the rest of the session, so we enter the following command and confirm it with a password.
sudo -i
2.2 We make sure that everything is up-to-date.
apt update && apt upgrade -y`
2.3 We download nginx.
apt install nginx -y
2.4 We open the configuration file using the nano editor.
nano /etc/nginx/sites-available/default
2.5 In the server block, we find the line:
root /var/www/html;
And we change it to:
root /mnt/c/www;
This corresponds to the www directory on the C drive of Windows. Similarly, you can change it to any location that is convenient for you.
2.6 To avoid having to go back to the file again, we configure PHP, which we will install in the next step. So we continue a few lines down and between index and index.html we add index.php, which in my case looks like this:
index index.php index.html index.htm index.nginx-debian.html;
2.7 Go to block
#location ~ \.php$ {# include snippets/fastcgi-php.conf;## # With php-fpm (or other unix sockets):# fastcgi_pass unix:/run/php/php7.4-fpm.sock;# # With php-cgi (or other tcp sockets):# fastcgi_pass 127.0.0.1:9000;#}
and remove comment signs
location ~ \.php$ {include snippets/fastcgi-php.conf;## # With php-fpm (or other unix sockets):fastcgi_pass unix:/run/php/php7.4-fpm.sock;# # With php-cgi (or other tcp sockets):# fastcgi_pass 127.0.0.1:9000;}
Here, if needed, adjust the PHP path to the version you will install as the process will be similar for other PHP versions.
2.8 Apply the following sequentially: CTRL + X and then Y, Enter to exit and save the changes.
2.9 We test our configuration with the command:
nginx -t
2.10 Startujemy serwer uruchamiając usługę
service nginx start
2.TIPS
Stop service by calling:
service nginx stop
Service restart (e.g. after modifying the configuration file):
service nginx reload
3. Visibility of the server on the Windows side.
In fact, the server is already visible under Windows, specifically under the IP address assigned to the WSL service. However, this is not a particularly convenient solution, so let’s change it!
3.1 Remaining on Ubuntu, we type the command and copy the displayed IP address.
hostname -I | awk '{print $1}'

3.2 Edit the Windows hosts file as an administrator, located at:
C:\Windows\System32\drivers\etc
3.3 Add the following line at the end of the file and save the changes.:
COPIED_IP_ADDRESS localhost
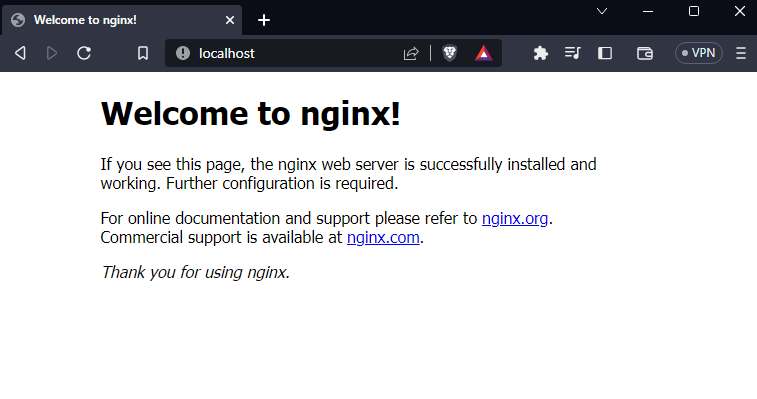
3.4 Launch the browser and enter the address http://localhost. If you have done everything correctly, you should see this beautiful image:
To proceed further, we need to install PHP and MySQL, so let’s continue!
4. Instalacja PHP
4.1 Install additional repositories.
apt -y install software-properties-commonadd-apt-repository ppa:ondrej/php
Confirm ENTER
apt update
4.2 PHP Installation
apt install php7.4-fpm -y
4.3 Start the service.
service php7.4-fpm start
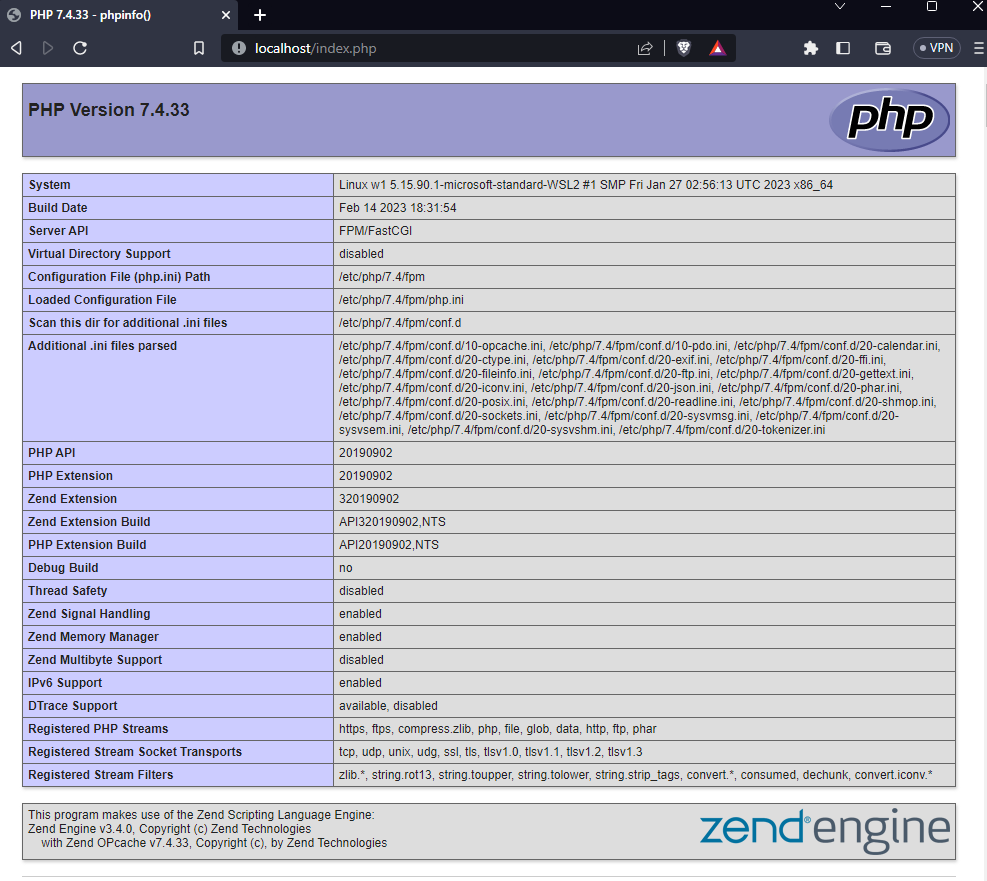
and after going to the address http://localhost/index.php we should see an image like this:
index.php file:
<?php phpinfo(); ?>
4.TIPS
Here, it works analogously to nginx, i.e. start/stop/reload.
5. MySQL Database
The last but not least, because without it, few applications will make sense. We are only two simple steps away from installing MySQL.
5.1 Installation
apt install mysql-server
5.2 Start the service.
service mysql start
Summary
It’s possible that someone may find this configuration useful or that it may at least introduce someone to a system other than Windows. If there is a need to expand on this topic or implement other complex configurations, feel free to write about it in the comments.
Enjoy!


