
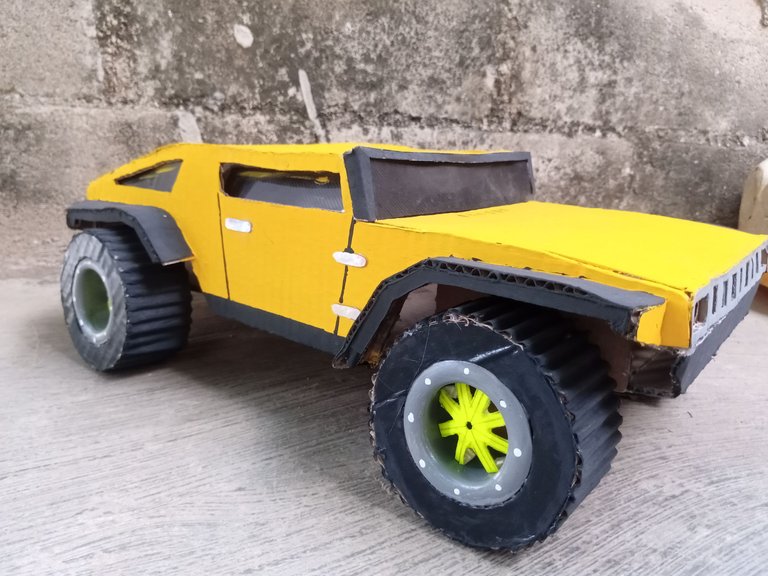
Hummer H4 made with reusable cardboard
Hello, how are you my friends, nice to greet you again, I had been away for a few days because I had a bit of work, but here I am again to bring you the works or crafts that I like to do, it is a wonderful modesty car apart 😁😄, but I really liked this work that I did and today I want to share it with you I hope you like this tutorial post, and are encouraged to build a cart of these, to Then I show you the step by step.

Materials Cardboard scraps scalpel rule Cold painting Silicon in bar Brushes Paper Adhesive Tape 2 inch PVC pipe
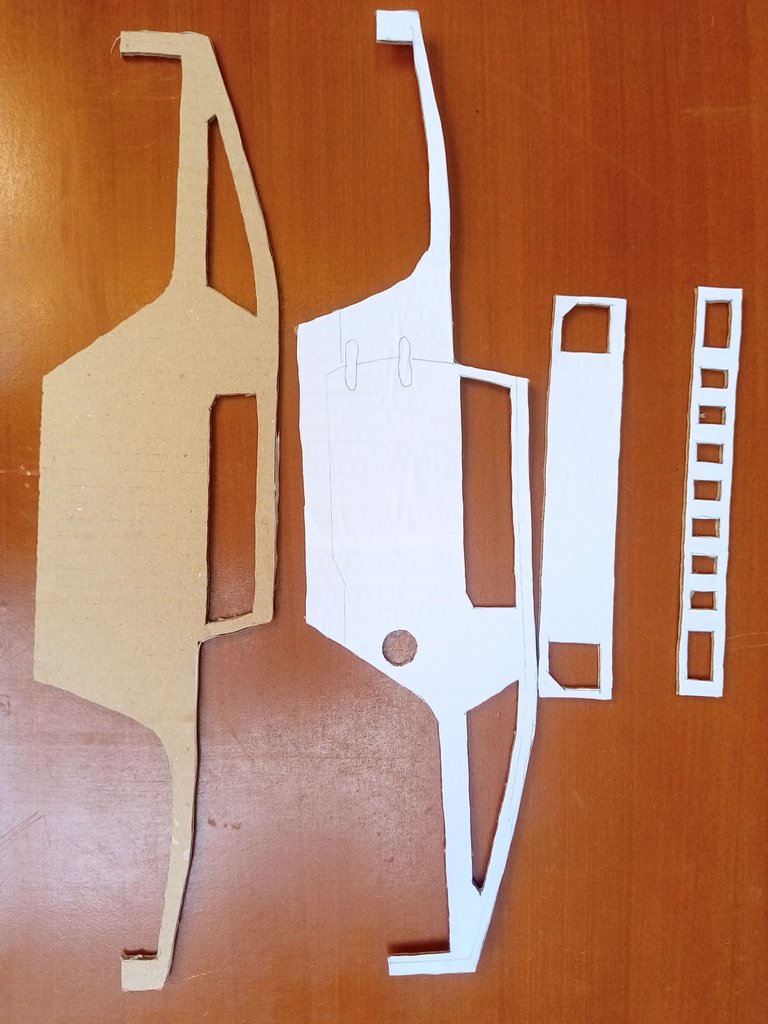
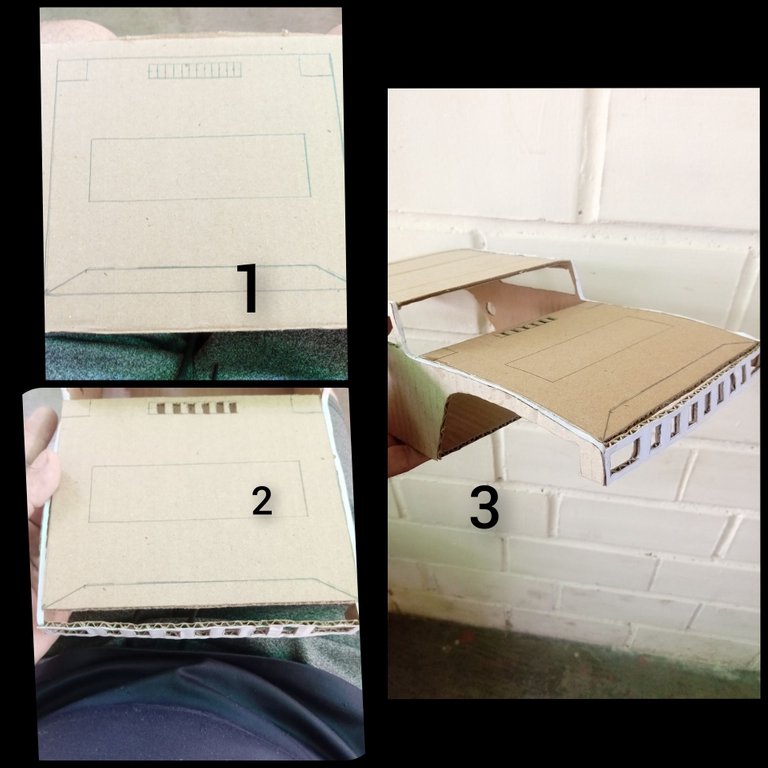
Step 1
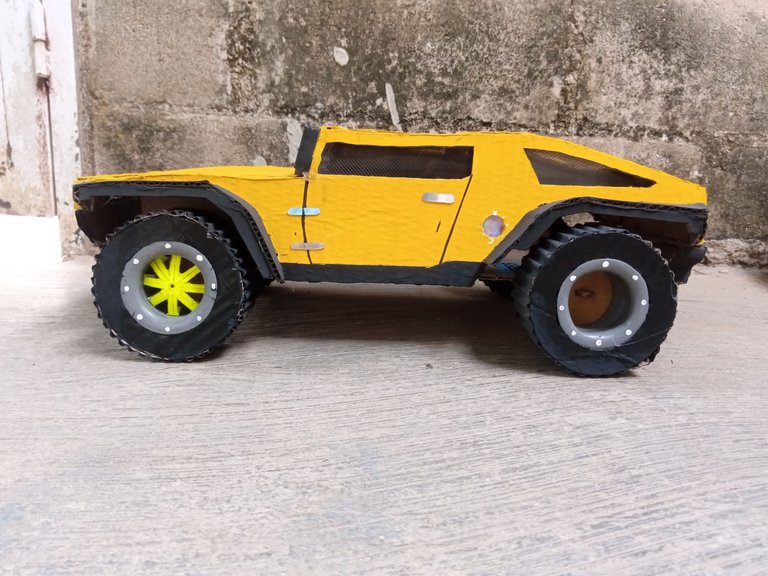
For this step the first thing we will do is design or draw our first parts on a sheet of paper and then I stick it to the cardboard, this method is easier for me since the cuts can come out more accurate, of course the pulse plays an important role 😄. The measurements for these pieces are: the sides of the car are 46 CM long and 12 CM high. In width it will measure 19 CM. These will be the first measurements of our pieces.
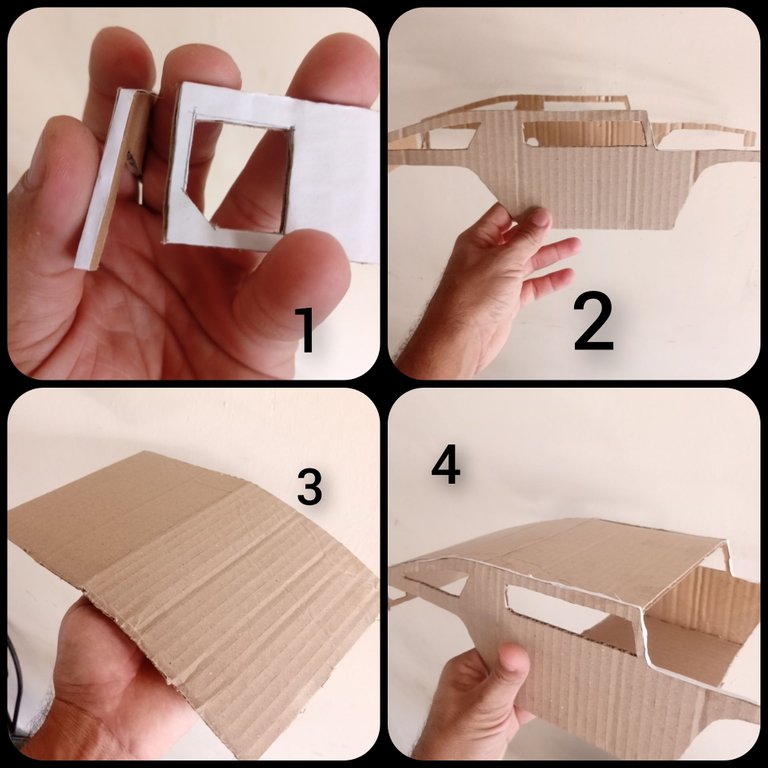
Step 2
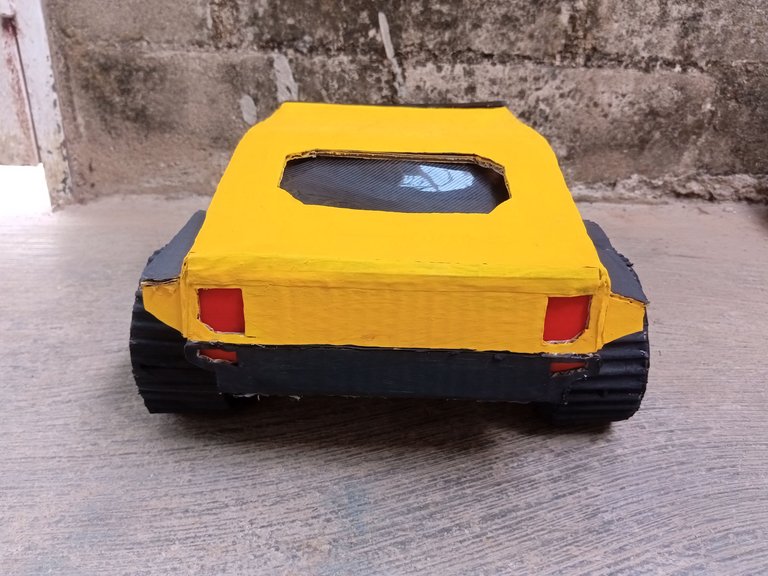
In this next step we will paste the first parts, in this case they would be the sides and the front, rear and roof, the roof will measure 16 CM wide by 28 long, in In my case, I would say that they are the most important parts, since from here we start to get the other measures and the "perfection" so to speak of our car.
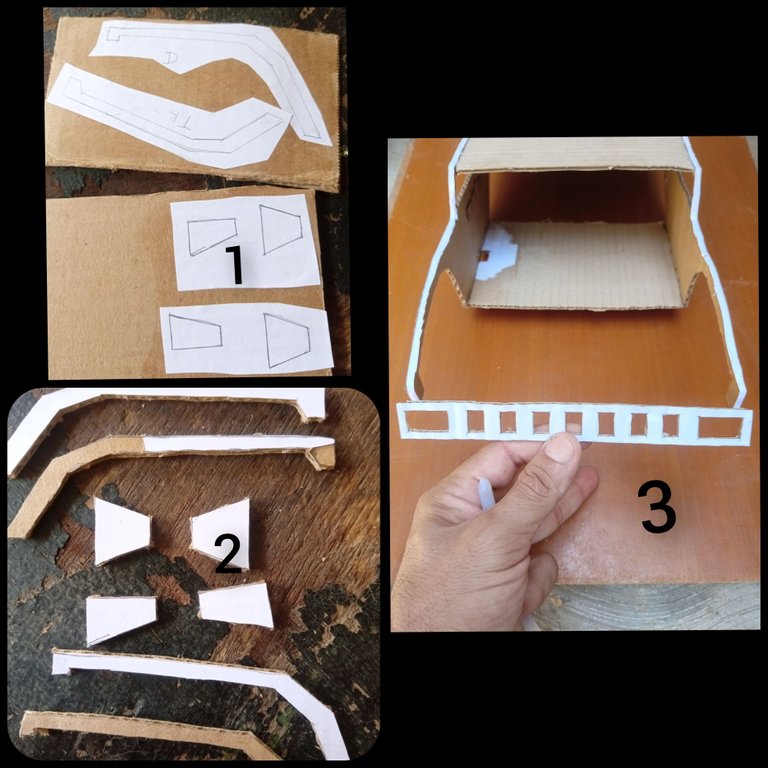
Step 3
It's time to make the fenders, they will go in parts, first we draw what will be the lateral part and then place a piece of cardboard to measure that will go on top.
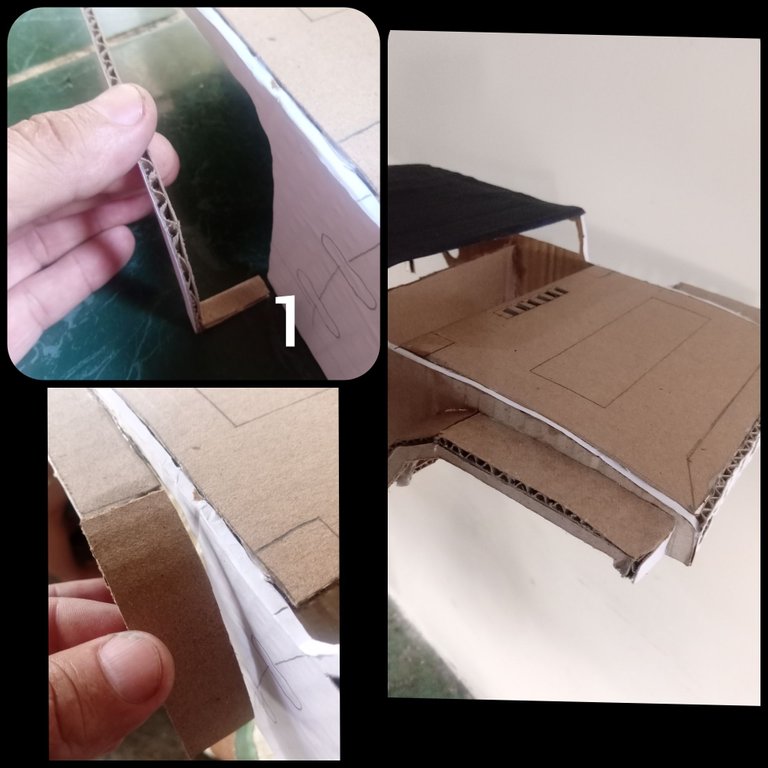
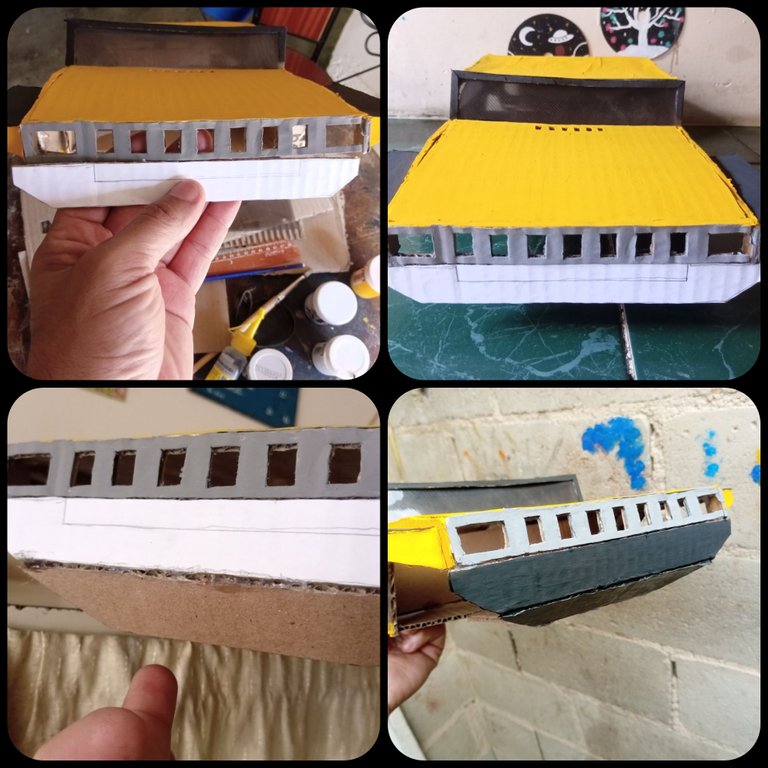
Step 4
Little by little our car is taking shape, so it's not time to make the hood, it will measure 16 CM wide by 15 CM long. As they are assembling, they will notice some difference in measurements, more than everything in the roof and hood, but don't worry, that is the structure of the car, in the upper part it is slightly smaller than its normal width.
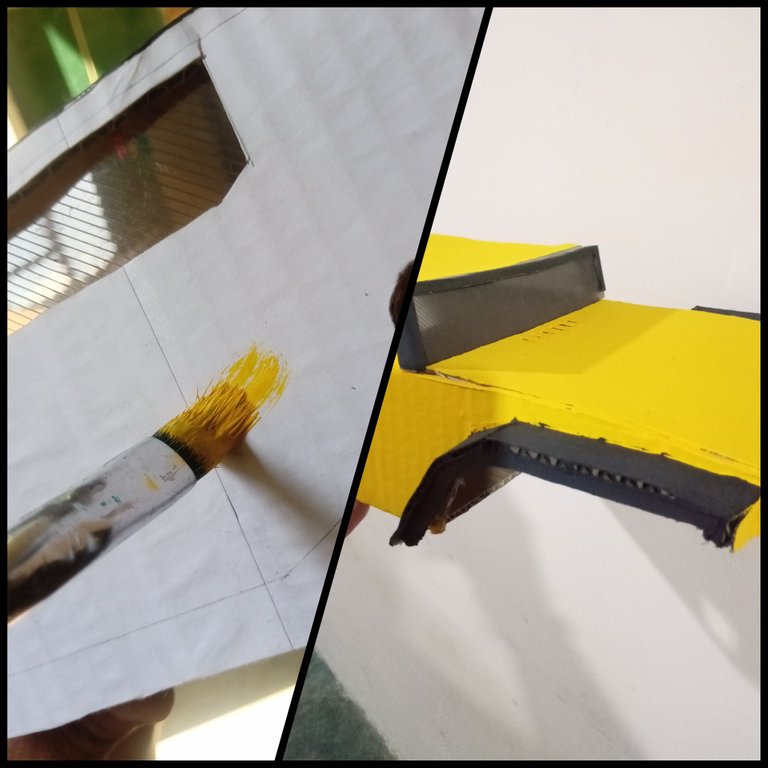
Step 5
Since our car already looks like a car 😁 it's time to start giving them a few coats of paint, in my case I used yellow, black and some gray details this car took 5 coats of paint since cardboard absorbs a lot of paint.
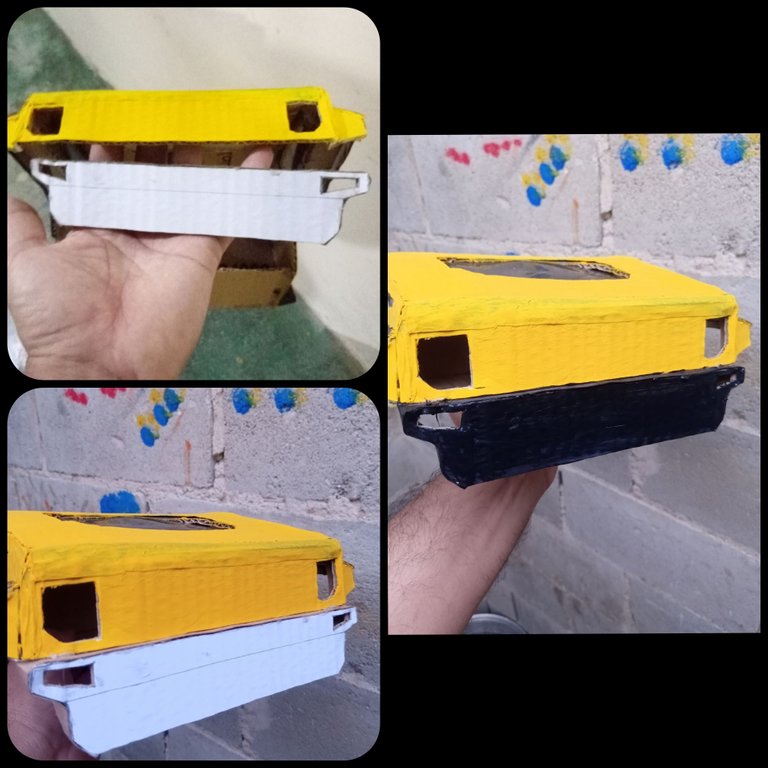
Step 6
Already painted several times we make what will be the bumpers, in this case they will be the front and rear I am going to measure, just measure the width of the car and make it to then glue and give it some hands black paint
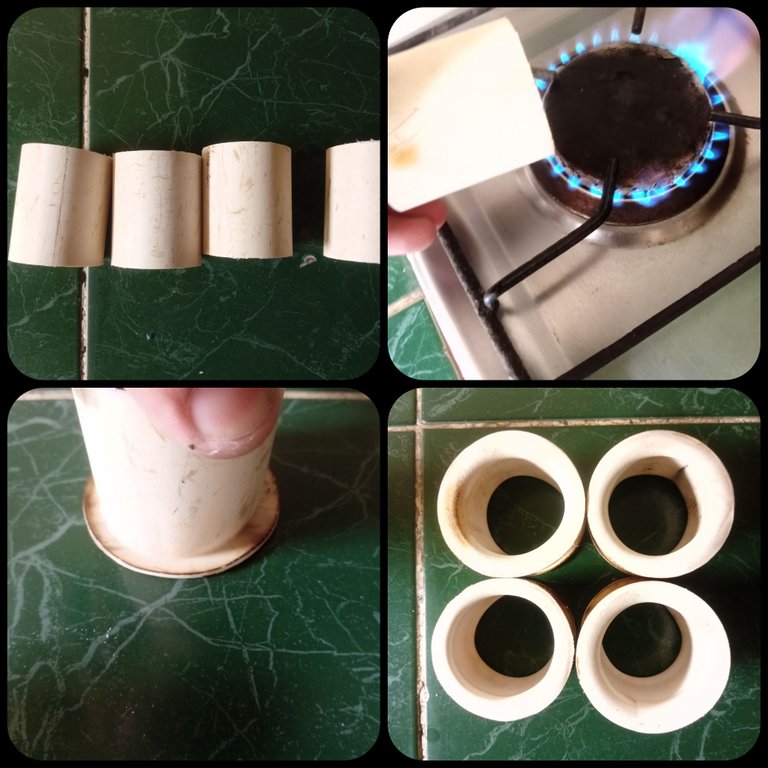
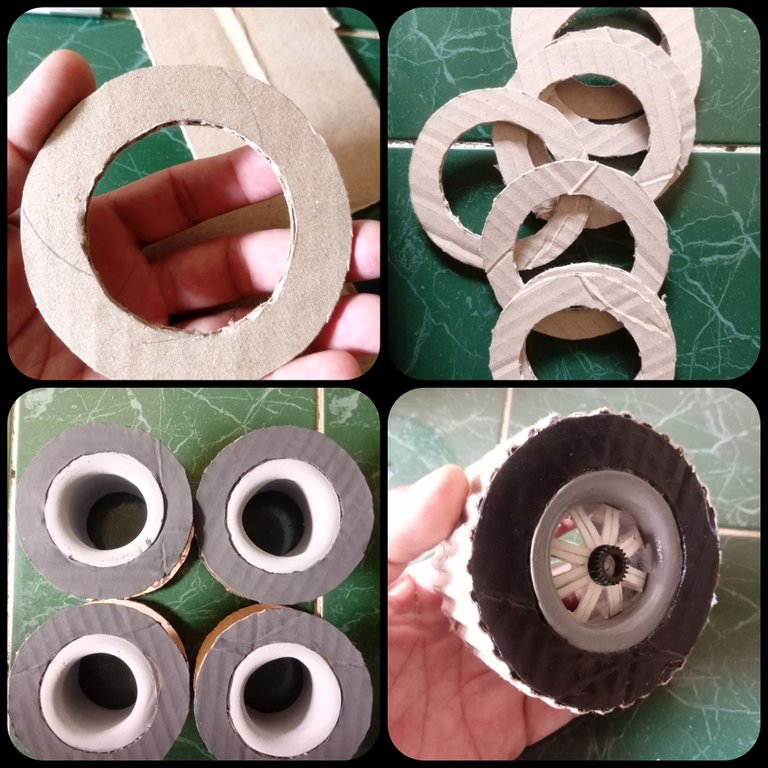
Step 7
After doing all of the above, it's time to make the wheels. To do this, use 4 pieces of 2-inch PVC pipe, these measure 6 CM. Then I pass them through fire to soften and thus be able to make them as a tab type, here in Venezuela we call it Rin, immediately afterwards we make 8 rings of 8 CM in diameter by 1½ CM high, these will go on the tab that we make in the PVC tubes to these we call it rubber here in Venezuela. And the wheels would stay this way as shown in the following images.
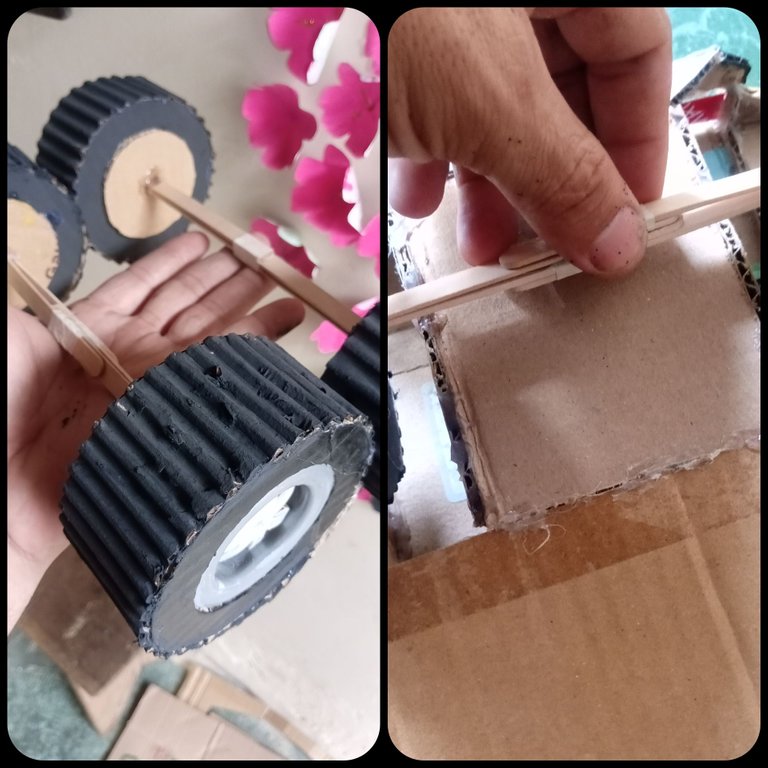
Step 8
List the wheels, take 4 wooden pallets and make what will be the axis of the wheels, they will not turn since it will be a decorative car along with the ones I already have 😁. They will go this way as it will be shown in the image
Final result
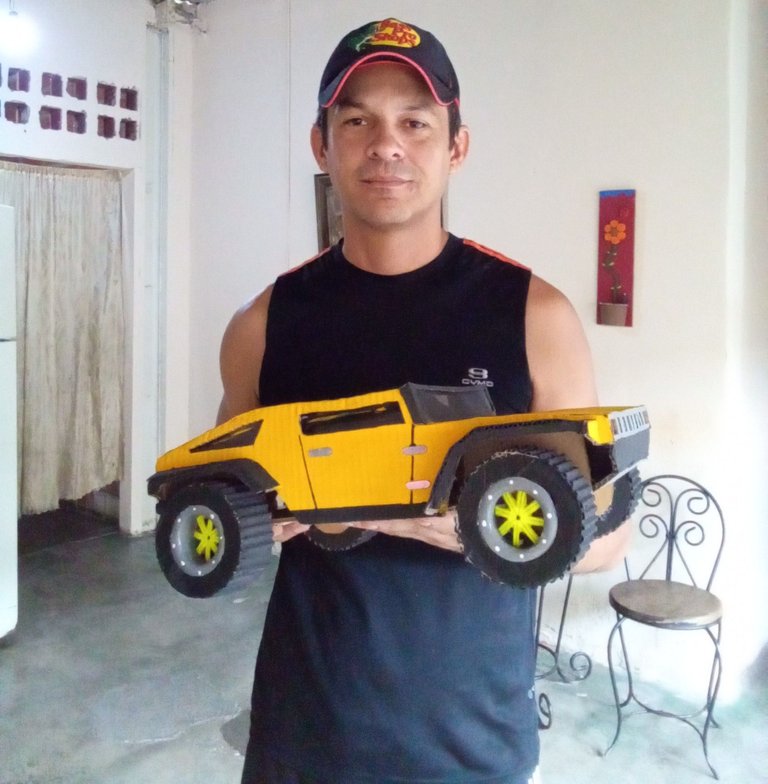

Well my friends, I made this cardboard car like this, I hope you like it and thank you very much in advance for visiting my post. See you soon with more wonderful crafts, God bless you greatly 🙏


