![How to Bridge $AMPL to #BSC [Beginner Friendly]](https://www.publish0x.com/img/584305.png?action=resize&ar=1&inv=0&ori=1&st=1&up=1&w=1140&signature=3478aa488d3080d57f34d8ecb5daf4415ae5478a43176833b0b0c1123bf0d3b0)
During the first half of June 2021, Evan Kuo, the co-founder or co-creator of Ampleforth, announced that $AMPL is finally a multi-chain cryptocurrency;
The announcement stated that $AMPL is now capable of being transferred over to the Binance Smart Chain through their bridge and would experience rebases across all chains evenly. This makes $AMPL the first rebasing multi-chain cryptocurrency in history.
In this article, I will guide you on how to easily bridge your $AMPL over to the Binance Smart Chain. Don’t worry; it’s super easy!
Bridging Your $AMPL Over To Binance Smart Chain
Head over to the $AMPL bridge at https://bridge.ampleforth.org/transfer and connect your MetaMask wallet with the Ethereum network selected;
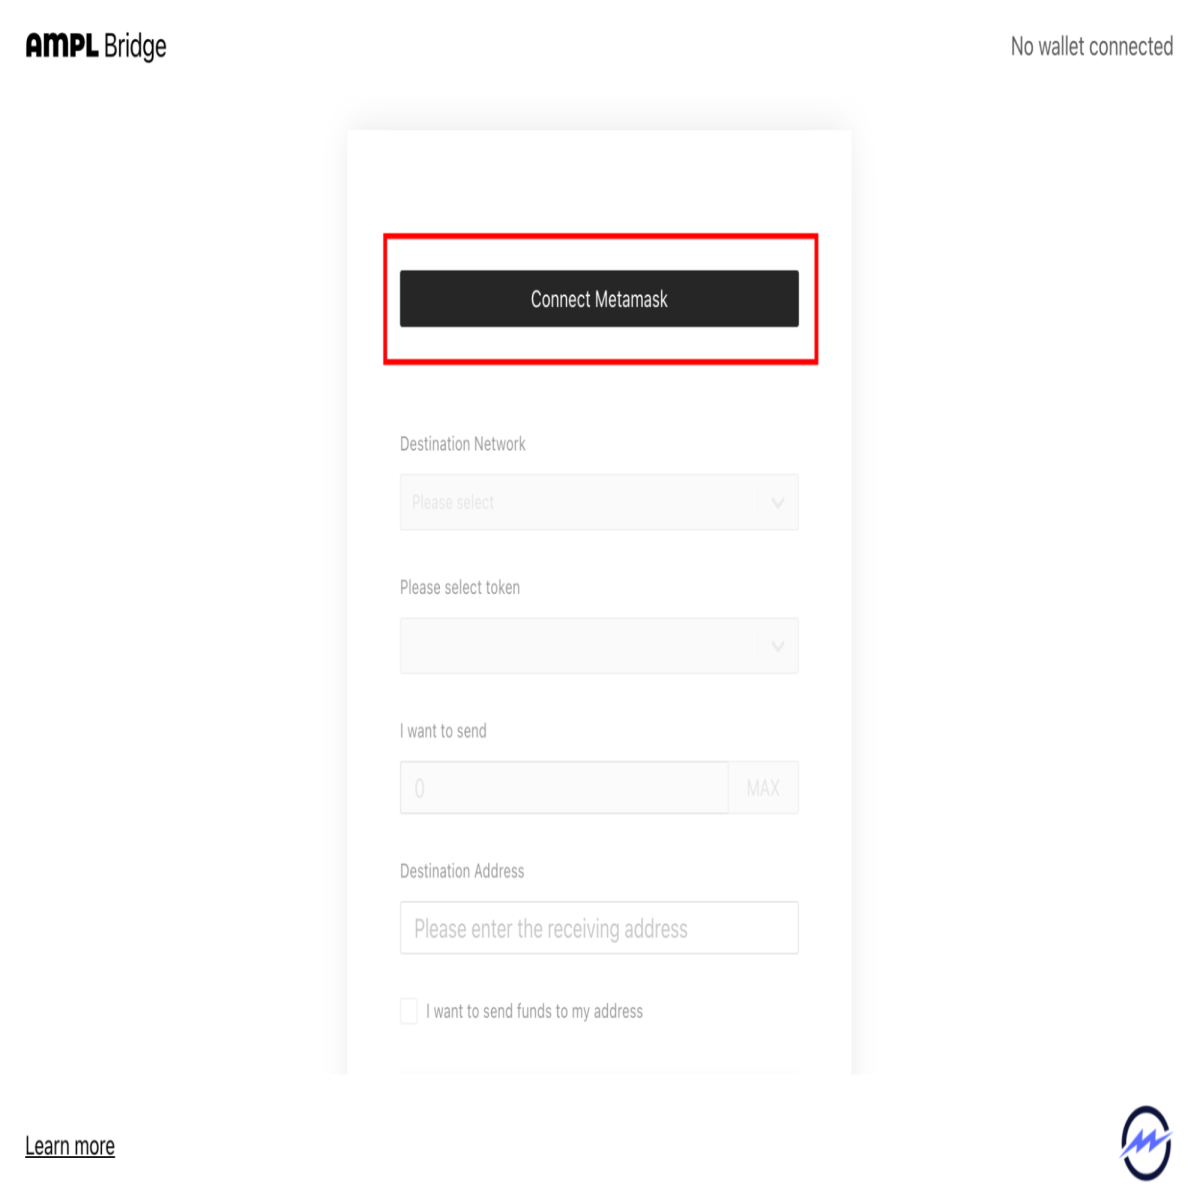
Once connected, it’s time to fill in the form to bridge our $AMPL. The first two fields will automatically be filled in. As we have connected through the Etheruem network, the “Home Network” field will automatically fill to Ethereum with the “Destination Network” field setting itself to “BSC”;

Next, we need to select the token, which should be $AMPL. Currently, $AMPL is the only currency you can bridge over;
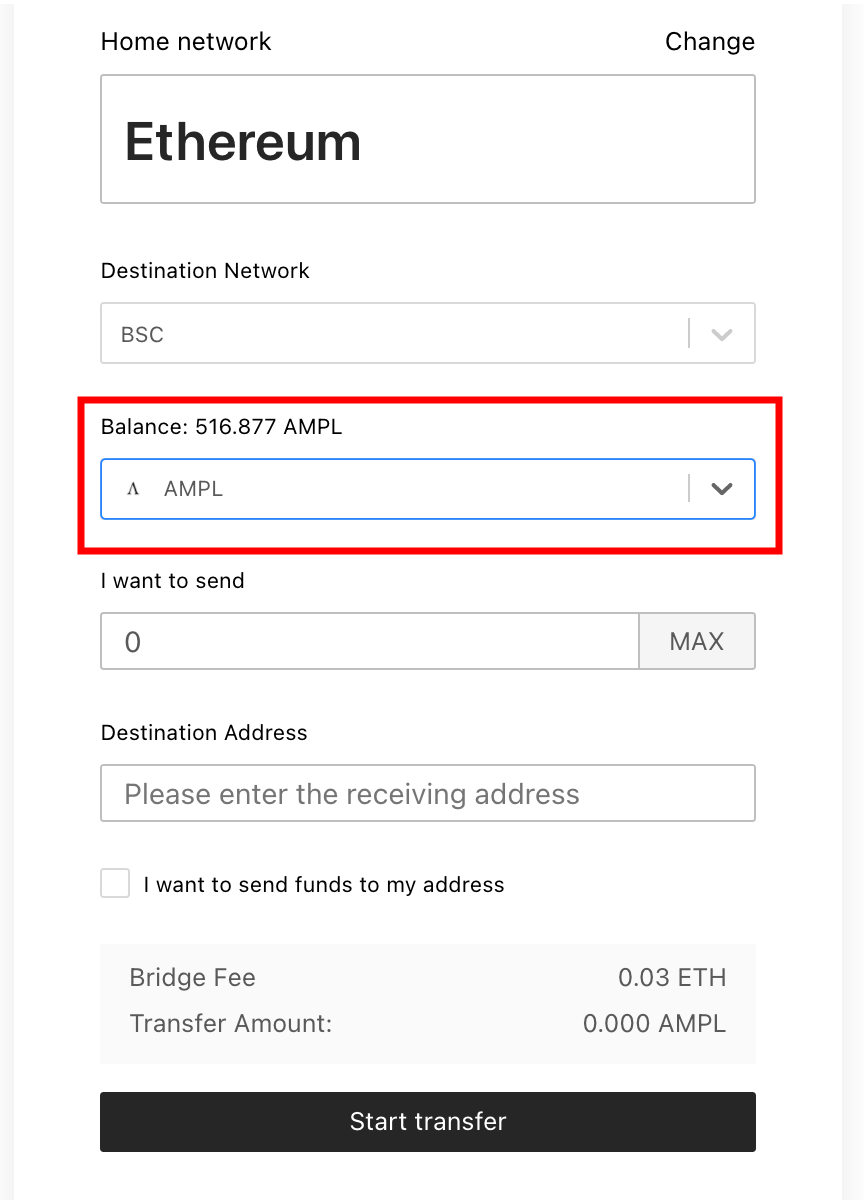
Next, we need to select how much $AMPL we would like to send over. In this tutorial, I will send over 500 $AMPL to the Binance Smart Chain. Alternatively, you can hit “MAX” to send over your entire $AMPL balance;

After inputting how much $AMPL to send over to #BSC, it’s time to enter the destination address.
Remember, all Ethereum addresses are accessible on the Binance Smart Chain, but you have to change the network settings in your MetaMask wallet to access it. If you need help configuring your MetaMask to access the Binance Smart Chain, look at this article.
For this tutorial, I will send the $AMPL to a different address, so I enter this into the “Destination Address” field;

The dashboard will show you the “Bridge Fee” to send over the $AMPL and then the total “Transfer Amount” you selected. If you are happy to go ahead with the transfer, hit “Start Transfer”;

A “Pre-Flight Check” will appear, providing a warning and asking you to confirm all the details. Read the information and check the details are correct, and hit “Start Transfer”;

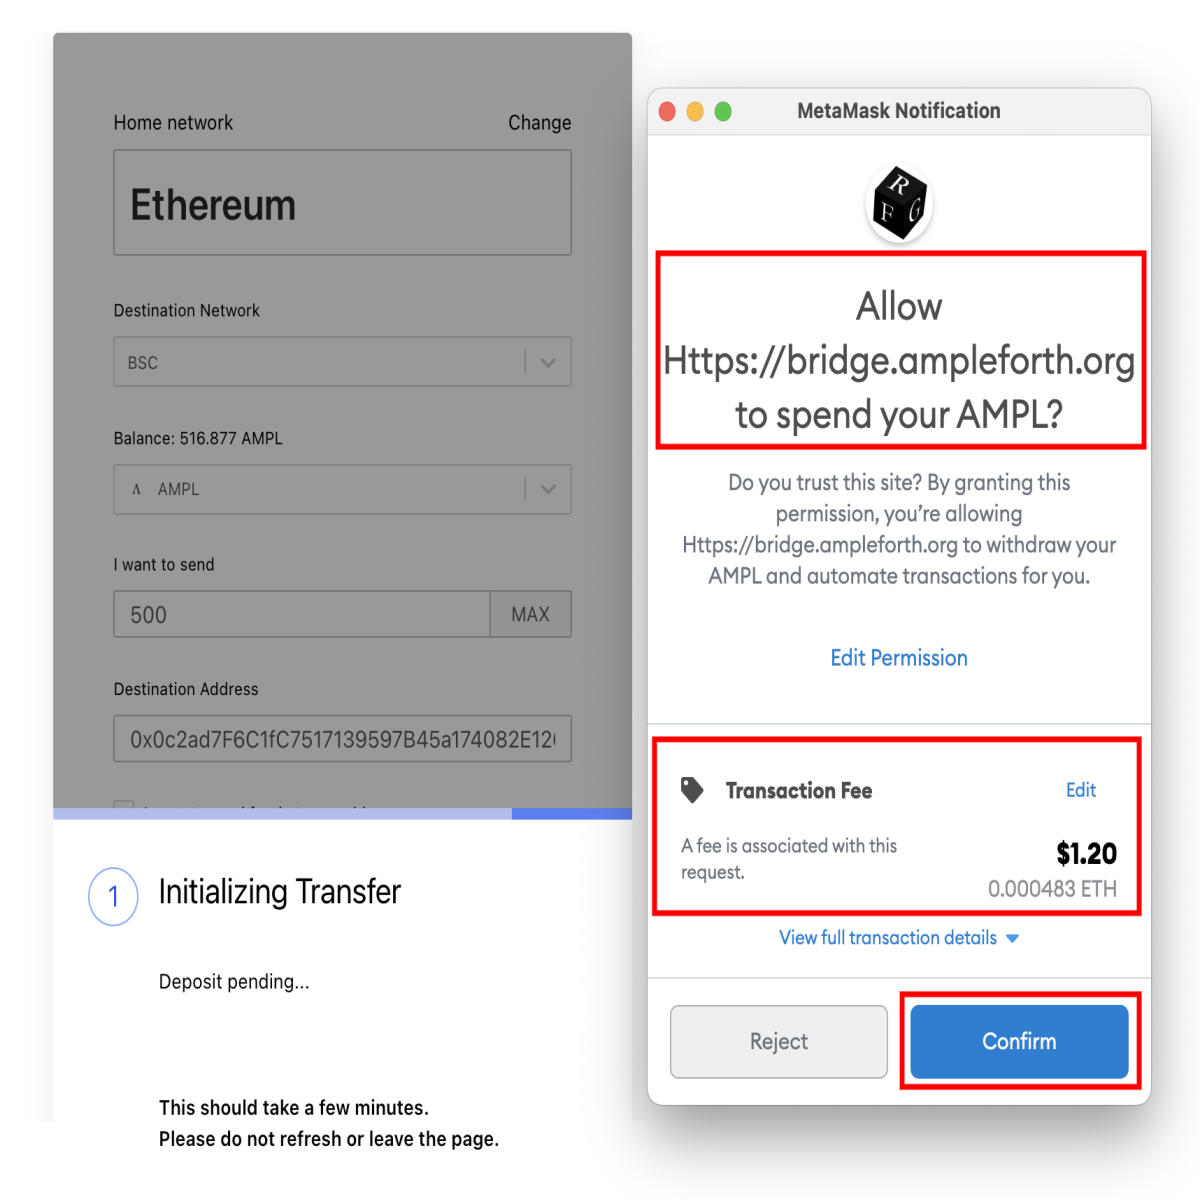
Once started, a MetaMask window will appear asking permission for the bridge to spend your $AMPL. Note the transaction fee and hit “Confirm” if you are happy;
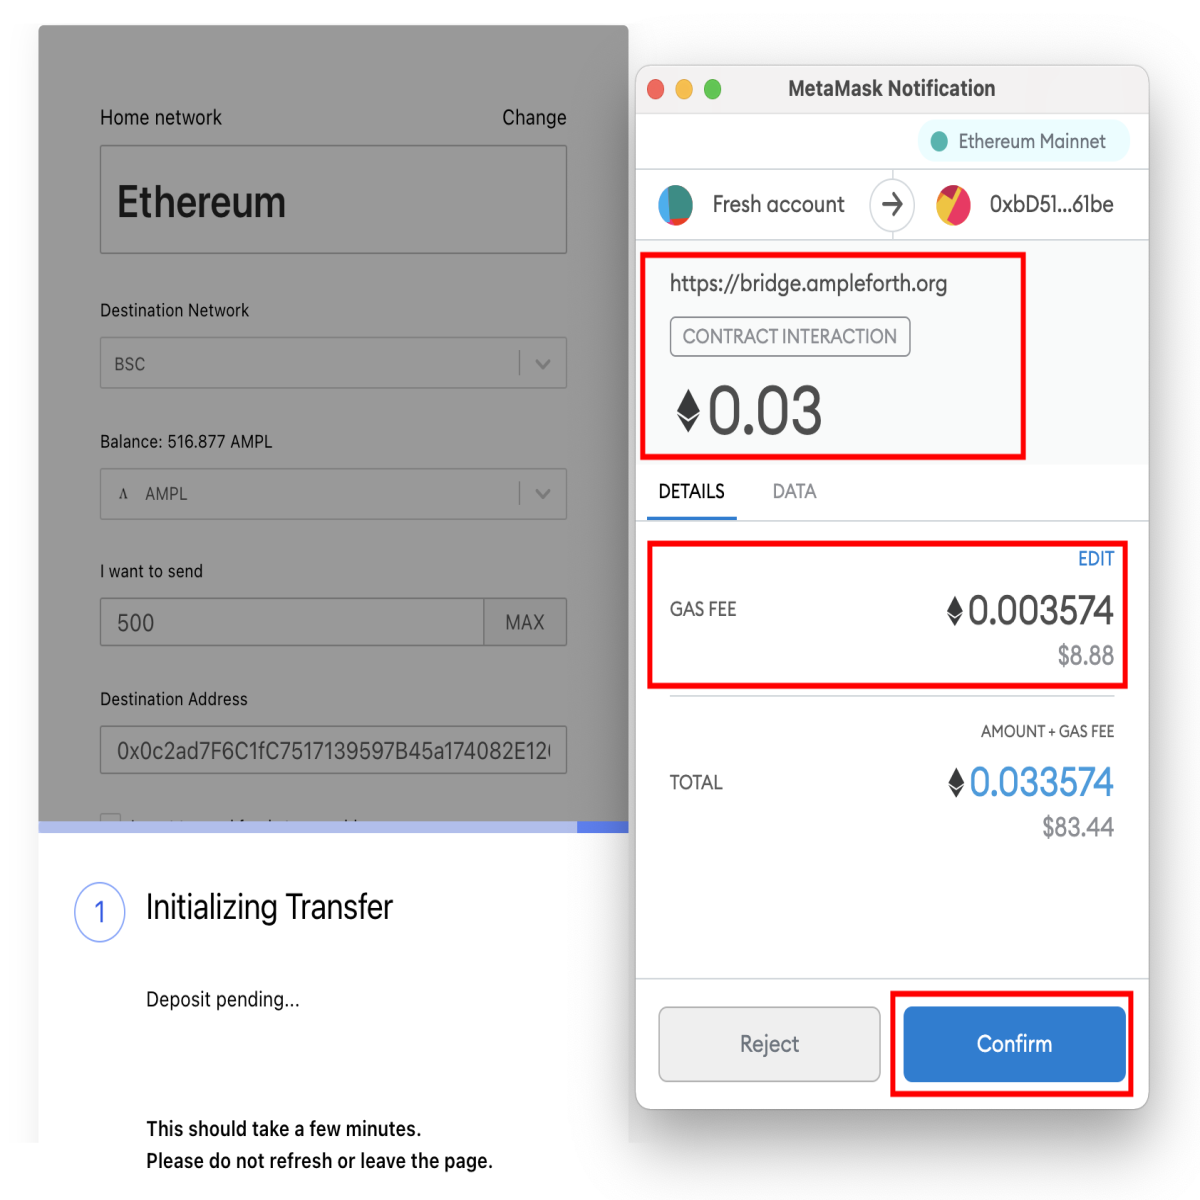
After that transaction has been confirmed, another MetaMask window will appear asking for confirmation for the contract interaction with the bridge. As we are dealing with a smart contract, the transaction fee will be slightly higher. This is the same fee as shown previously in the dashboard. If you are happy to go ahead, click “Confirm” again;
After that transaction has confirmed, the AMPL Bridge dashboard should change to the following to show that the $AMPL bridge is currently underway;

A total of two signatures are needed. After a few minutes, the first signature will come through, and you will see the following;

After a couple more minutes (depending on network congestion) , the second signature should come through, and the dashboard will show the following to confirm it is complete;
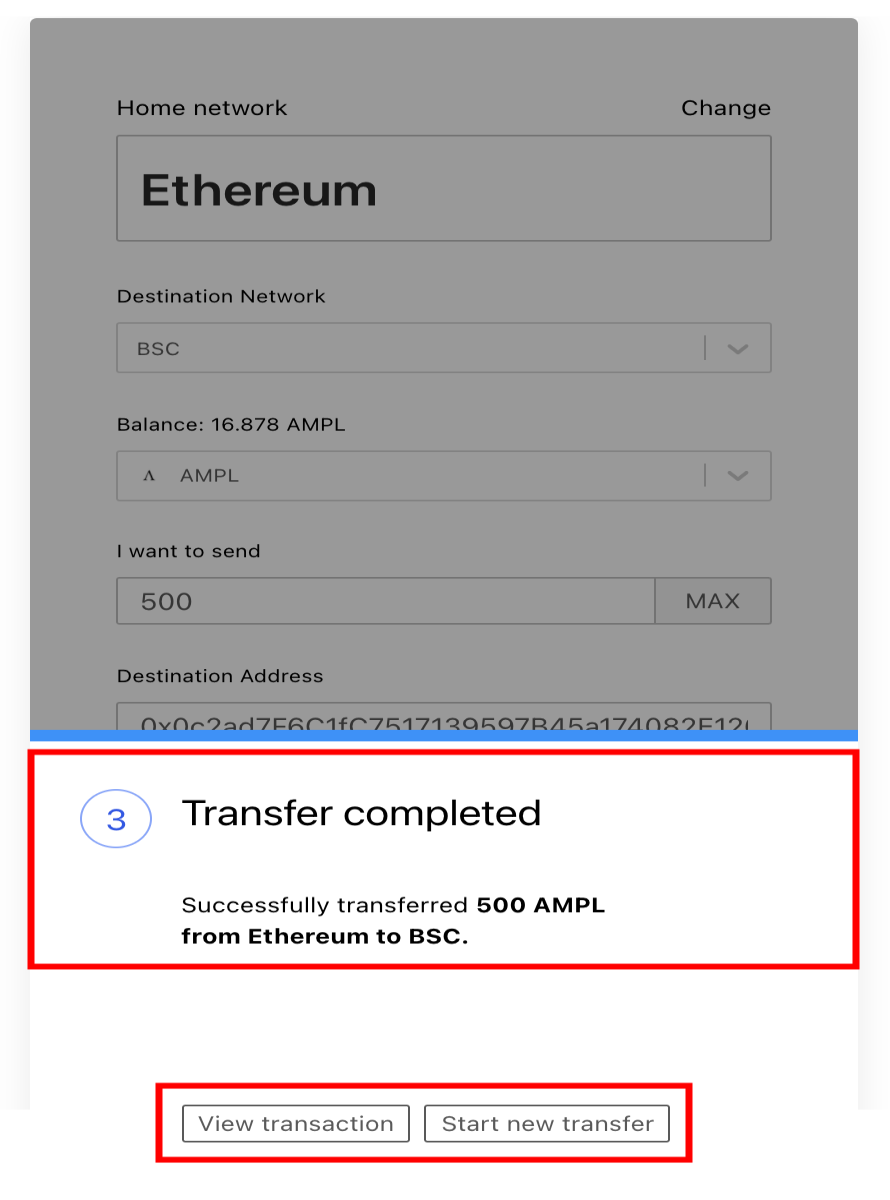
From here, you can either view the transaction on the Binance Smart Chain or start a new transfer.
Viewing Your $AMPL in Your #BSC Wallet
To see the $AMPL in your target wallet, you will have to add $AMPL as a token. With the “Smart Chain” network selected, hit “Add Token” on your MetaMask wallet window;

There, you need to paste the #BSC $AMPL token contract address:
0xdb021b1b247fe2f1fa57e0a87c748cc1e321f07f
you can double confirm it on BSCscan
Once pasted, the “Token Symbol” and “Decimals of Precision” fields will automatically populate. After, hit “Next”;
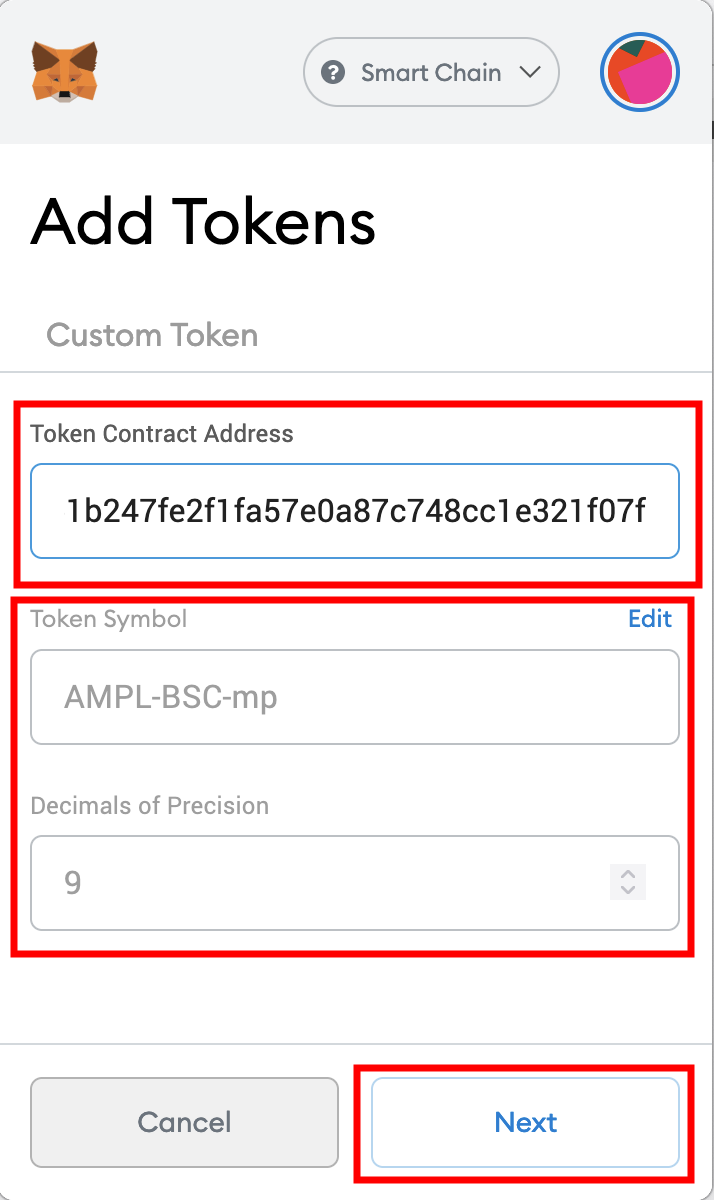
Hit “Add Token” again in the following window; (it shows 50 because of a user-interface glitch)

You will then be able to see your $AMPL in your Binance Smart Chain wallet;
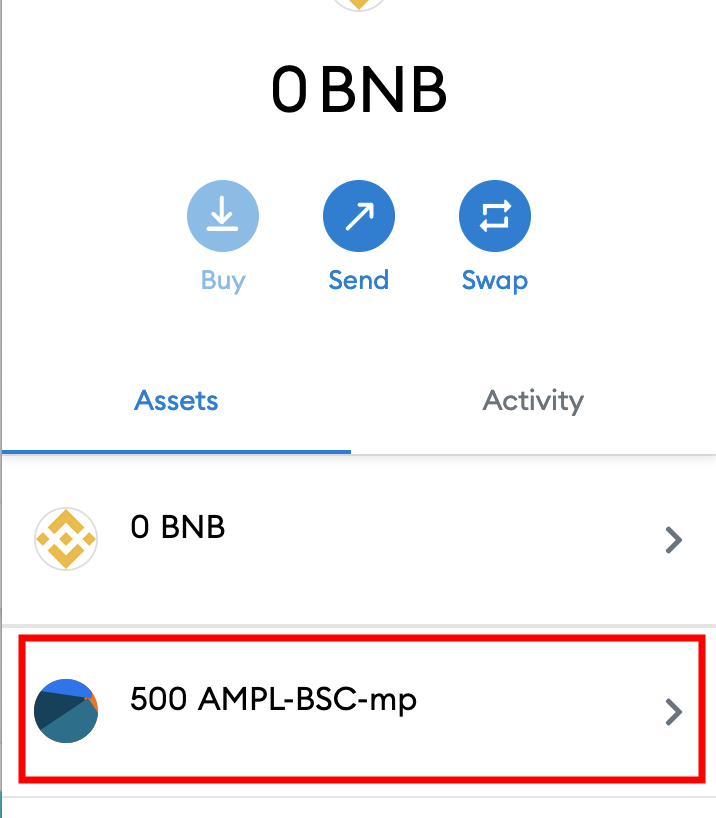
Yay. It's showing 500. Phew.
That’s all there is to it. You have now successfully bridged your $AMPL from the Ethereum network to the Binance Smart Chain.


