
More progress made on the Daihatsu. The biggest obstacle to overcome was the welding, as I cannot weld and electricity confuses and frightens me in roughly equal parts. A friend was able to come over and work on the chassis rails which were the last MOT failure issue that needed resolving. A quick recap on the situation

The yellow chalk marks the problem areas, both sides of the spring mount. I had removed the filler neck and tank by this point which gives a clearer idea of the issues. We unbolted the top mounting nut of the damper and flipped the damper itself down out of the way, then pushed the rear beam downwards to release the spring and get better access to the problem areas.
My welding friend got stuck in with the angle grinder, starting with the rearmost (left side of pic) area. This needed cutting back to almost the spring mount on the right, and to about 1" to the right of the factory holes on the left but didn’t take long. While this was going on, since I had nothing to really do that would help I set to with the spring. I removed both rubber mounts and cleaned them up with water and a brush, cleaned and sanded down the spring itself and used black spray enamel paint to recoat it. I also took the opportunity to protect the mounting rubbers by sliding some silicone hose over the ends of the spring top and bottom

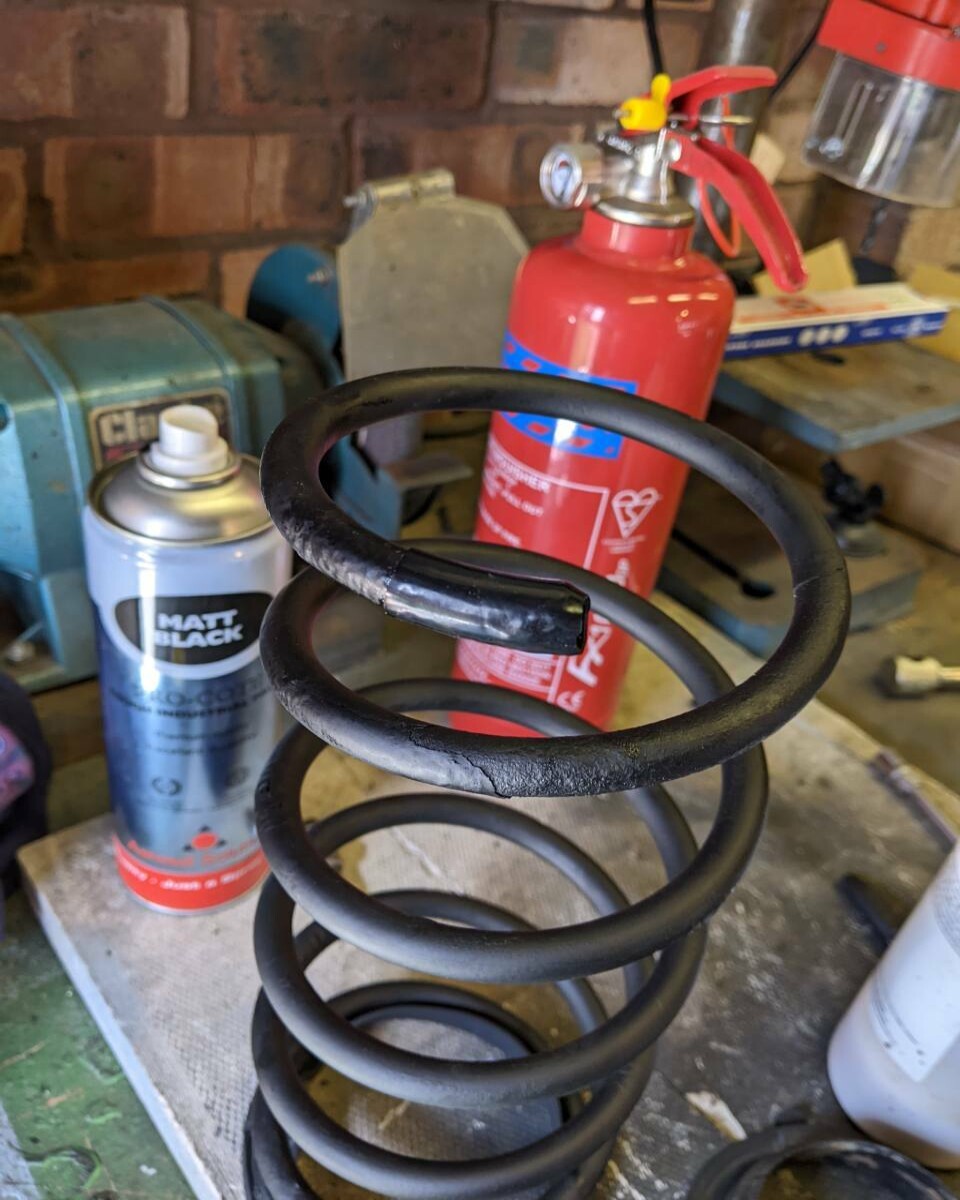
This should slow down the wear in the spring mounting cups.
While I was fiddling about, my friend had made serious progress on the cutting, fabrication and welding on the chassis rail
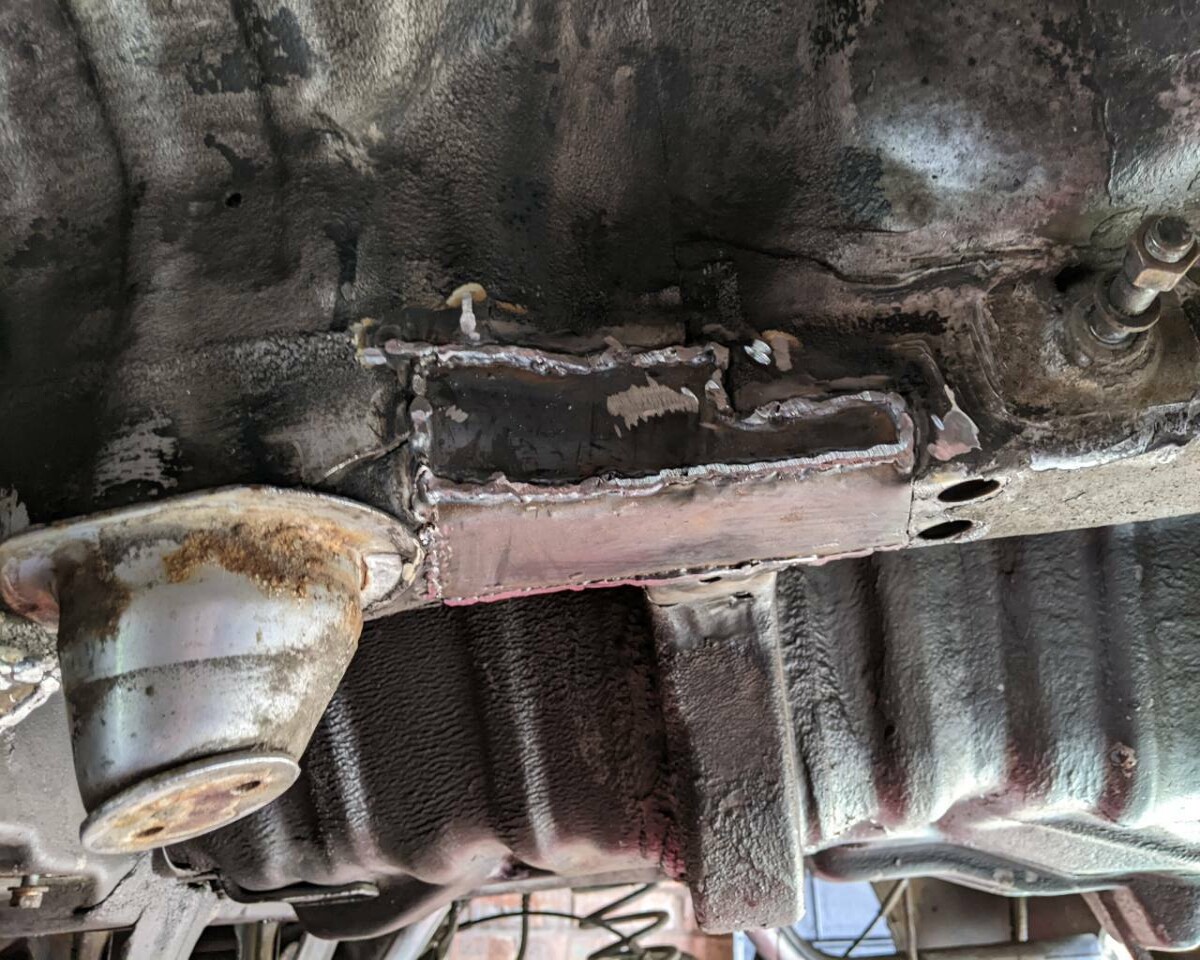
He’d let in two sections of 1.6mm steel, a horizontal and a vertical to reconstruct the rail rear of the spring mount.
He then set to work on the fore section. This was a bit more difficult, as it was right above the bracket for the rear brake pipe, and caused some issues. To start with he moved the ABS wiring out the way, then the only option was to disconnect the brake pipe union, remove the clip for the flexi section and bend the copper line well out the way. I put a bit of old carrier bag over the reservoir cap in the engine bay and we cable tied the finger of a nitrile glove over the end of the copper brake pipe to catch the drips of brake fluid
The bracket was bent downwards to give access to cut the rusty old steel out and a new square section was welded in. While this was going on I sanded down the brake pipe clip which was pretty cruddy. We were both amazed that the union actually came undone without shearing, as it had definitely not been apart in the 18 years since it was built!
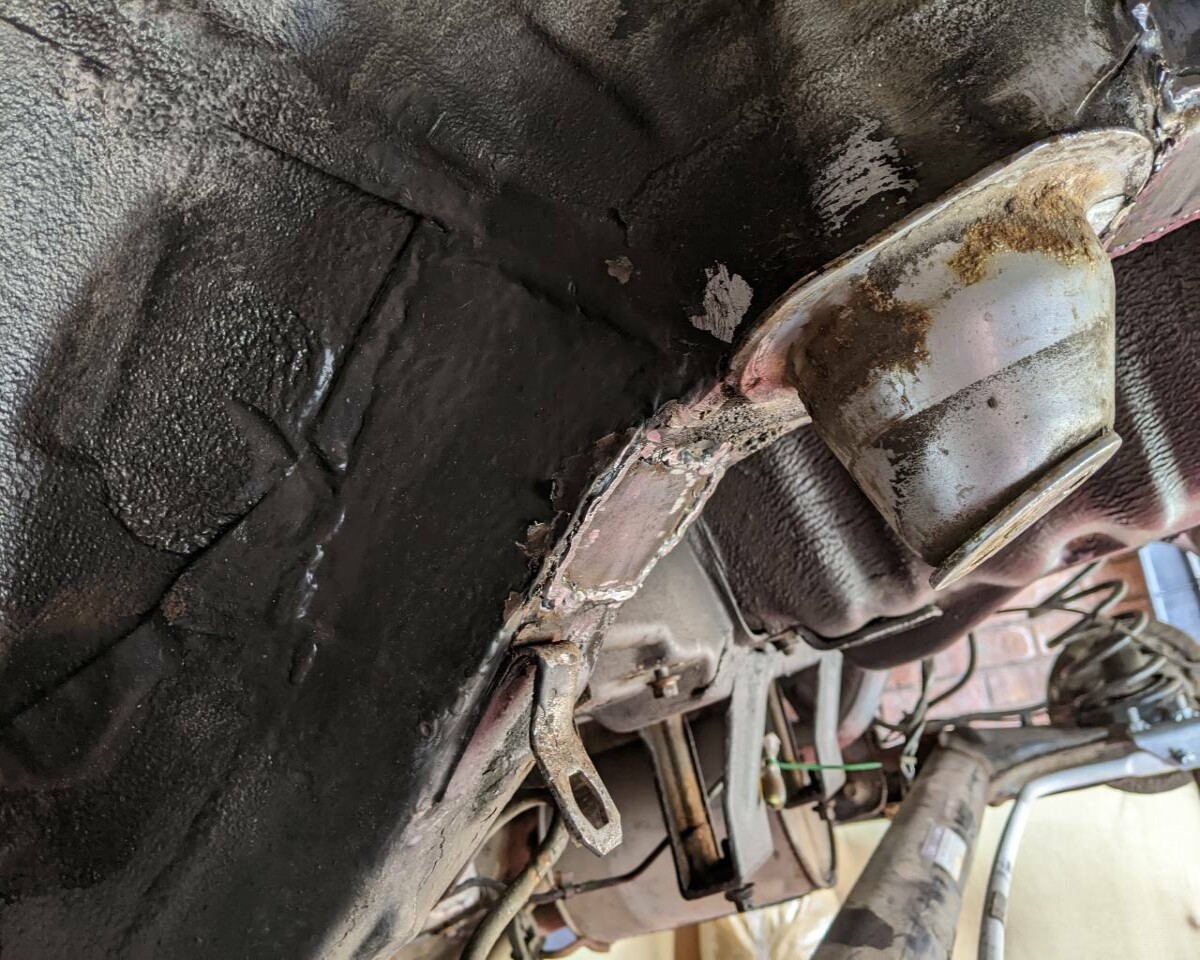
With this done, my friend ground down the welds as much as possible, then zinc primer'd the bare metal and followed up with a coat of black enamel aerosol paint

We also sanded back the surface rust on the suspension mount and zinc primered that too for good measure. You can see in the second pic above just how difficult it was to get at the rusted out section which lives underneath the hardline → flexi joint of the brake line for this side.
With the brake pipe reconnected we bled the system, noting that the fluid was actually in very good condition which is good news. I topped the reservoir up with some dot4 I had on the shelf
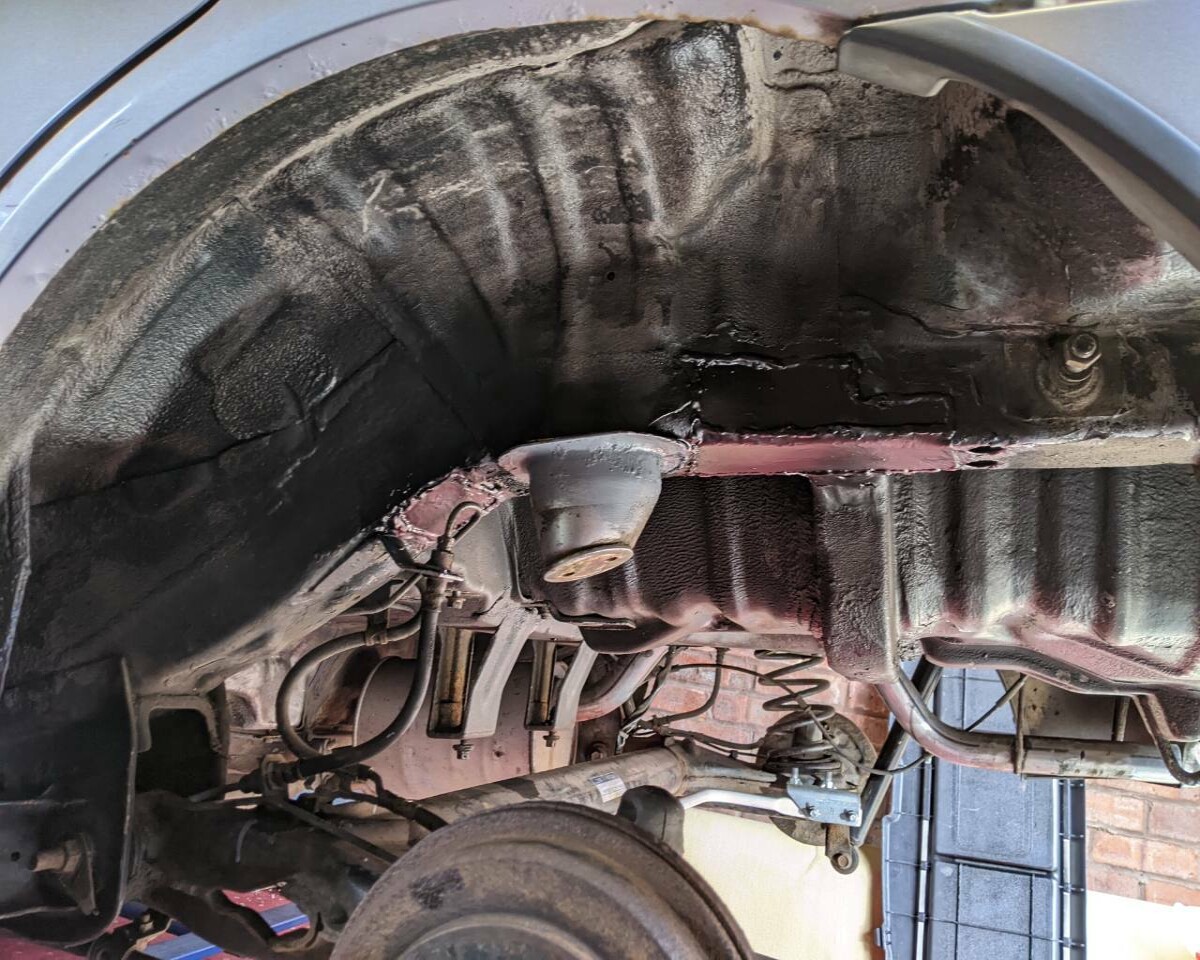
I nipped out earlier and put another coat of black enamel on the new metal and will do another one tomorrow morning.
I get paid next week, so will order some underbody wax and spray that all around before refitting the fuel tank and filler neck, slopping a couple of gallons into the fuel tank from a jerry can and then getting it booked in for a new MOT at some point next month.
I’ll get the garage to change the rear beam bushes at the same time since I have the parts, but not the inclination to fit them!


