New news! With everything fully disassembled, I've finally got some forward progress.
I've been busy de'rusting the outside of the fuel tank with a wire brush, painting it with Vactan and tonight, applying zinc primer. I need to buy some more black enamel paint for topcoat in due course.
Today my Amayama order arrived, lots of small things I needed and have now got

A replacement breather hose, filler neck gasket, filler neck bolts, screw hose clips and the things that the back seat base pushes into to keep it in position, all delivered from Japan. All OEM genuine too.
I fitted what I could, I still need the filler neck to arrive before it can be fitted with some of the top side stuff, and I need a couple more coats of zinc primer and then a few coats of enamel on the actual tank, but we're getting there

Onwards!
A modicum of progress on this, the filler neck has been dispatched and will be with me next week sometime, I was given the option of Hermes delivery for £5 or Parcelforce for £8. I opted for Parcelforce, lets see how good a decision that turns out to be shall we? The cost isn't a big issue, but these are hard to track down - I think I have been given one of the last 3 revised filler necks in the UK so if they muck it up I'm going to be a very cross boy.
In prep for this arriving, I've carried on painting the fuel tank. It had 2 coats of Vactan, 2 coats of zinc primer and now had 2 coats of toolstation matte black enamel and looks pretty sexy


And should last a good few more years. Its sitting in the garage awaiting the filler neck arriving and some welding help before it can be refitted.
I spent rather a long time under the car, taking advantage of having removed the tank and filler neck and things to wire brush the underneath rearwards of the front seats. This was generally in good condition, but had various patches of surface rust and this seemed as good an opportunity as any to treat that. It got cleaned down and then scrubbed hard with a wire brush all over, then given a lot of Vactan, painted on by brush, upside down. This was a messy escapade.
This is an example of the inside of the rear 3/4 panel where the fuel filler pipe goes, this was probably the worst of it in all honesty
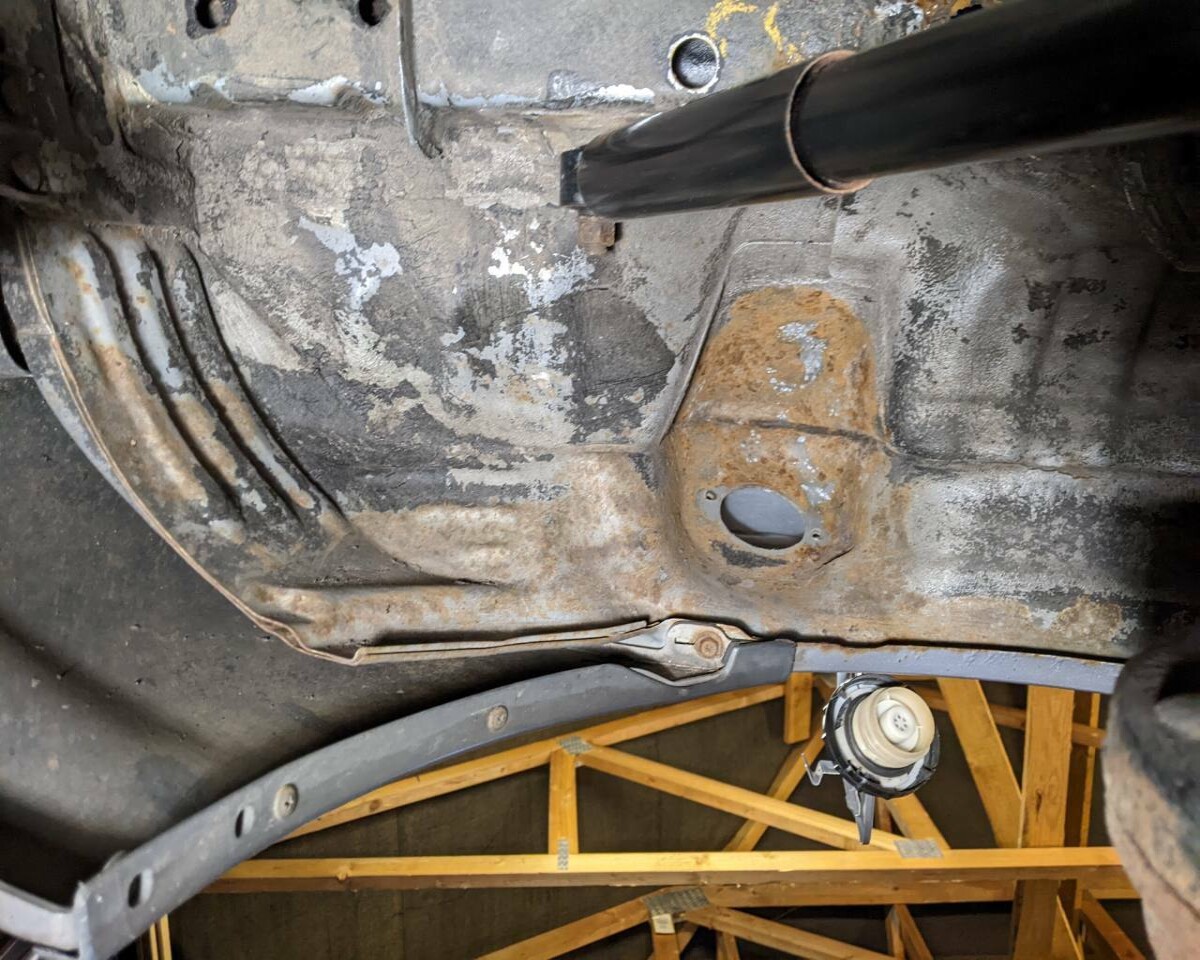
That's lying on the floor, looking up at the hole the filler neck will attach to. This was all scrubbed down and thoroughly painted

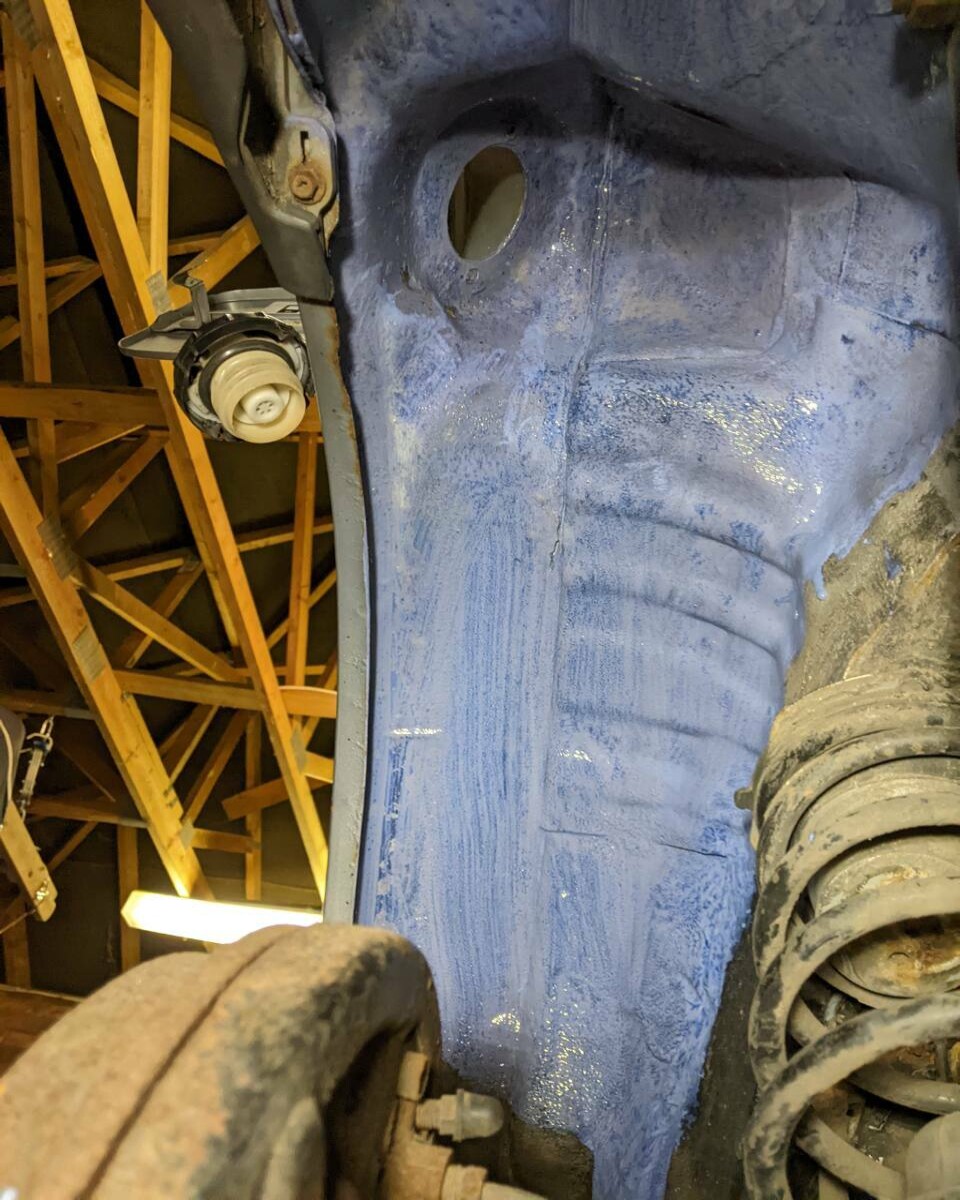
I also did the same in the other rear arch, rear valence, boot floor, chassis rail on the driver side (I deliberately left the passenger side chassis rail as this needs welding still), arch lips and floorpan above the fuel tank - essentially everything rearwards of the front two seats. My plan for this is to wait for the welding to be completed, then vactan and zinc primer the newly welded bits, then black enamel the whole lot before giving it the gold star treatment with some Dynax UB wax all over the whole area. I can then wax the outside of the fuel tank too, then refit that, the filler neck, and all the gubbinz and then it can go in for another test, and for the rear beam bushes to be replaced. Its a bit of a big job all in all, but worth doing while its all apart because a lot of it is entirely inaccessible once the tank is back in. I have almost all the parts I need now, just waiting on the filler neck. Then I will buy some Dynax UB wax in prep for the underneath, but I'm holding off on this until the welding is done.
Not a riveting update, but some progress at least.
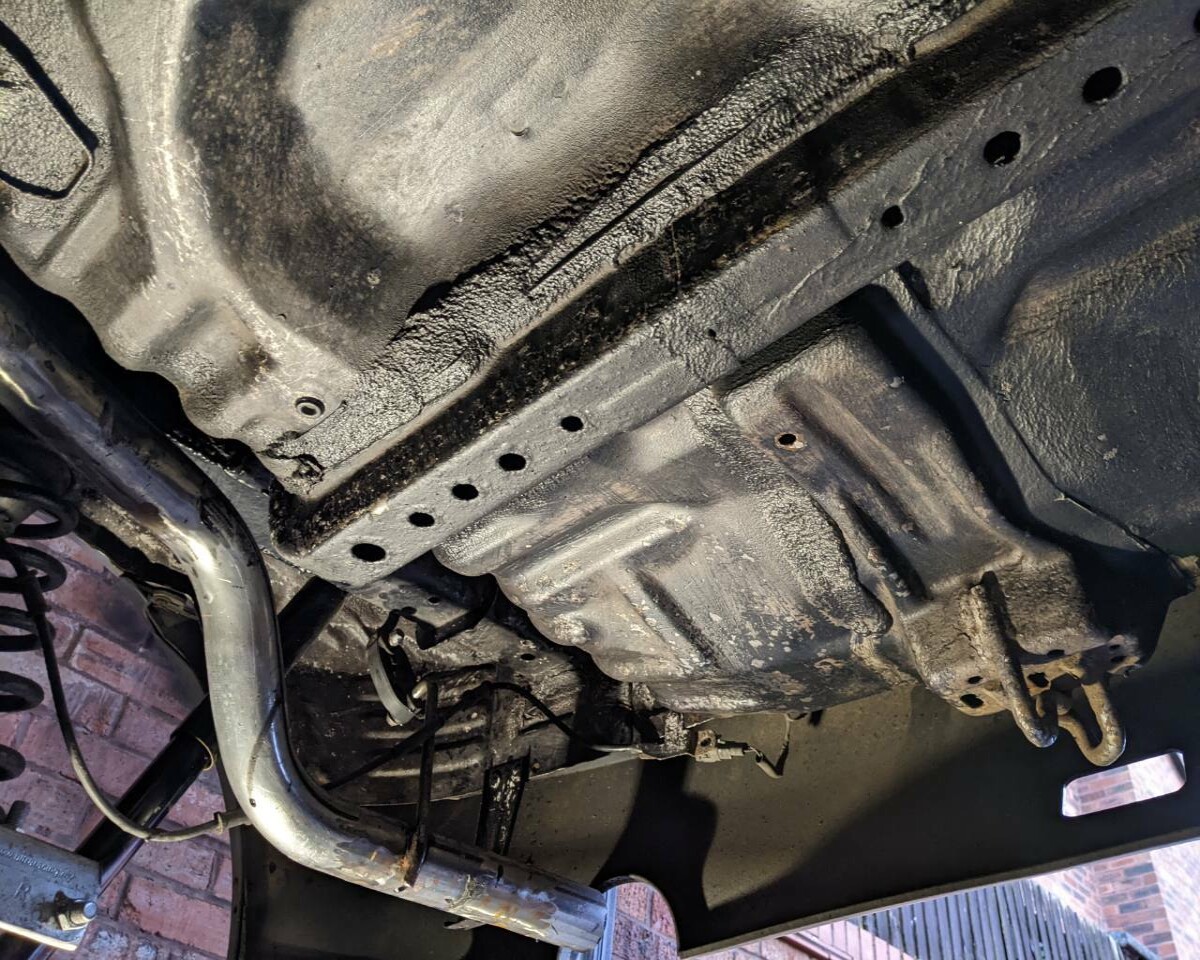
This is the view of the underside currently

Verdict? Adequate, 2-legged. NAO FEED ME