
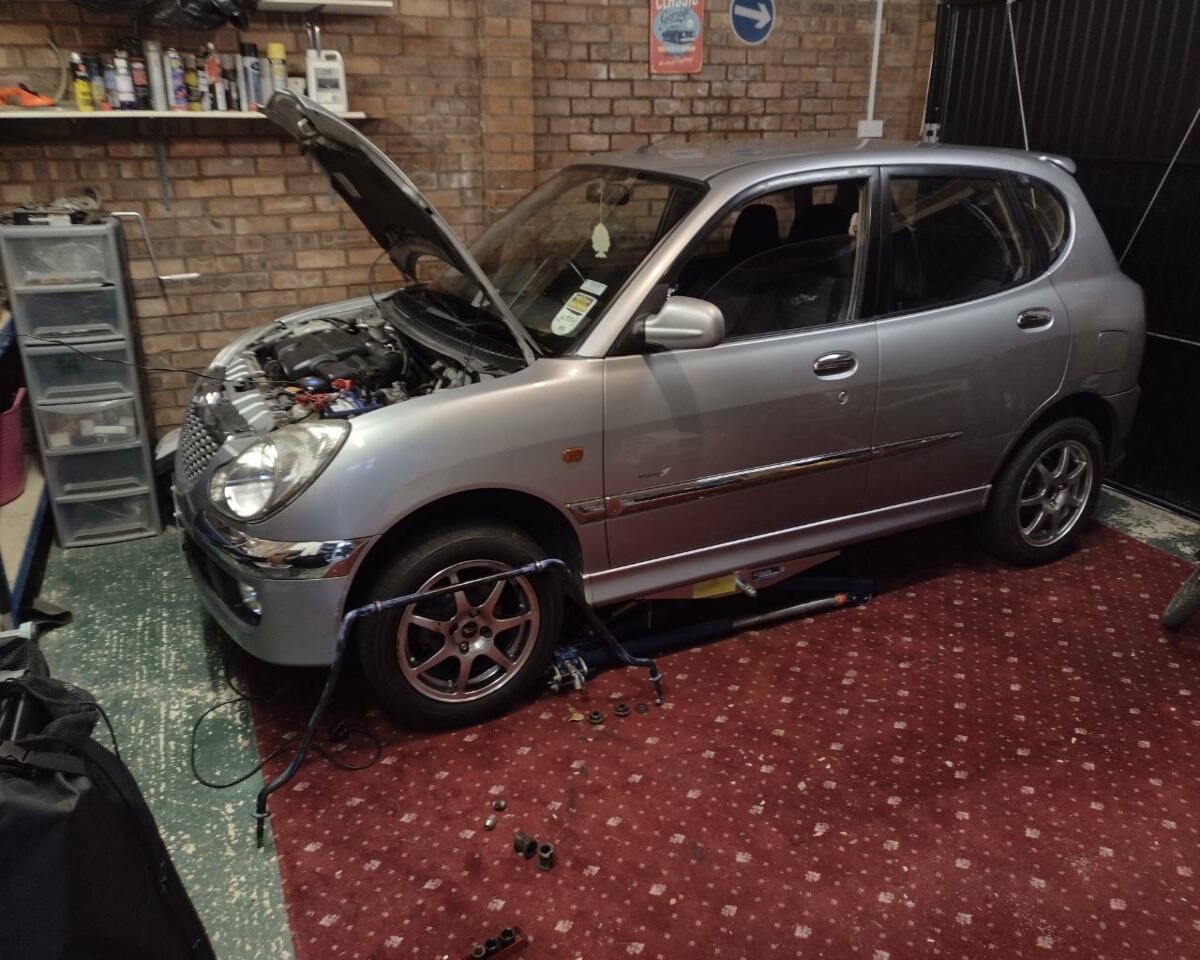
I Spent some time over several evenings recently working to replace the bushes and suspension arms on my diminutive Daihatsu. To get the ball rolling, I set to with penetrating oil and a socket, more in hope than anything, to see if I could get any movement on the u-clamp bolts and the nuts on the treaded sections on the two ends of the ARB itself. Bear in mind these are now 17 years old and a bit corroded
To my astonishment, with a bit of careful application of a long bar and penetrating oil all 4 bolts and both nuts loosened up fine. I wasn't expecting much so it was quite late before I started, so once I'd loosened everything up, I did it all up again and left it for 24 hours.
My main concern was the tension on the ARB - it wasn't obvious to me whether the bar was under tension with the wheels on the floor, or with the front off the ground and suspension at full extension, or somewhere in between. I decided that the bar wanted to be horizontal with where it locates through the lower suspension arm bushes, and that this roughly equated to the front lifted up, but not as far as to lift the tyres off the ground. I left the nuts on the threaded ends of the ARB and carefully undid the u-clamp bolts on the leading edge of the subframe cradle. I watched to see if the bolts undid and exposed the threads, or if the tension of the ARB was pushing the metal u-clamp off the subframe, luckily I had guessed about right and the bolts undid and u-clamps dropped off without the ARB smashing my teeth out.
I dropped the u-clamps off and cleaned up the threads of the bolts with a wire brush and the bolts in a vice. They are 'handed' so I set them to one side for safe keeping.
I then lifted the car up, took both front wheels off and undid the nuts on the end of the threaded sections, took off the large washers and wiggled the rear top-hat bushes out. Then bashed the ends of the threaded section through the voids with a rubber mallet so I didn't mushroom the ends.
I was then able to pull the ARB out from the front of the car, hooray!
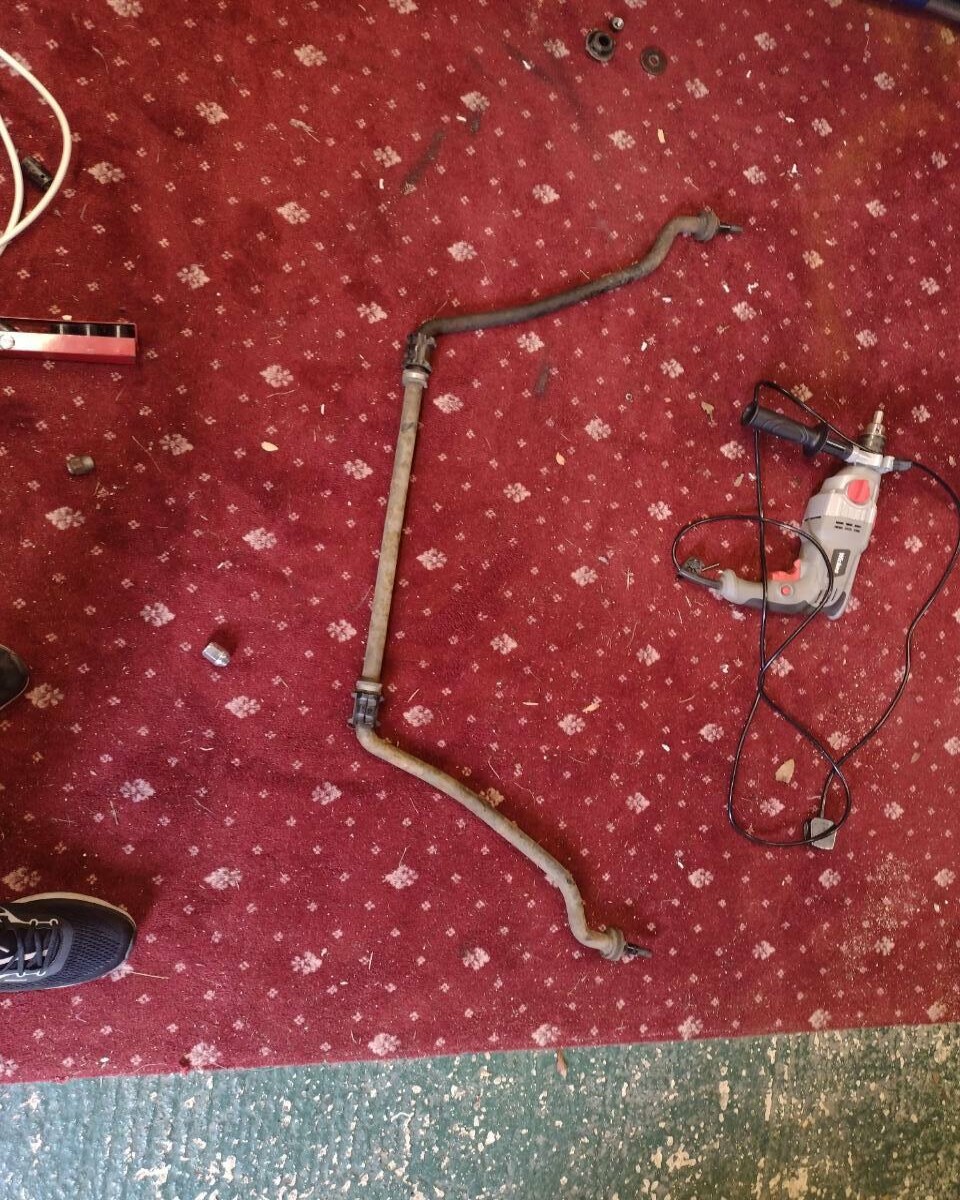
As you can see its got quite a bit of surface rust on, so after unpeeling the split (intentionally) front bushes from the ARB I sanded it down, wiped the rust/dust off with a wet sponge and painted it with Vactan, and left it propped up against the front wheel overnight to dry
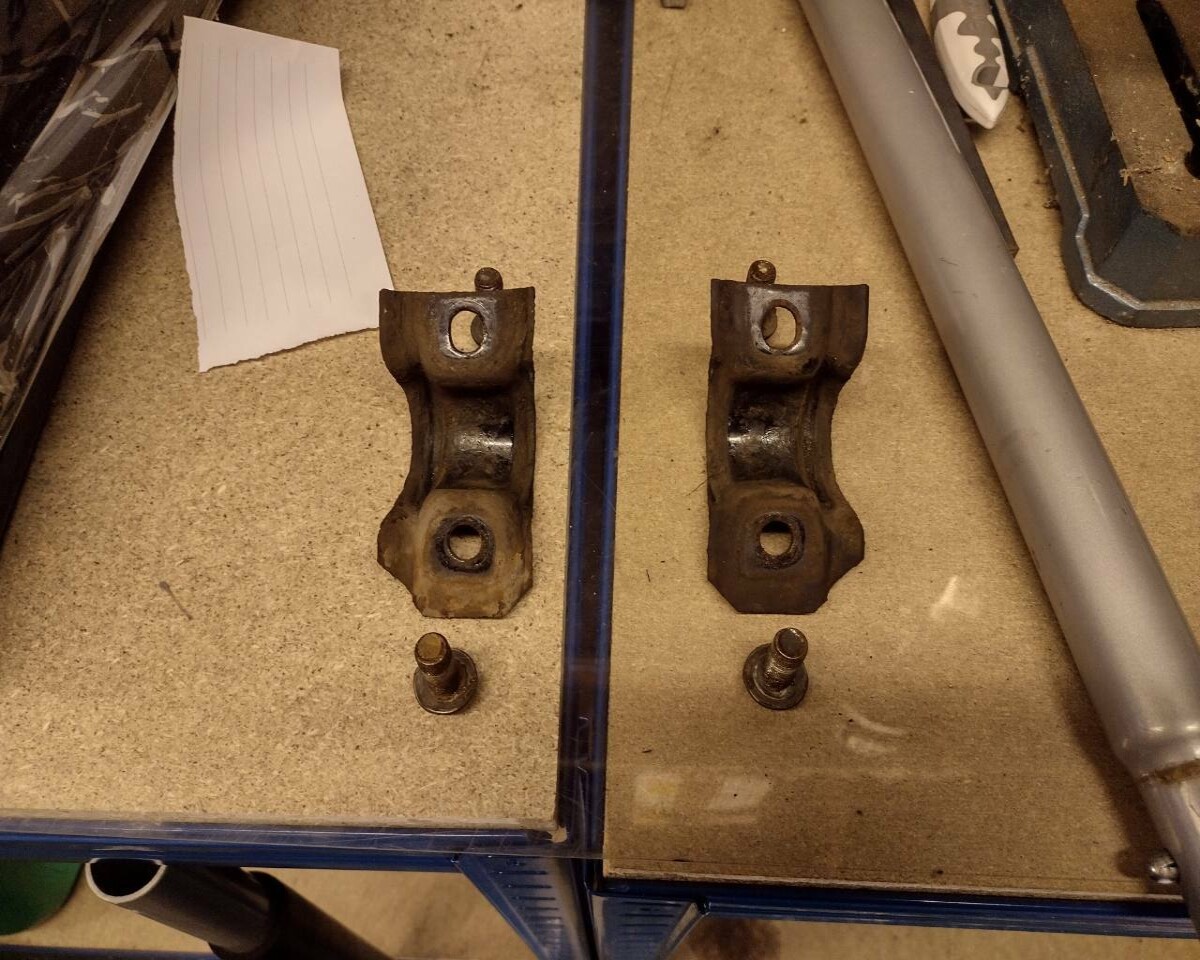
The ARB bushes look to be original and are a bit crusty

These are the ones under the u-clamps on the leading part/straight bit of the ARB. I had to guess which u-clamp bushes to get as they come in 23mm inner diameter and 23.5mm, I went for the 23.5mm ones on the basis my car likely has a thicker ARB because its the SPROTS VERSHUN - a test of the ARB itself with my calipers measured 23.37mm so with a lick of paint that will be 23.5mm I'm sure. I suspect the 23mm ones would have been fine in reality.
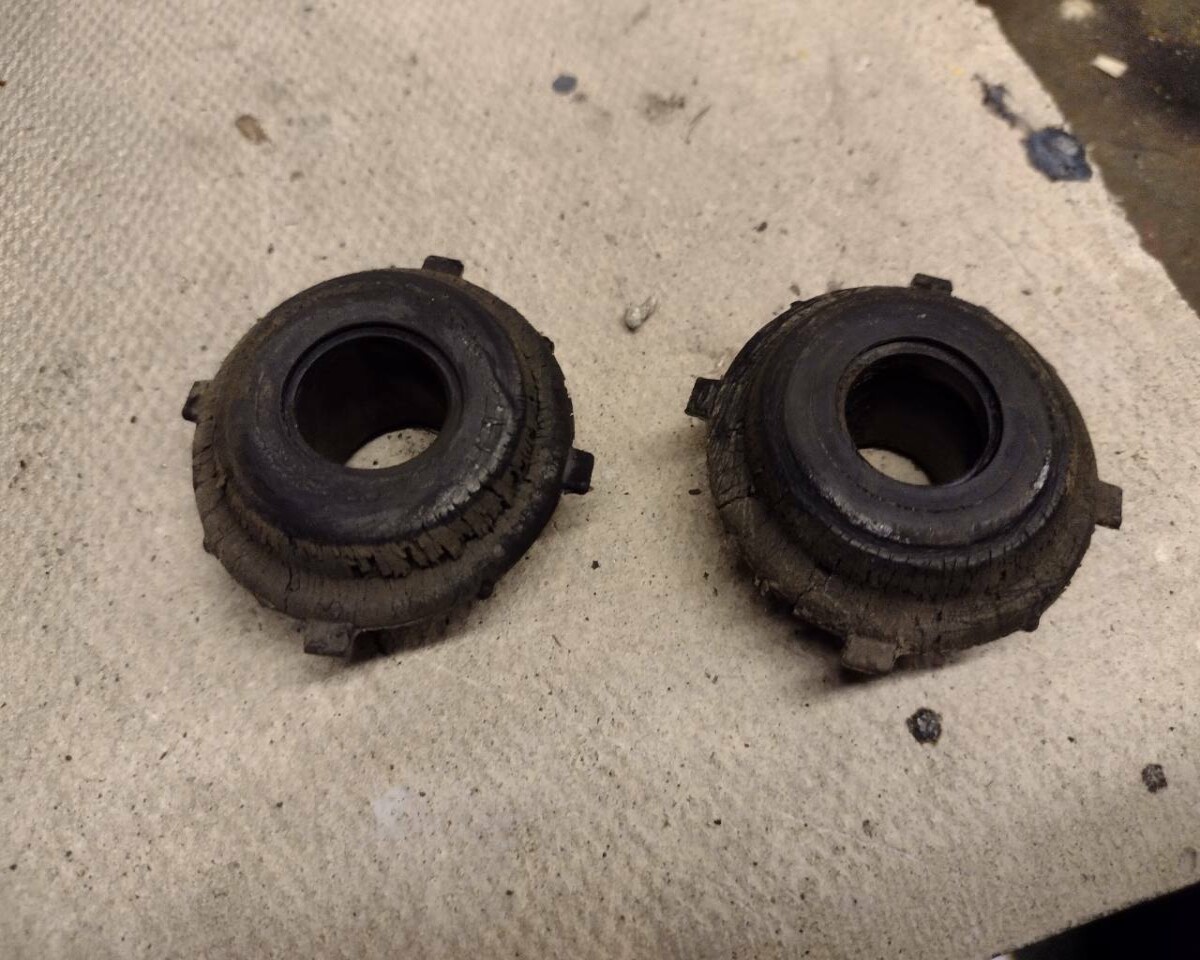
And these are the much crustier top-hat bushes that allow the ends of the ARB to locate through the lower arms - these were super easy to remove which bodes well for when I replace them with the PU ones that are on their way to me from a polybush manufacturer in Vladivostok right now.
The only ones I'd not yet touched were the bushes that go on the inner end of the lower suspension arm because they look like they'll be a right old war to remove from where they sit, and I though that I really needed a balljoint separator to get the lower arm off the car entirely to remove the old ones and replace with the new ones on order.
I left the ARB overnight for the Vactan to dry properly and then got ready to paint it with aerosol black enamel the following evening in prep for the bushes arriving hopefully next week.
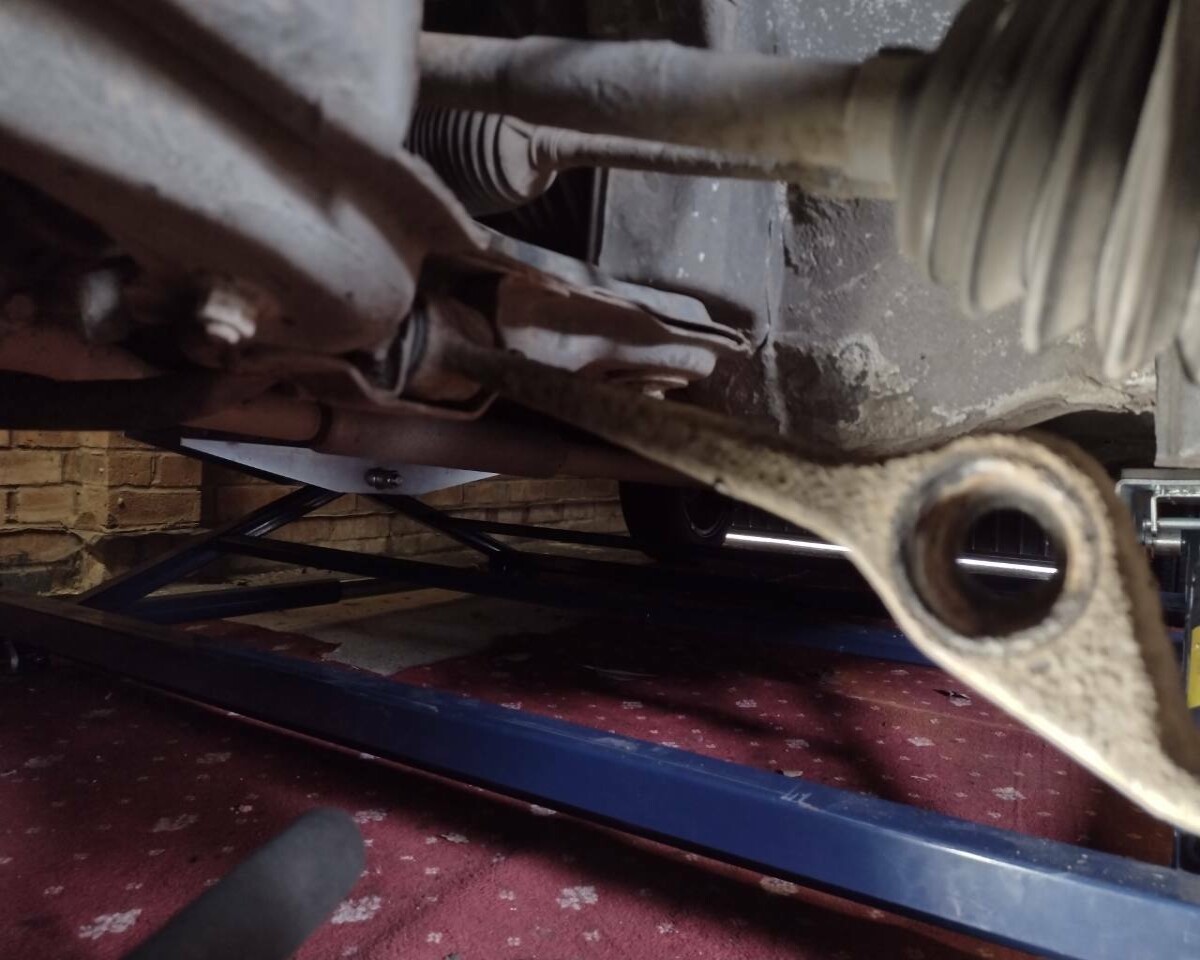
The following night I had some more time so had a go at removing the drivers side lower suspension arm. The balljoint dust covers were an advisory at the last MOT anyway and I needed to get the arms off to be able to remove the old bushes and press the new PU ones in when they pitch up.
Access isn't too bad with the wheel removed and the ARB detached

I had undone the 17mm nut on the threaded section of the balljoint end - as you can see, the dust cover is split at least halfway around here. I used a crowbar and hammer to lever the arm off the bottom of the hub
On the left you can see the cylindrical bit that the bush goes into, this is held onto the subframe with a stout 17mm bolt which was surprisingly easy to remove with no tension on the arm
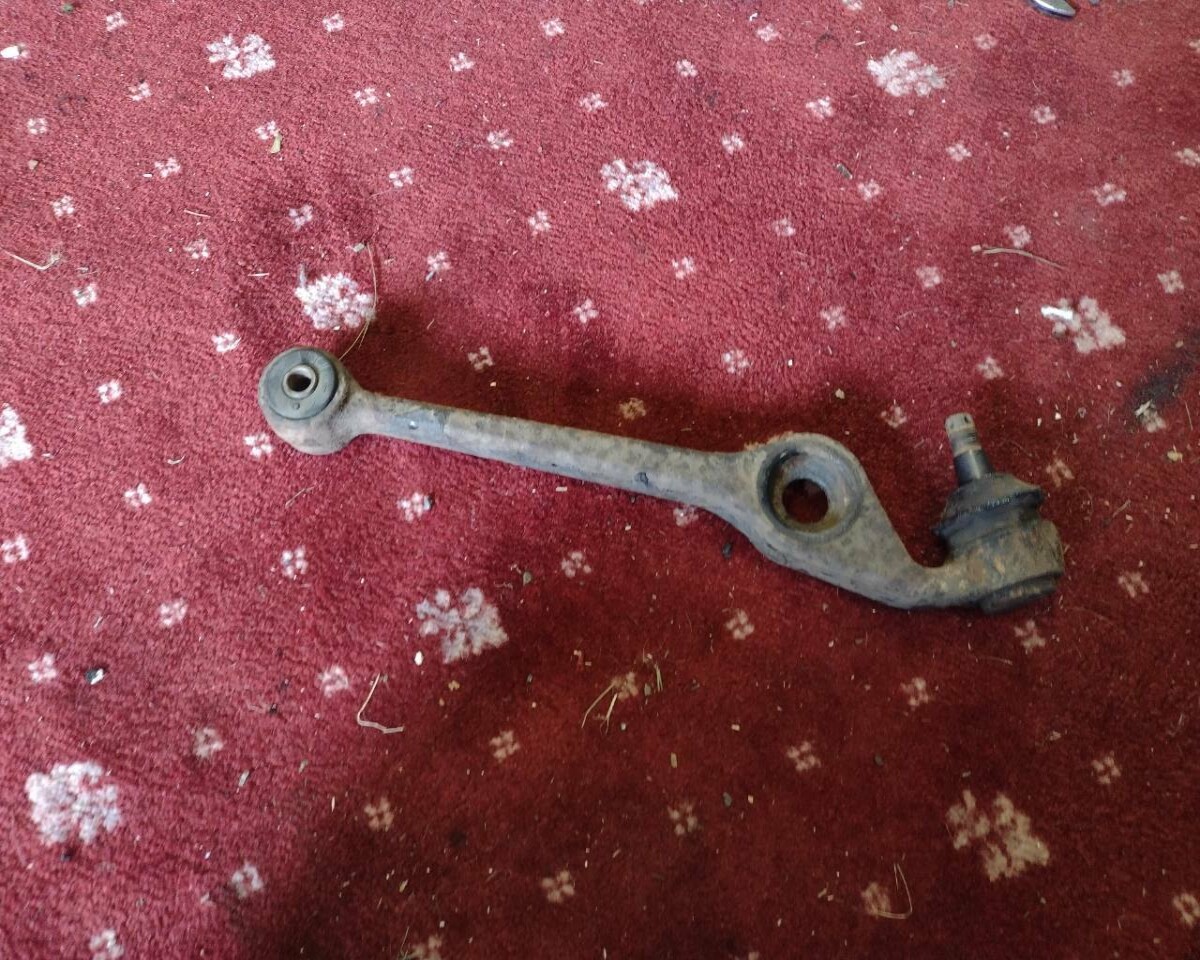
This is the arm itself which came out without too much struggle. the balljoint dust cover was wrecked by being removed so that will get replaced with one from a bag of mixed size balljoint dust covers I got several years ago. The arm itself has some surface rust but was otherwise fine. The next task was getting the bush on the left end of this arm out. What a pig of a job!
In the end I used a pillar drill to drill holes through the rubber until it was weakened enough that I could hammer the bush out with a drift, but not before I'd lost three drill bits to snapping, tried 2x g-clamps with sockets in to try and push the bush out, a hole saw and a LOT of hammering. Safe to say they are a 'snug fit' in the void!
This is it with the bush removed
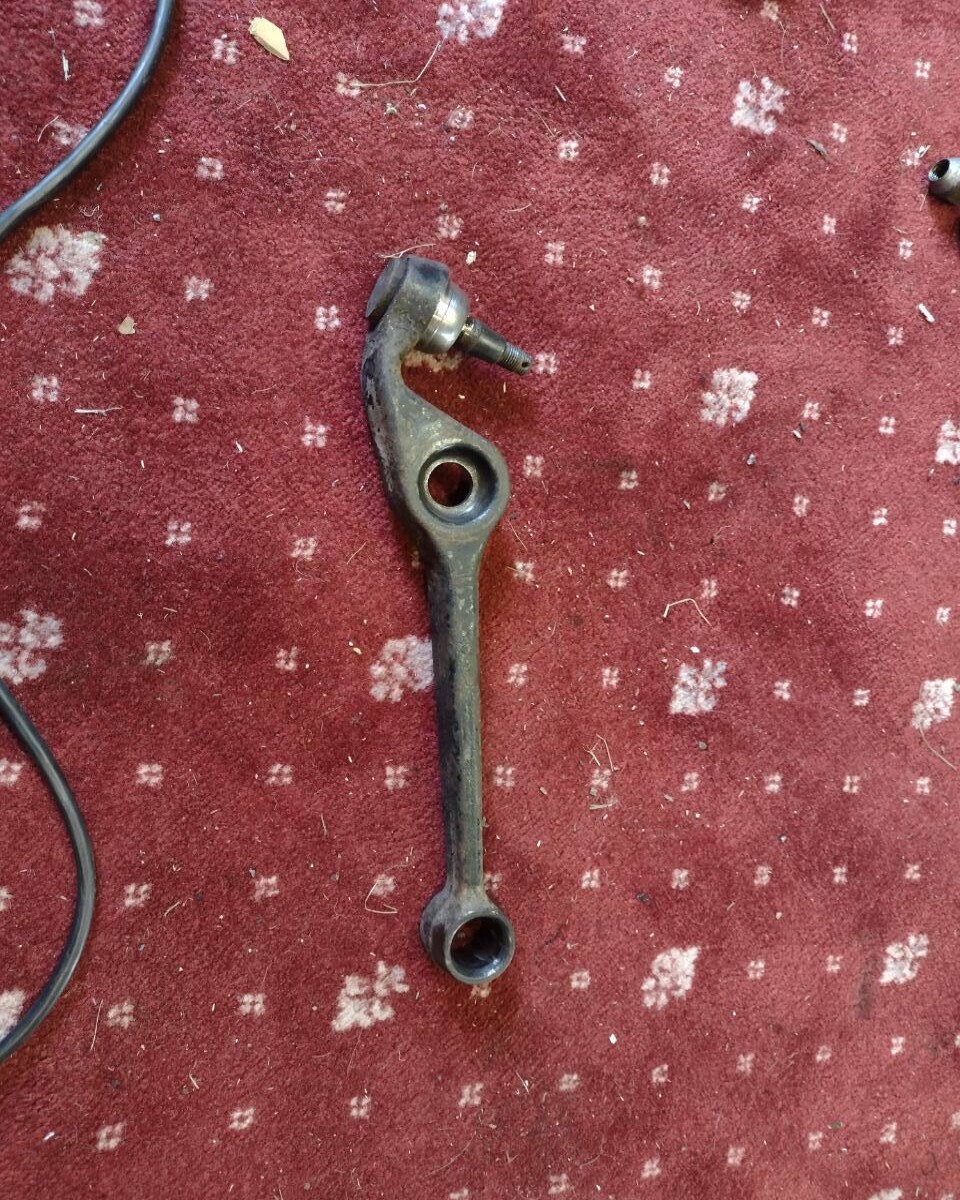
I cleaned up the void with a wire brush attachment in the pillar drill, and also cleaned up the other hole that the ARB mounts through while I was at it. Its not super-clear in this pic but I have managed to do a bit of damage to the inner edge of the void that the new bush will go into with the drill. I had hoped that this wouldn't matter too much, as the bushes don't rotate at all in the arm - they are pushed in and grip like limpets - with the PU bush, there is a chromed metal tube that the bolt goes through which is what moves, my plan was that when the bushes arrived, I would slide the tube out, silicone grease the inside and outside and slide it back into the PU bit.
I utterly wrecked the old bush getting it out, and didn't particularly fancy wrecking the new one trying to get it in. I decided that I would take the arms and bushes over the road to the mechanics there and see if they'll press them in to the arms for me for a contribution to the tea and biscuits* fund with a proper press.
I was also able to paint the ARB with black enamel and that's was fully dry by this point, ready to be refitted when the new bushes arrived in the post.
The following day there was some more progress. As I now knew what I'm doing* the other side came out in 20 minutes, I had a go with the hub puller I got in a jumble sale for £2 two years ago to press the bush out
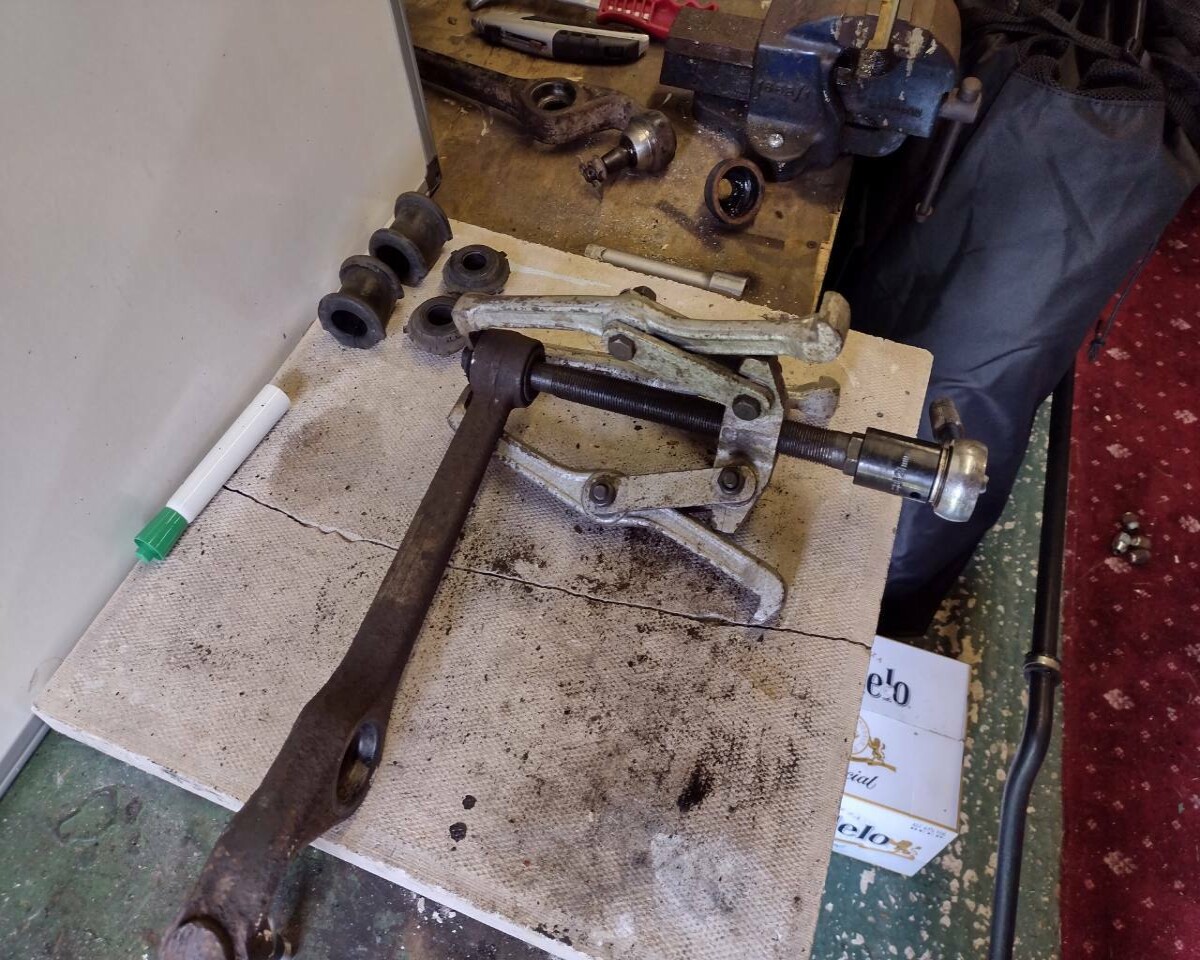
Which was an amazing success - the only fiddly bit was lining the three legs of the puller up on the rim of the void that the bush locates into, then just pushed it out by tightening the spindle of the puller up. The job took all of 2 minutes to do and I managed to not damage the inner face of the void at all.
However, what I DID manage to damage was the thread on the balljoint extrusion. Now there is more resistance in the nut tightening on the threaded section than there is for the balljoint to spin in its socket, and with no visible means to lock the balljoint the arm is scrap - I'll not be able to tighten the nut back up after I have pressed in the new bush on the car, and even if I did manage to tighten it up, there is zero change of it coming off again without a session with the angle grinder in a very tight space.
So I bit the bullet and ordered a pair of new lower arms as these come with new nuts, new clevis pins, new pre-fitted balljoint dust covers and I know its going to be easy to press the rubber bushes out and fit the new PU bushes using the hub puller anyway. They were only £28 each - 'Firstline' brand? Apparently they make loads of aftermarket stuff and are generally pretty good. Can't say I've heard of them, but then I've also never heard of the other options including KAVA, Febest, Japanparts, Ashika, Oyodo, NTY or various others.
I also put another coat of black enamel on the ARB itself.
Two days later the bushes arrived in the post - it took 8 days for them to be shipped from the very far east of Russia to the UK which was pretty impressive, and handy too as no-one else in the universe seemed to make polyurethane bushes for Daihatsu Sirions! The bushes were swiftly followed by a parcel delivery showing up 30 minutes later with my new suspension arms, so I had everything I needed.
With the bushes and new arms, the front end was completely rebuilt in an evening. The new arms had arrived in the post about 25 minutes after the PU bushes, I called my pet garage about pressing in the new bushes and they said they were stacked and it'd be 2 weeks time at the earliest so I had a stab at doing them myself with the hub puller. I was purple with rage due to a dire morning of work issues but was able to press the brand new rubber bushes out of the lower arms with the hub puller and a bench vice. I lubed up the voids with silicone grease and pressed the new PU bushes in with minimal fuss. I then loosely bolted the arms into the subframe, tapped the locating rod bit of the balljoint into the bottoms of the hubs and did up the castellated nuts to tighten them into position, then fitted the split pins to keep them in place.
Then I fitted the ARB bushes, put the ARB ends through the new lower arms and did the nuts up a bit to keep it in place. Then I sliced the u-clamp bushes, wrapped them around the leading edge of the freshly painted ARB, and clamped them down with the metal clamps.
I then went and did the nuts on the ends of the ARB up tight to pull the ARB > lower arm top hat bushes into position properly.
It all went together fine which was a big relief. So that's the front end refurbed with all new bushes and arms which should help a lot.
I tilted the nose of the car down and took one back wheel off, the rear beam bushes are a bit trickier as I don't really want to drop the rear beam entirely, and the bolts that hold the leading edge of the rear beam to the body mounts are super tight. I tried to see if I could get the ugga dugga on them to tempt them out, but they weren't having any of it, and access was awful.
Here are some 'this man has just run me over' style photos of the finished job
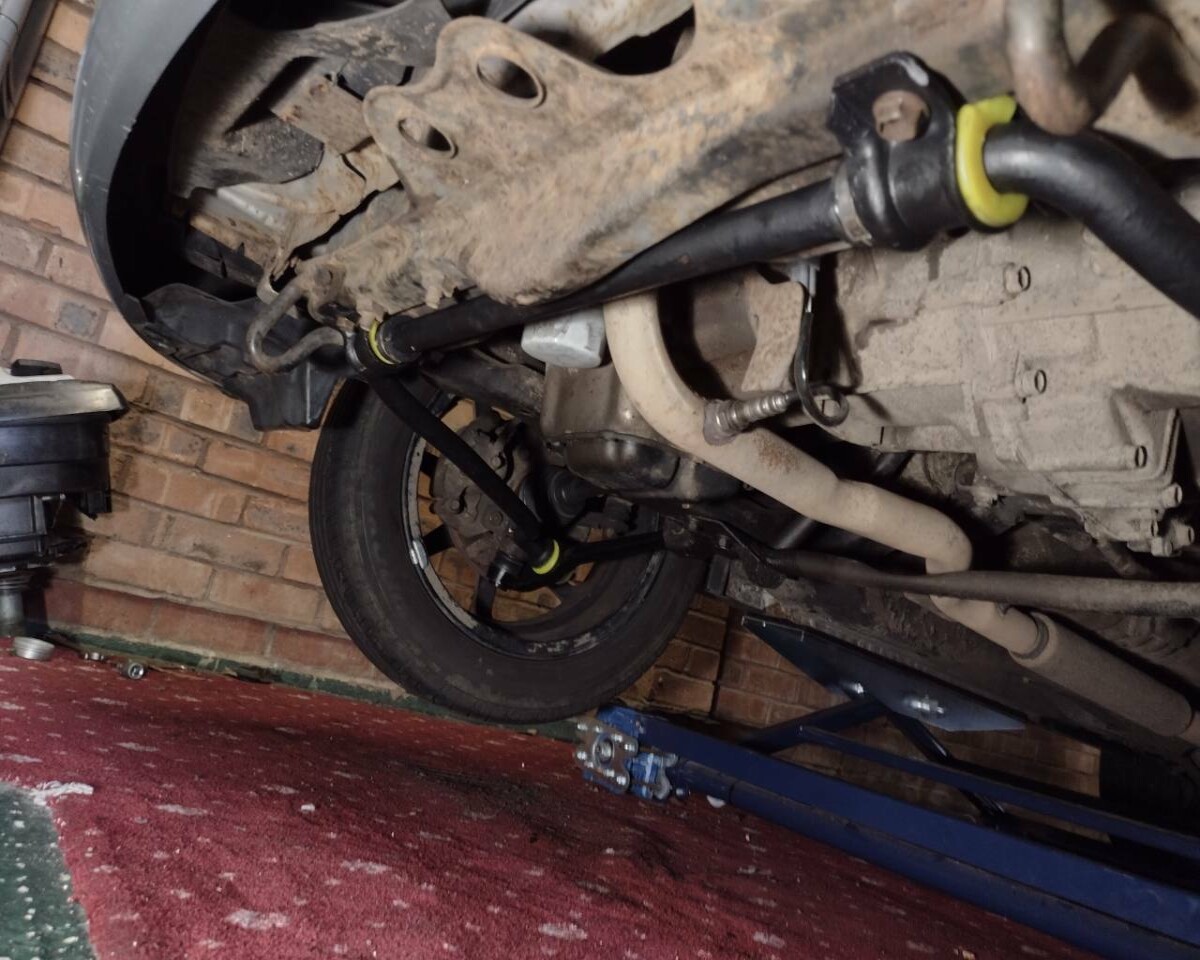
As you can see, I sanded down, Vactan'd and enamel painted the ARB itself and the u-clamps in matte black, the new bushes are bright yellow which gives a nice contrast
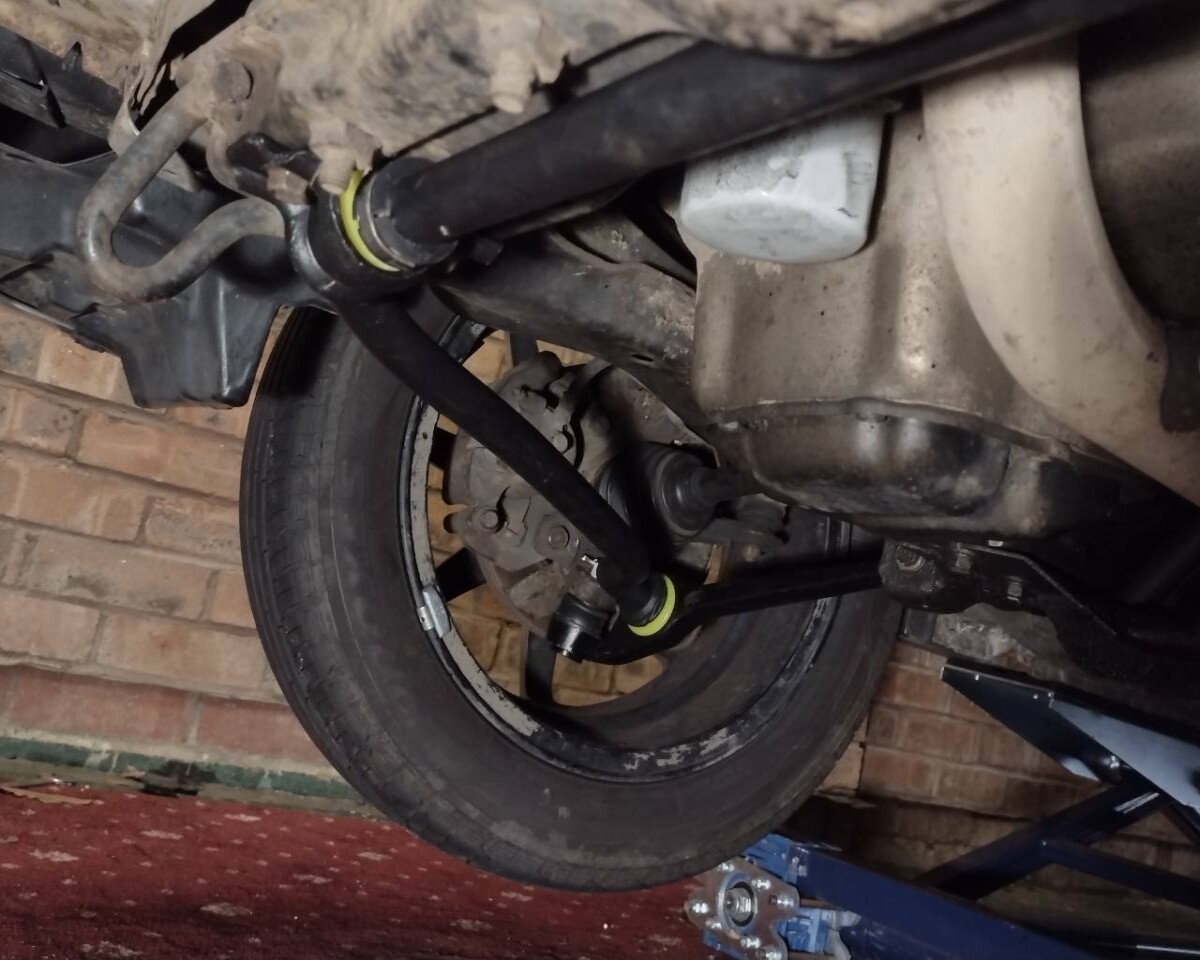
Its quite a simple setup, but entirely effective.
I took it out for a very quick run and initial impressions are good, the ride is no more firm, but there is less clonking over poor road surfaces than before - at least from the front end. It's also helpfully dealt with the advisory for perished lower balljoint dust covers as I've replaced the entire arms.
I had a go at the rears which was an abject failure - I couldn't get the nut to release from the through bolt that holds the rear beam on, even with the ugga dugga. Its an awkward spot on the passenger side (access is better for the drivers side actually) due to the location of the fuel tank so I'll have a think about what to do with that. It might be a job for a proper garage potentially? I'll call my pet garage up tomorrow and ask them when they might be able to have a look and quote for the work. I don't imagine it'll be particularly cheap to do if they want to drop the whole rear beam off for access


