
So a small recap, I've recently purchased a Daihatsu Sirion Rally 2, a very rare, highly tuned version of the humble Sirion. There were only ever 120 of these cars made, having taken a standard Sirion 1.3 Sport and handed it over to Auto Image Bedford to tune further. They replaced the exhaust cam with a higher lift profile version, a different ECU and a high-flow air filter, liberating an extra 8bhp, taking output to 110bhp. This might not sound a lot, but in a car weighing under 850kg it means 130bhp/tonne, a very rev-happy engine (redline at 7800rpm) and a NCAP rating that's worth never thinking about.
My car is one of just 29 left on the roads, and while it needs some work, its all do-able by me, other than some welding which will need someone actually competent to have a look at. The first thing I wanted to do was extract the alternator, as it was in a bad way and needed replacing. I was informed by the previous owner that he'd replaced it once with a secondhand part and that it was a pig of a job, needing to come out the bottom by way of partially dropped subframe and allsorts. I managed to get the alternator out in just under 39 minutes. And it came out the top 😁😁😁
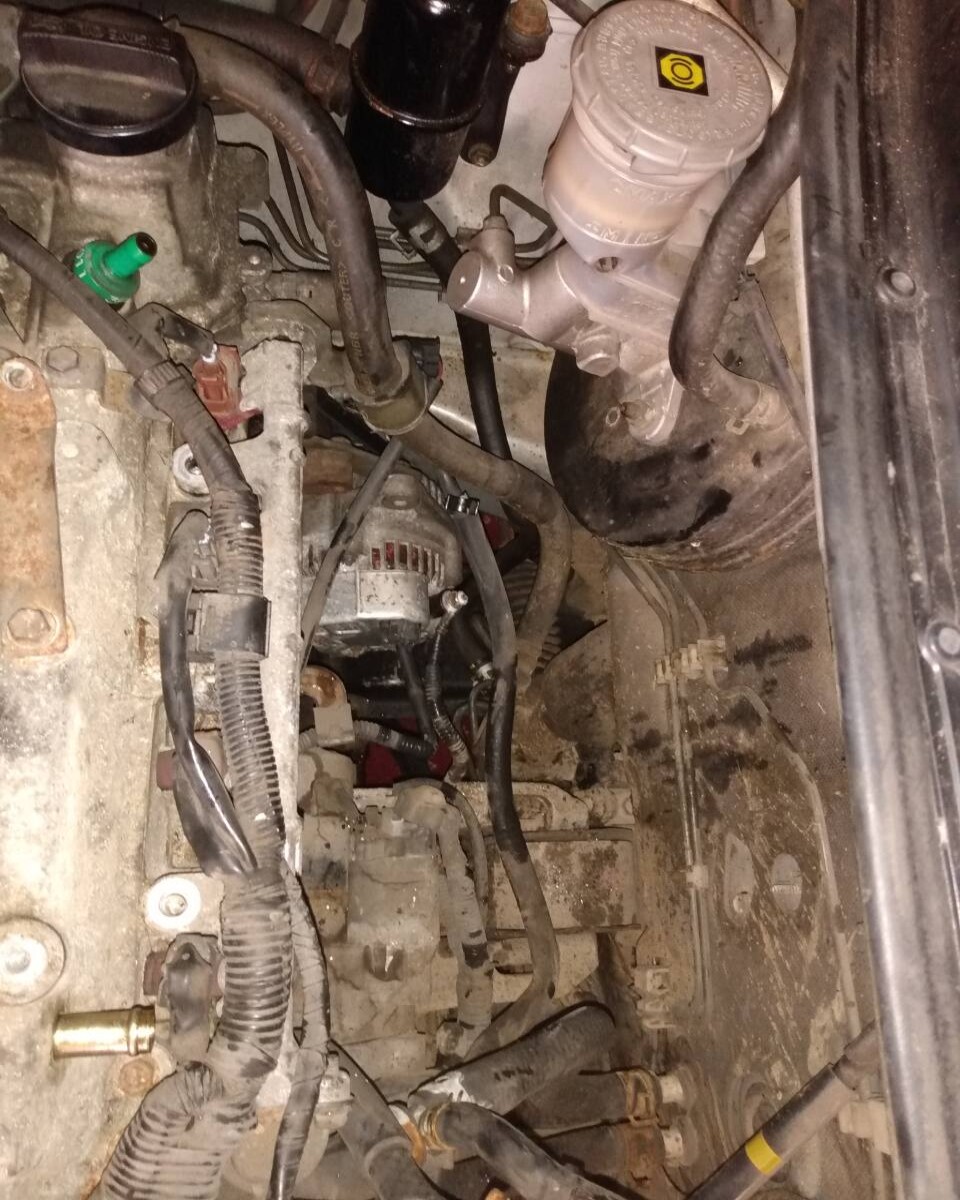
I was removing the throttle body and inlet manifold anyway as I wanted to renew the gaskets for both. I'm reasonably sure that there is an air leak after the throttle body which is causing the idle issue and gaskets are a cheap place to start. With the TB off and cleaned thoroughly using carb cleaner on the bench, and inlet manifold out there was loads of room to get at the alternator. I undid the top bolt, allowing it to pivot around the tensioner bar, slipped the belt (v old and being replaced) off and then used a spanner jammed between the locking nut and the driveshaft to hold it in place while I undid the bolt end
This is a view from the top with the TB and inlet manifold removed
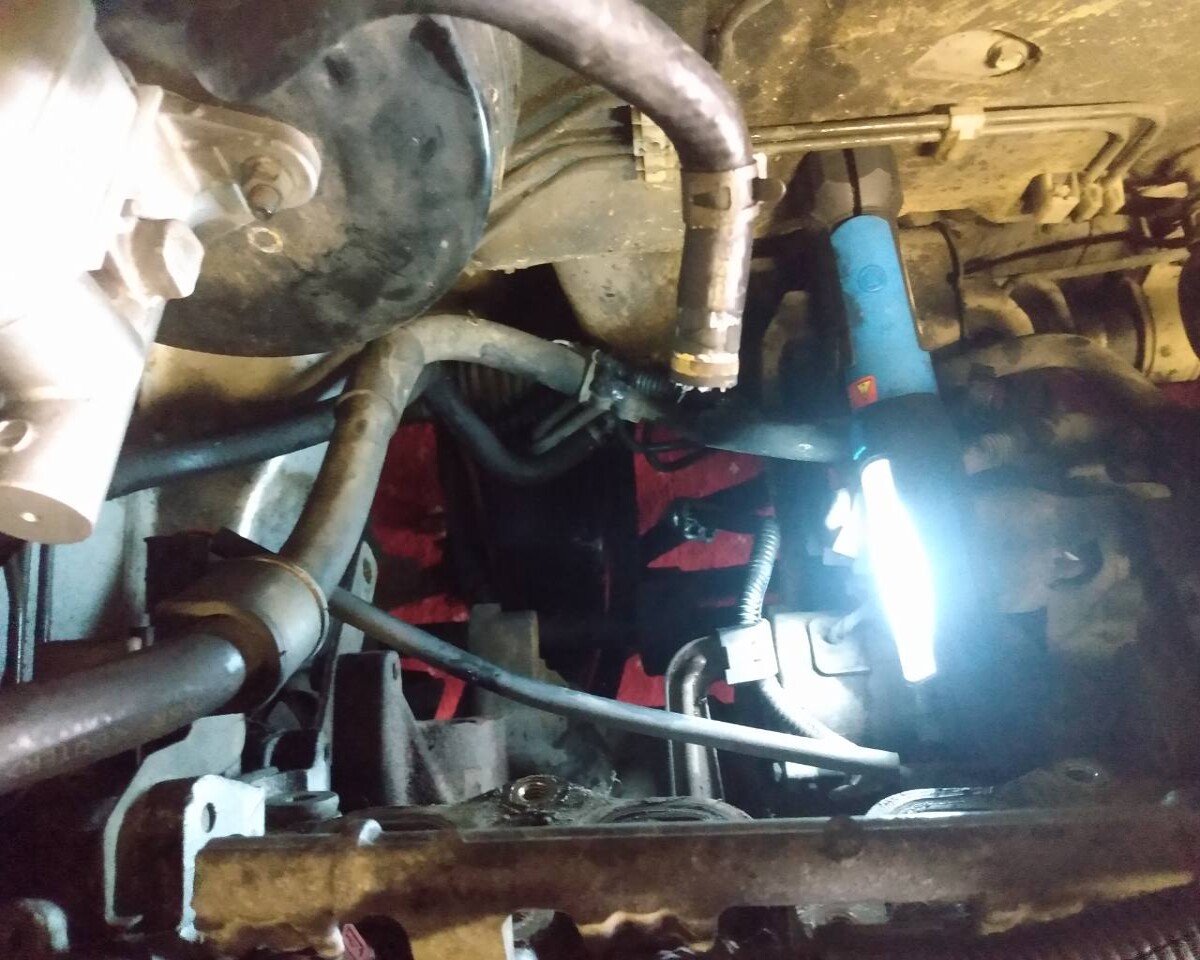
And here is the alternator brackets visible with it removed
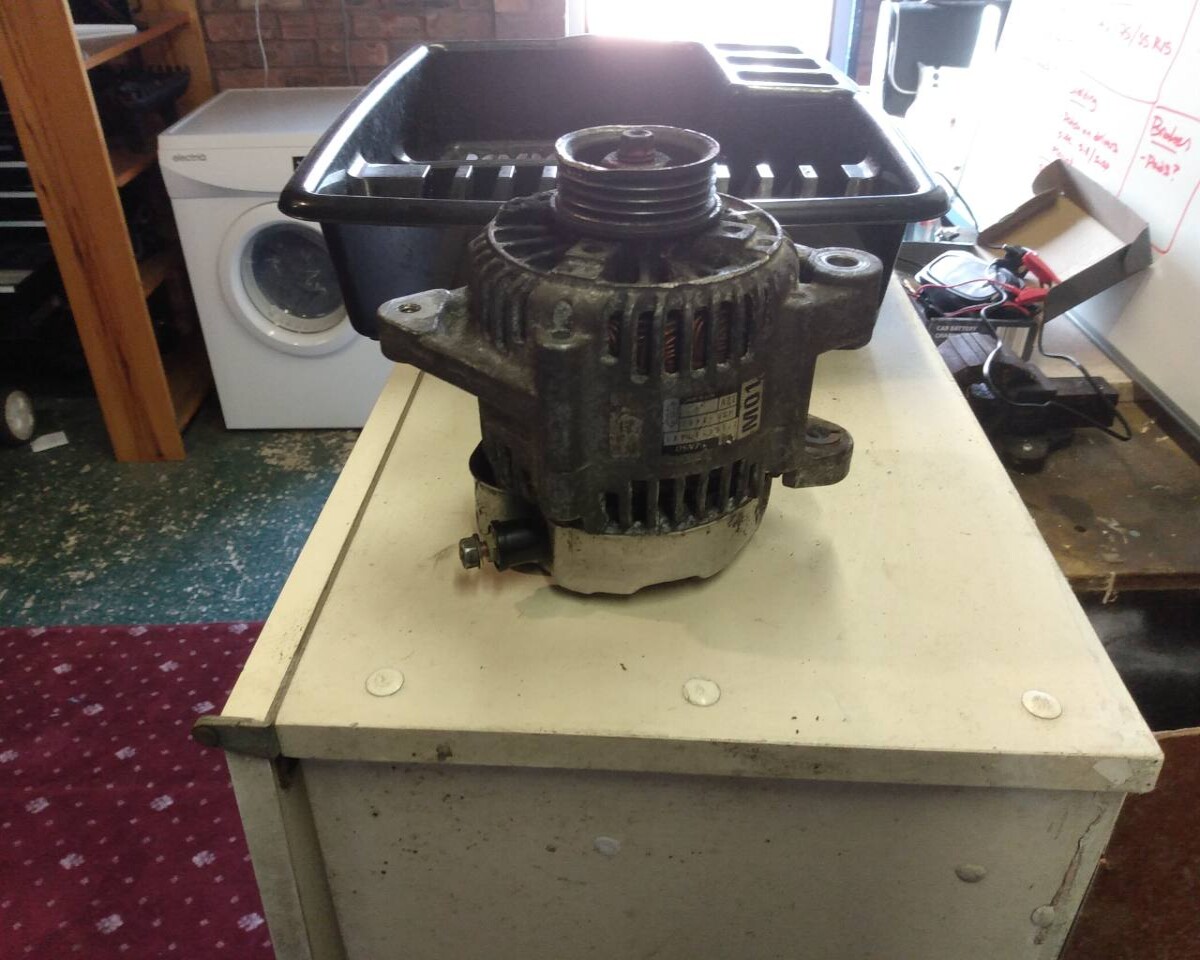
And finally the prize!
I'm pretty pleased with that TBH, the majority of the pipework I removed I pressure tested scientifically* by putting a finger over one end and blowing down the other. My lips now taste weird and oily. Nothing unusual there. I need to take the alternator to a local specialist who can rebuild the innard with new diodes and regulator and other clever things for less than a new unit, and also drop by my local Toyota dealer for the throttle body gaskets I ordered, which are helpfully shared with the Mk1 Yaris among others.
I left the alt belt in situ so I can see how the new one needs to go when it arrives early next week. I can slip it into place with all this gubbinz removed and then hook it over the alternator pulley when its back from being refurbed before reassembling it all.
The alternator out the top was more luck than judgement - I was removing the inlet manifold anyway, but once out there is quite a bit of room to get down to the alternator. I fully expected to have to go through the process of getting it out the bottom as the previous owner did.
Once I'd taken the alternator to the specialist, I had some time spare as I couldn't put anything back together until the alternator had come back. I spent some time looking at the rear end. With the car up on the lift I could get both back wheels off and have a serious look at the rust. The bad news is that it's gone both sides, the drivers side I knew about and actually this looks relatively simple to deal with. Its been welded here before, there is a triangle-shaped fillet that's been welded in before, but its gone further down that this in a pretty bad way so I think the best option is to cut the whole section out and then form a new C-shaped section from 2mm steel and have it welded in by my brother in the summer.

The pipe going across the top is a rubber sheath taking a wire to the back bumper so can be moved out of the way easily. with that removed, I can undo the tired damper and ease the spring out by lowering the torsion bar, then I aim to cut the U-shaped bit to the left of those (factory) holes and as close as I can to the spring mounting and then have a new u-shaped section made up and welded in, then fill it up with as much Dinitrol cavity wax as I can get in.
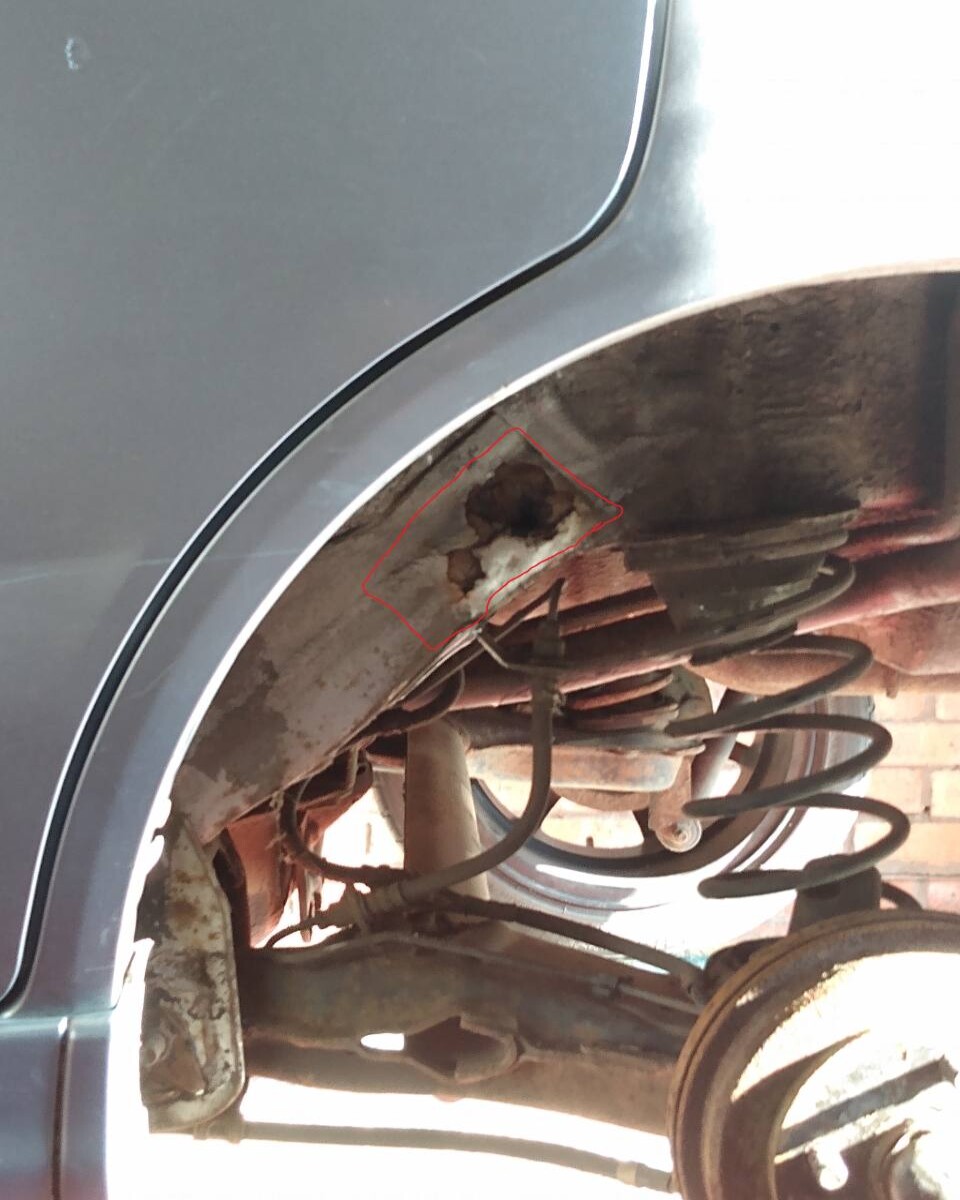
The passenger side had a rusty looking scab that turned into a 2" hole when probed gently with a small hammer. I decided to have a good poke about because if its in for welding then it might as well have all of it done at once. This is in a rather more fiddly area where multiple sections meet. the good news is that its quite localised, and the inner bit is in fairly good shape. I will aim to cut this out carefully with the grinder and see if we can plate over it. see below

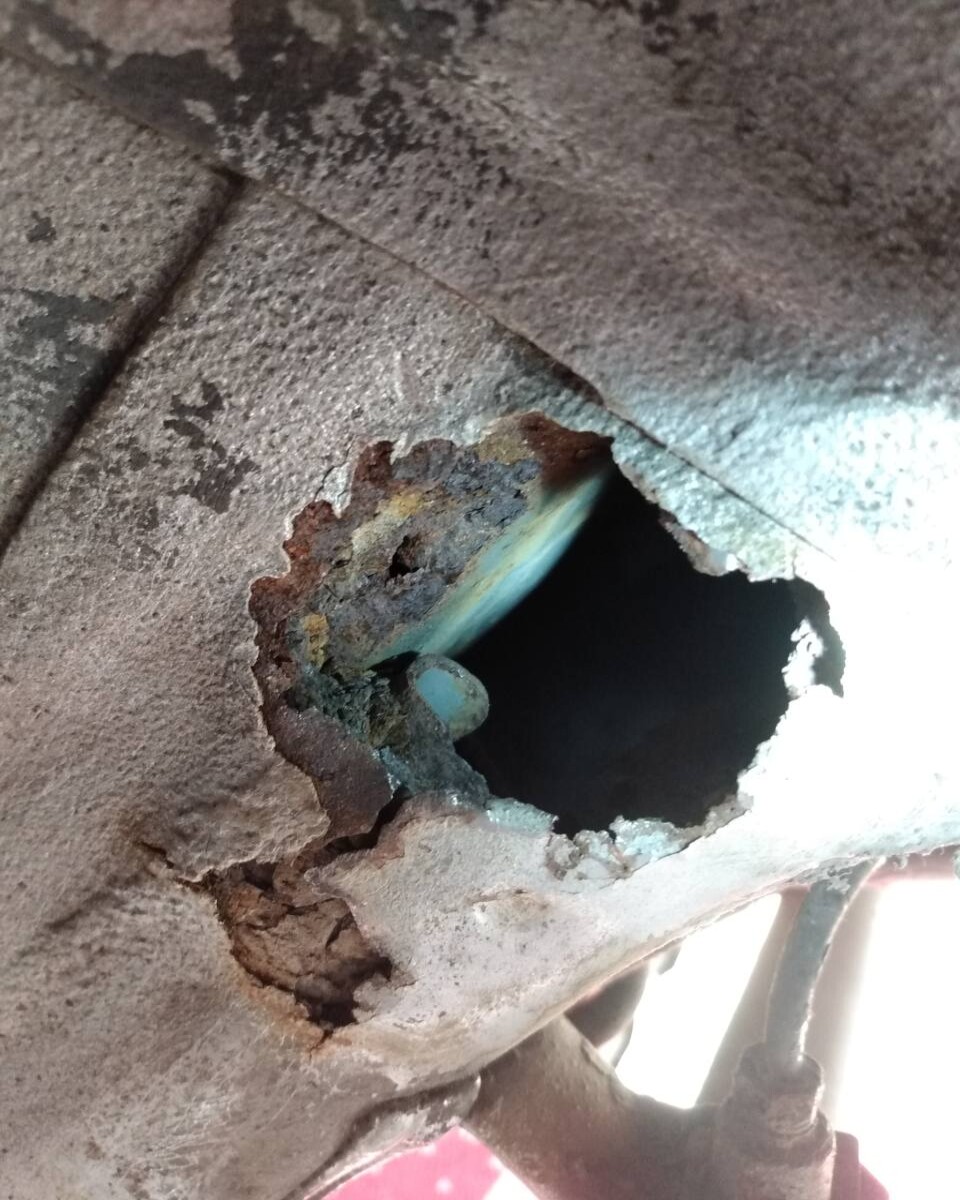
Thats the 'good' side - I plan to cut out this bit as best I can and have a new bit welded in where the red outline is
I also spent some time with a wire brush in my drill removing loose surface rust from the rear of the sills and leading edges of the inner wheelarches, before painting it all with a liberal coating of Vactan. It looks like two small fillets have been welded in here in the past too. They are in decent condition, but I wanted to catch them before they go crispy and need re-doing so its Vactan then zinc primer tomorrow, followed by probably black enamel since they aren't visible at all unless I have just run you over.
I had a go at undoing the bolts that hold the rear section of exhaust to the centre silencer but they aren't having any of it, I gave them a good dose of penetrating oil and will try again. the nuclear option is to use the impact gun but I'd like to at least try to loosen them by hand before that. The exhaust I think is not a standard storia/sirion part as its bigger bore than I'd expect. Probably about 1.75". I imagine a standard end pipe would fit though so we'll see what happens when/if it comes off. its got a fairly big hole in so needs replacing. the rest of the system is in good condition, I hope to get it to come off intact in case I need to have a new bit made up in stainless.
A few days later, I got the inlet manifold gasket in the post so that has been fitted. I removed the old one and gave the recesses that the new gasket goes into a thorough clean out with brake cleaner and a tooth brush, then washed with water, then dried with cotton buds. I put a smear of silicone grease around the manifold side of the gasket and gently fitted it. I'm not putting the manifold in the car as I need the alternator to be fixed first. I used an abrasive pad to clean off the engine block side of the inlet ports while it was all apart too. It got cleaned down with a rag and some brake cleaner afterwards.
I cleaned up, vactaned and zinc primered the bottoms of the leading edges of the inner arches at the back. I'll wait for the primer to dry for a few days then spray them black enamel with a rattle can I think. It'll be hard-wearing I hope and its not a visible area anyway.
I managed to get the old exhaust rear section undone with a good dose of penetrating oil and then assault with the rattle gun. I've ordered a replacement end section from ebay for £27 delivered so I'm fully expecting something crafted from sellotape and kitchen roll tubes. I also ordered 2 new rear dampers as they were only £58 for the pair and these ones are quite tired looking. While I had the impact gun I undid the damper bolts, copper greased them then did them up again in prep for the new ones. This all went without incident.
A few day later my new exhaust rear section arrived along with the crush gasket, so I set out to sort that out.

The new and old look approx the same dimensions, its also shinier and is made by a company called 'GT Exhausts so I'm pretty sure it will add at least 50bhp.
I wire brushed off the mating surface of the centre silencer, copper slipped the extruded threads, slid the metal crush gasket on, fitted the exhaust and poked the bent bit of metal into the old hanger rubber then tightened up the nuts. easy, even I couldn't muck this up
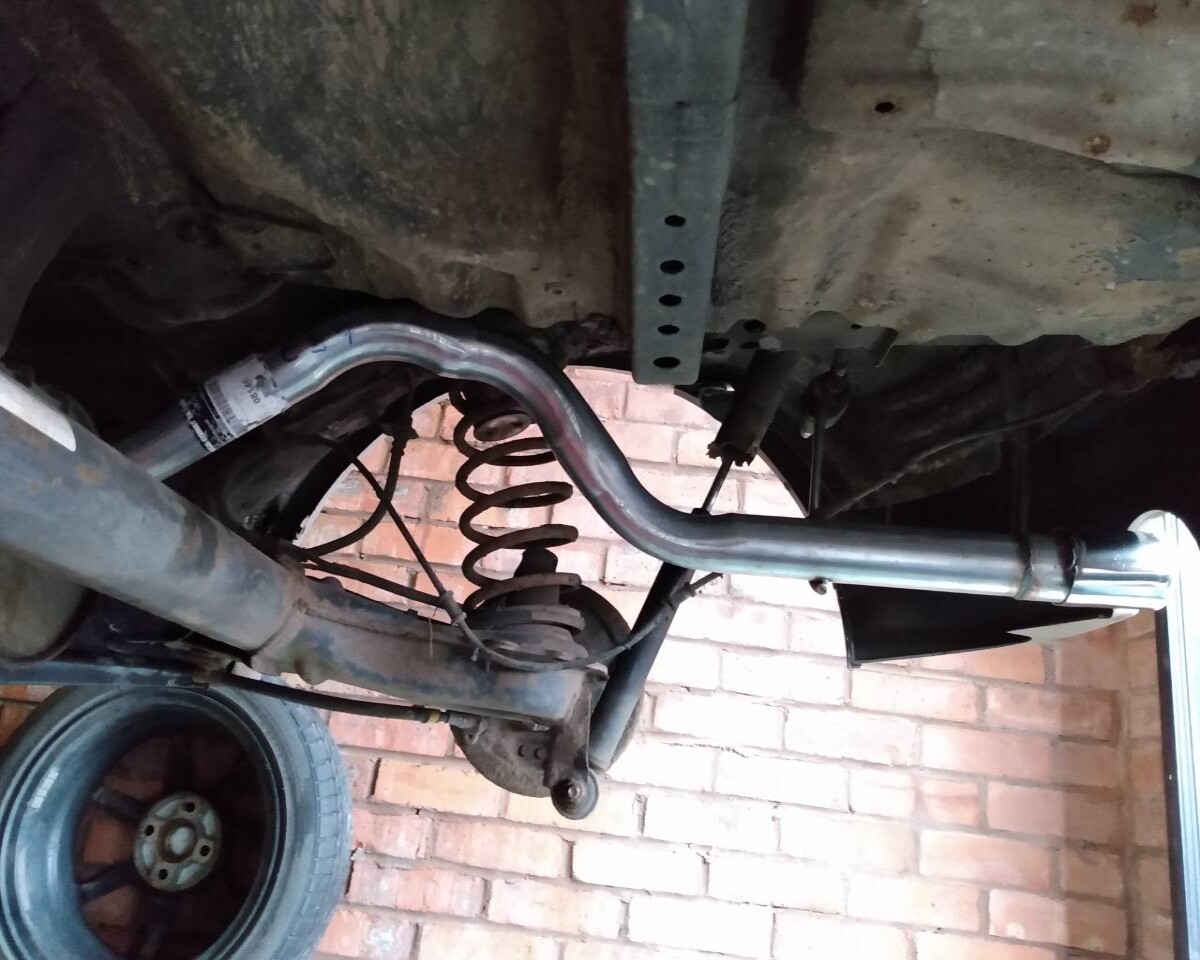
Sits fine, endy pipe is shiny, clears the torsion beam, happy days.
While I was underneath I gave the leading sections of the inner arches a good seeing to with black matt enamel paint
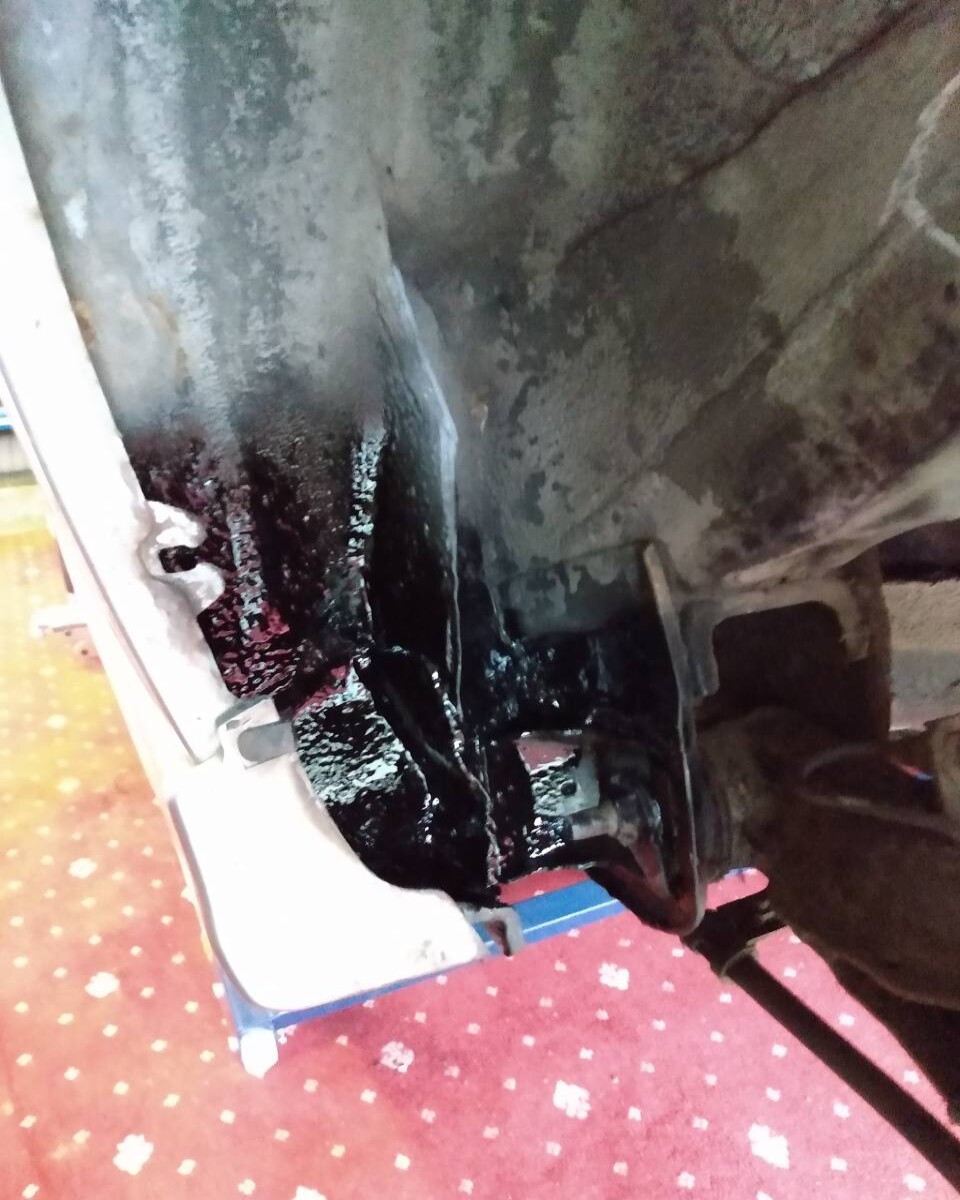
Tidying them up quite a bit and managed to not get any enamel paint on the training edge of the side skirts or on the bolt that holds the torsion beam bushes in, just in case this needs to come out at some future moment. I did the other side but its less accessible and looks the same.
SO, lets recap what we've achieved so far shall we?
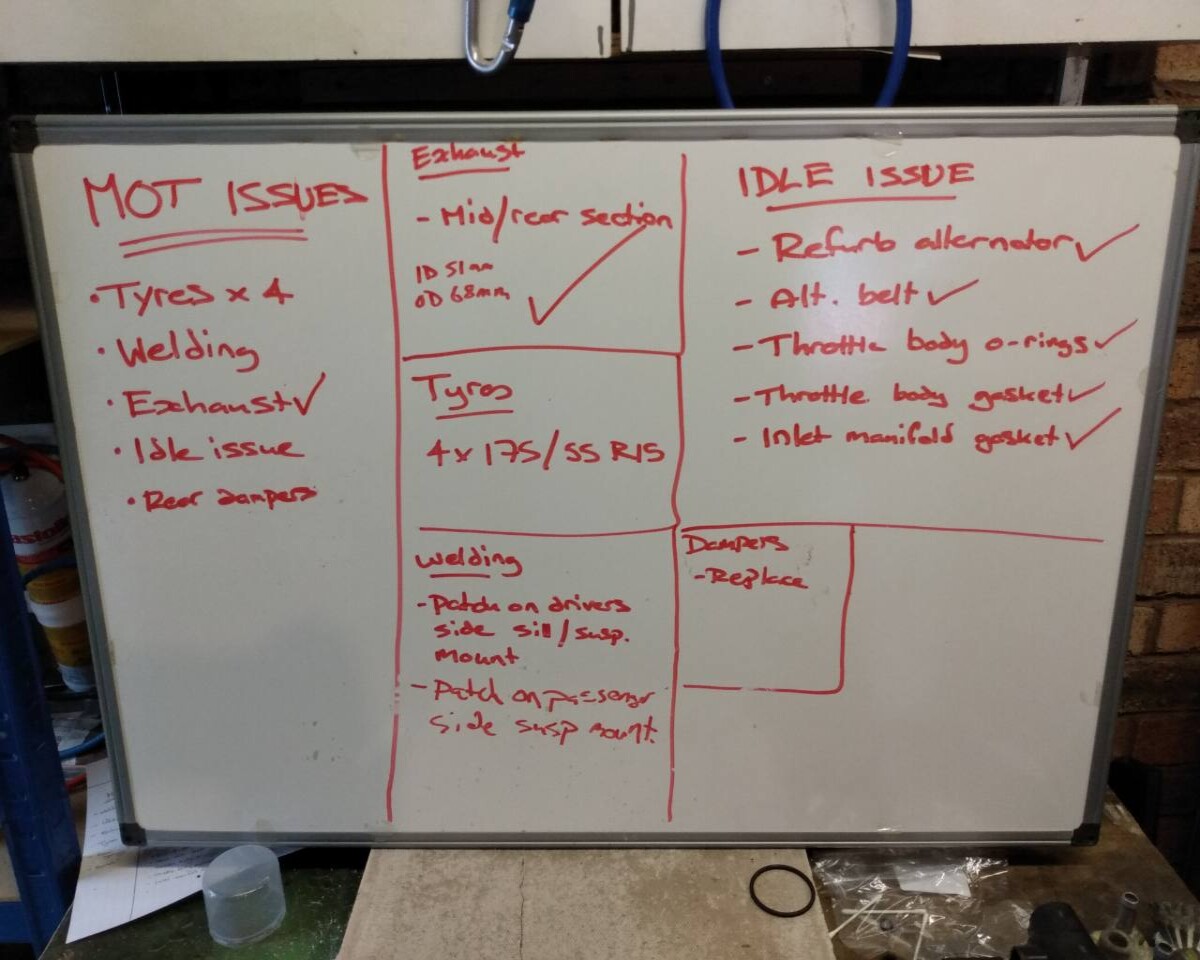
Exhaust done, dampers are on their way, welding we have discussed above, I need the alternator back before I can reassemble the inlet manifold and throttle body, though they have both been re-gasketted and cleaned up and are ready to be re-attached. Alt might be ready tomorrow if I'm lucky, or next week if I'm not.


